Upload Excel Sheet
This guide will walk you through creating a contact sheet using an existing Excel sheet on your desktop.Follow these steps to upload your Excel sheet and configure it correctly.
Add New Worksheet
Begin by navigating to the Add icon near the worksheets. Click the add icon, select "Worksheet," and click "Add New."

Name the Worksheet
Name the new worksheet "Expenses." Next, click the "Upload" button. Unlike the previous tutorial, where we manually created a worksheet, we will upload an existing Excel sheet this time.

Upload Sheet
A window will open, allowing you to upload your sheet. For this tutorial, we will upload a contact sheet from the desktop.

Create Worksheet
Once the Expenses sheet is uploaded, tap "Create." The uploaded worksheet will display all the columns of your sheet.

Set Data Types
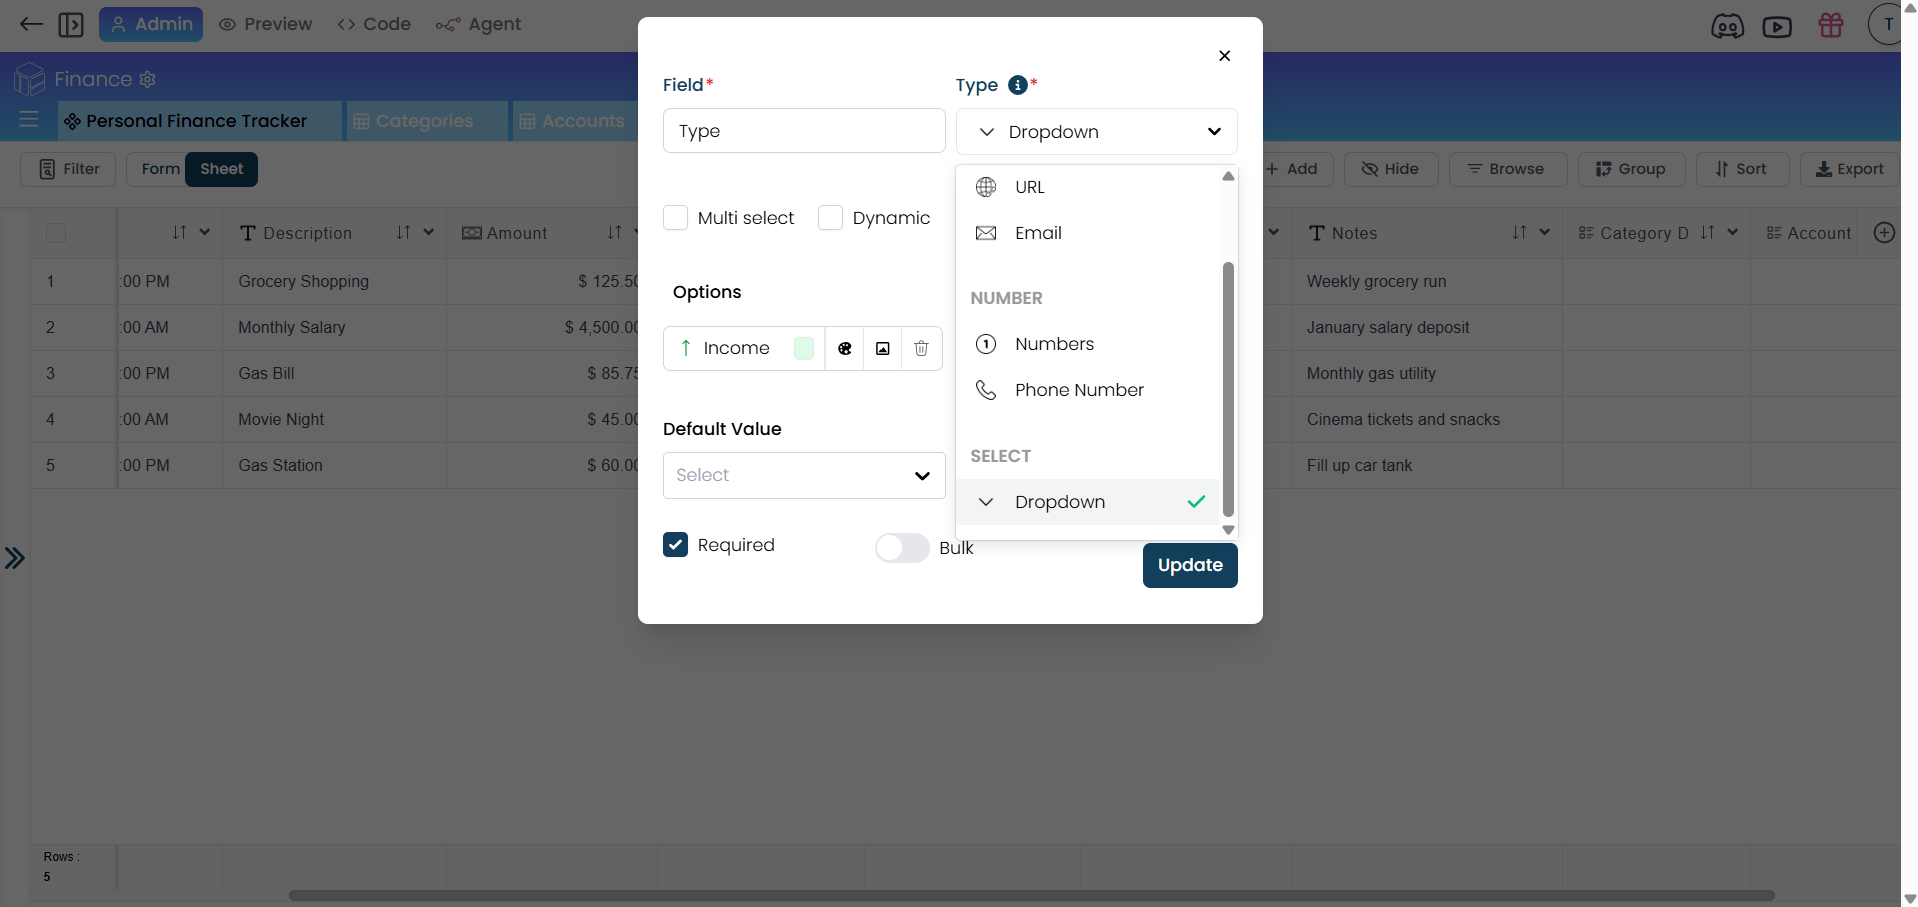
The sheet may contain several columns, such as Date, Description, Amount, Category, and so on. Choose the appropriate data type for each column. Most data types, like text and numbers, are simple to assign. For instance, set the "Category" column as a dropdown and the "Description" column as text.

Verify & Import
If you have a date column, verify the data type. Ensure your date column is correctly identified as a date type. Once verified, click "Import" to upload the sheet to the server.

Edit Columns
After the sheet is imported, you will see the date, description, amount, category columns. If you wish to add more columns, you are free to do so. You can also cross-check with your sample sheet and verify the data types. Click the small icon and then "Edit" to see the details.

Confirm & Close
Confirm that "Amount" is set as currency, then close this window.

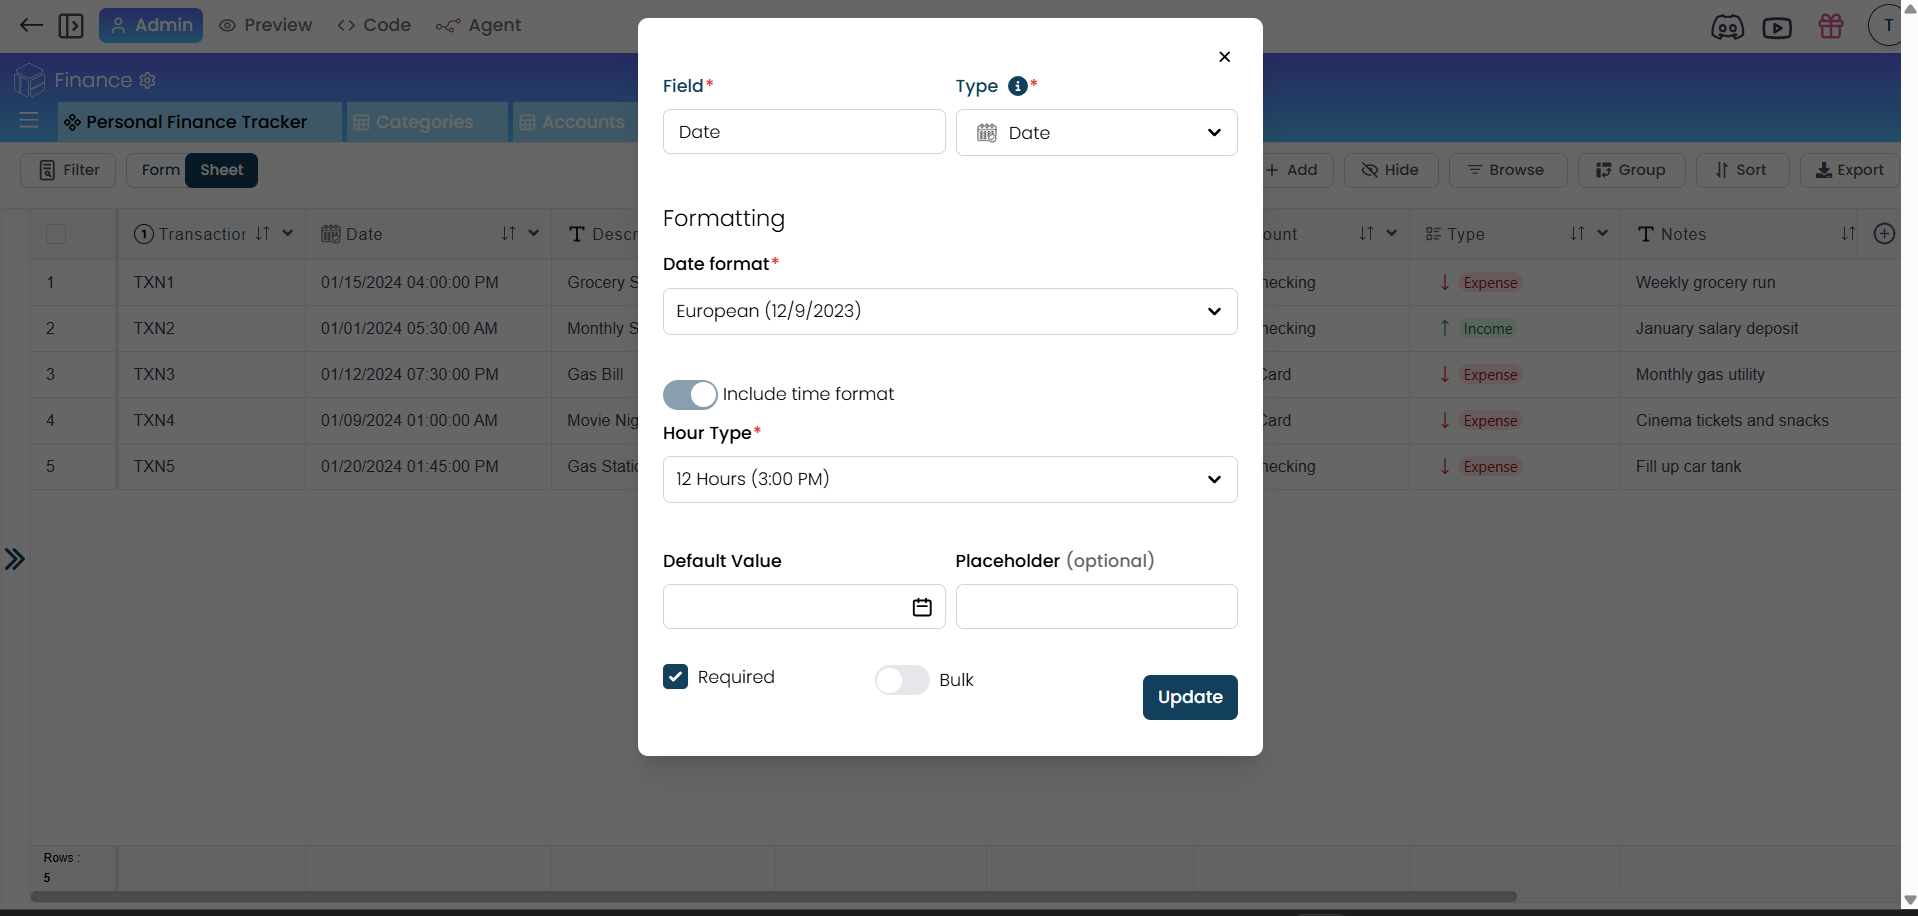
Verify Date Field
Click "Date" field and then "Edit" to confirm that it is set to date. After close this window.
Save & Complete
Update the fields to the corresponding data type and save the changes. This concludes the process of uploading and configuring your contact sheet. Stay tuned for the following tutorial, in which we will cover additional topics.
FAQ's
How do I create a new worksheet?
To create a new worksheet, navigate to the plus icon near the worksheets, click on the plus icon, select "Worksheet," and then click "Add New.
What should I do after uploading my contact sheet?
After uploading your contact sheet, click on "Create" to display all the columns of your sheet.
How do I set the data type for each column?
Select the data type for each column accordingly. For example, set "contact person" as text, "phone" as a number, and "email" as text.
What should I do if I have a date column in my sheet?
If you have a date column, make sure to verify the data type. Ensure your date column is correctly identified as a date type before clicking on "Import" to upload the sheet to the server.
How do I verify and update the data types of individual columns?
Click on the column you want to verify (e.g. "phone" or "email"), then click "Edit" to confirm the data type. If needed, you can change the data type and update accordingly.