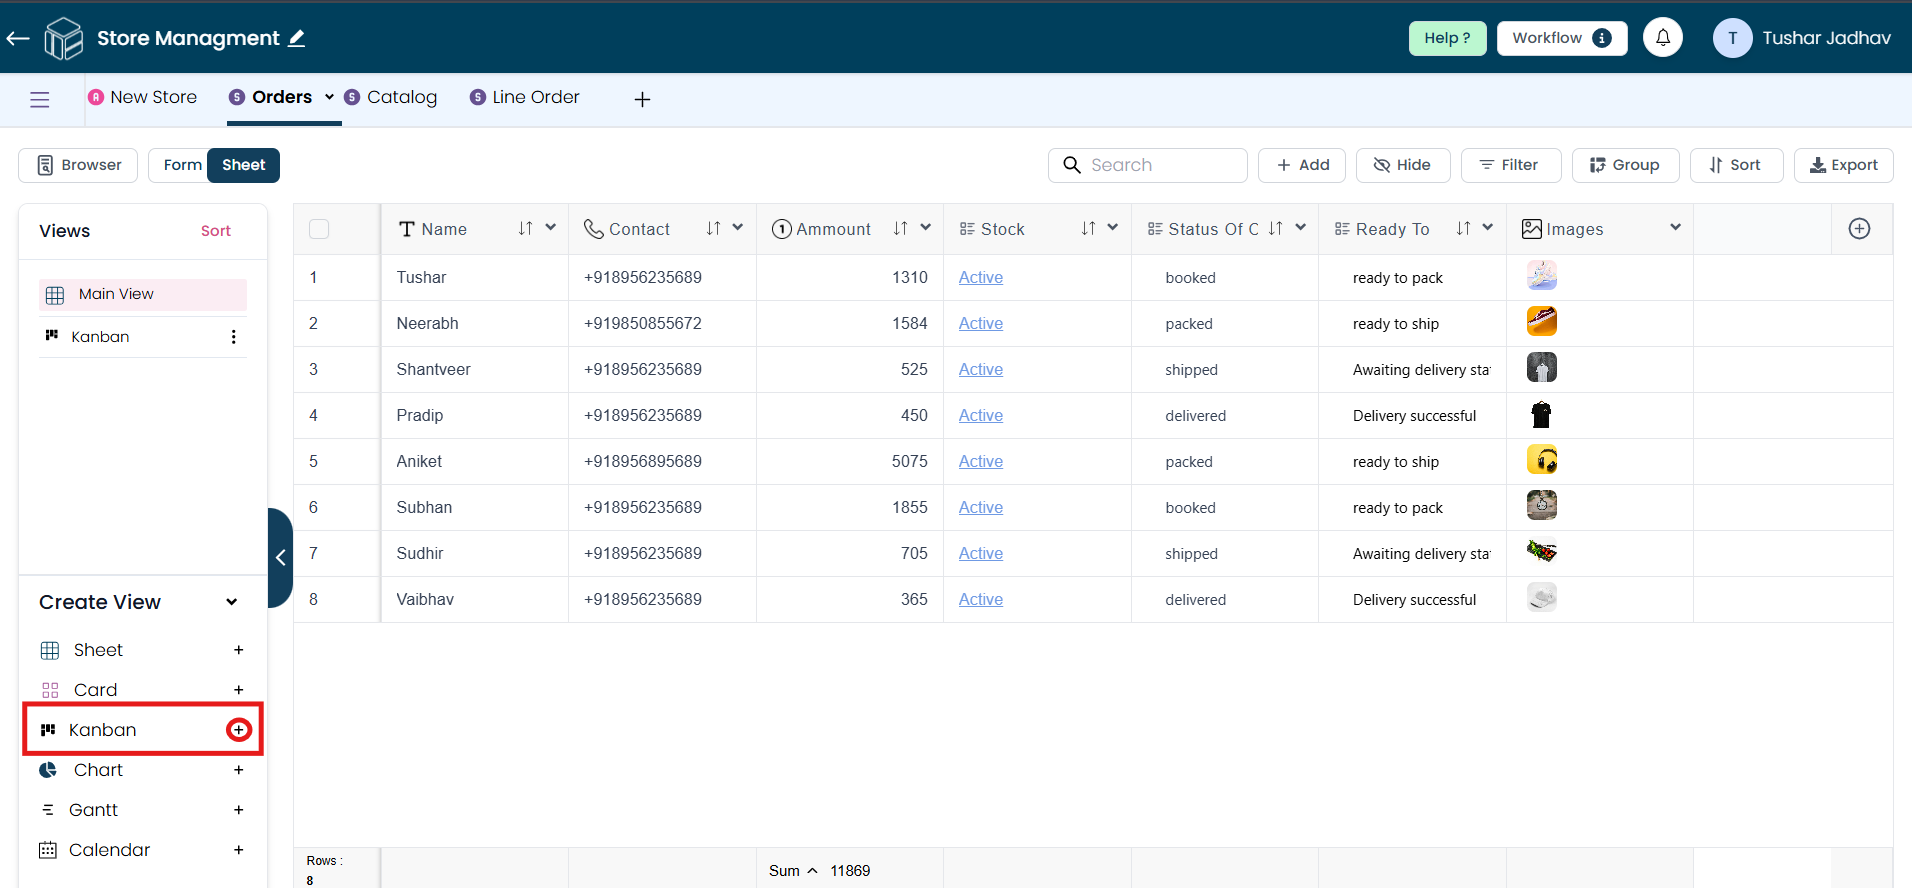
Creating a Kanban View
This guide will walk you through the step-by-step process of creating a Kanban view. Follow these instructions carefully to successfully create and customize your Kanban view to your preferences.
Step 1
To start creating a Kanban view, click on the plus icon.
Step 2
Once the pop-up window appears, enter the name for your Kanban view according to your preferences.
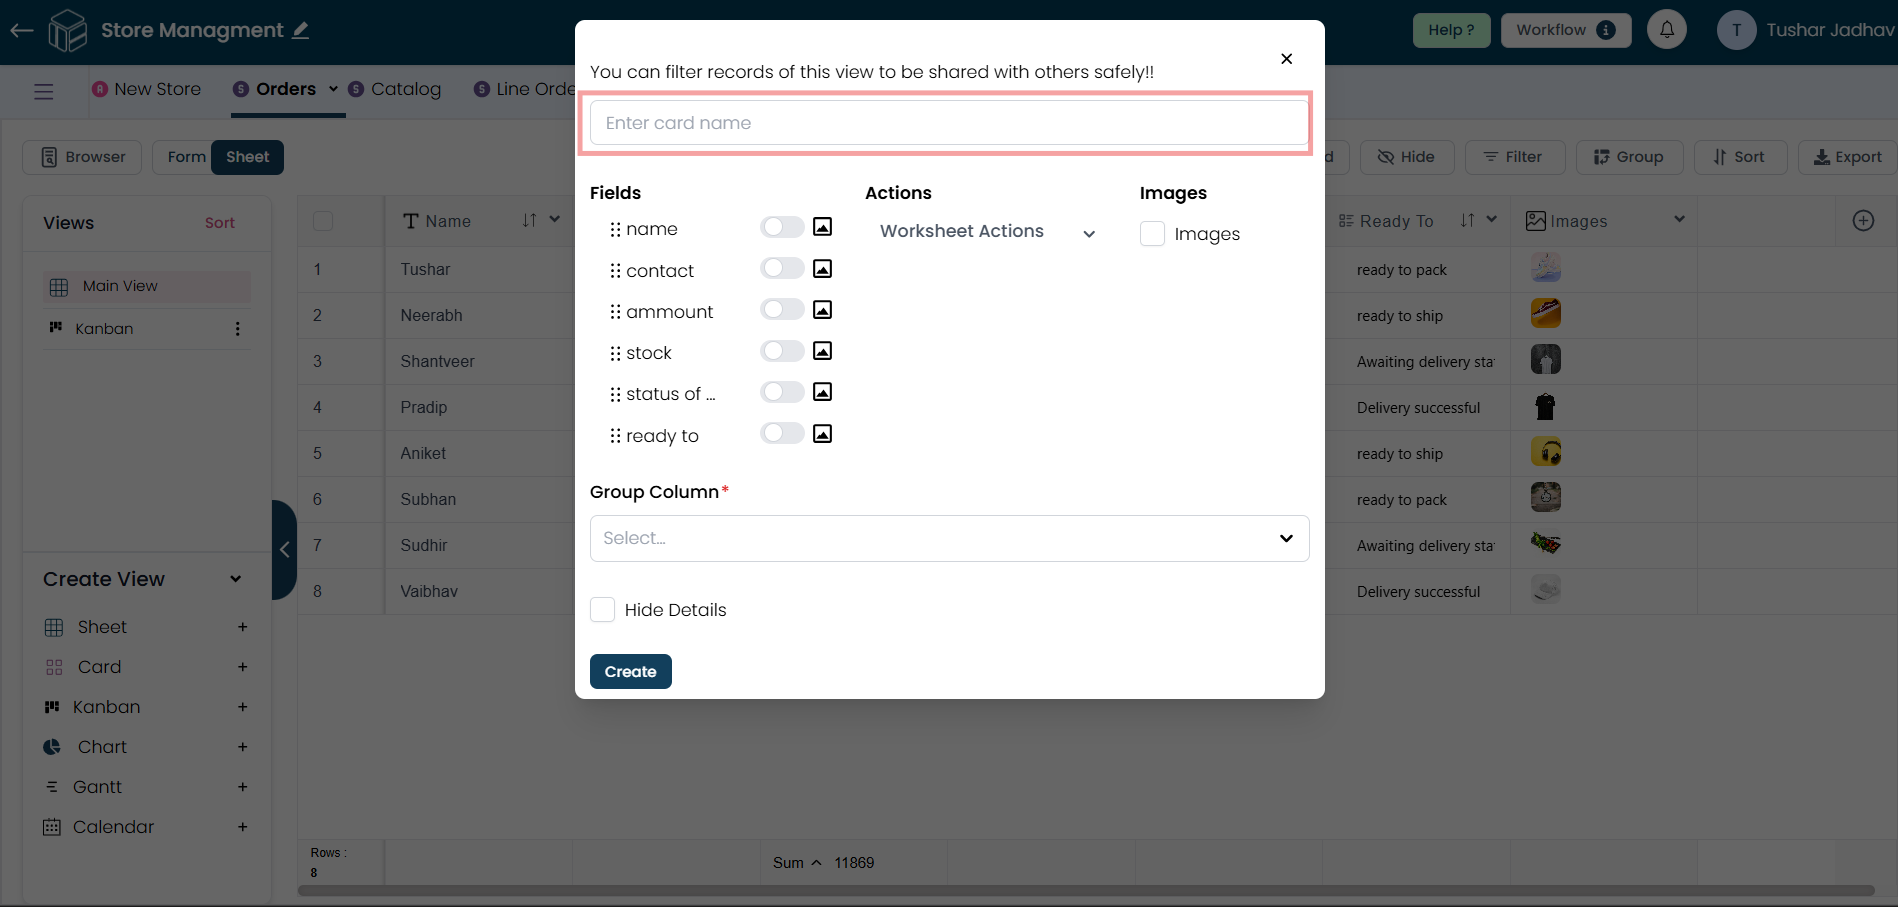
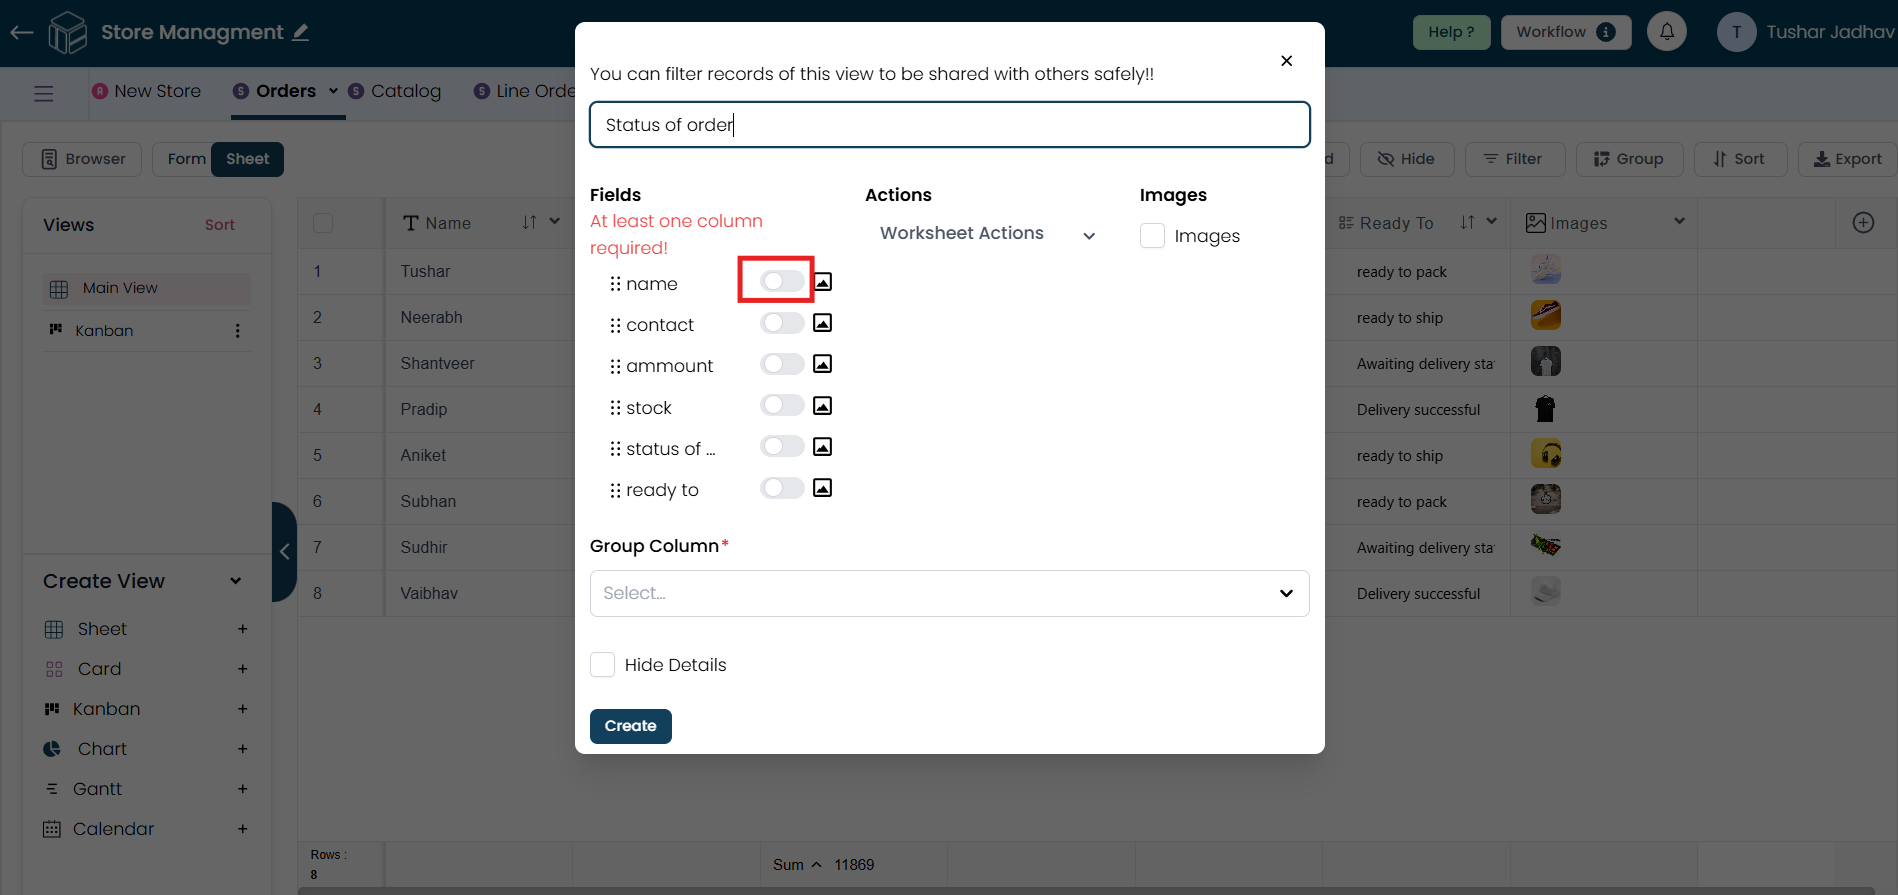
Step 3
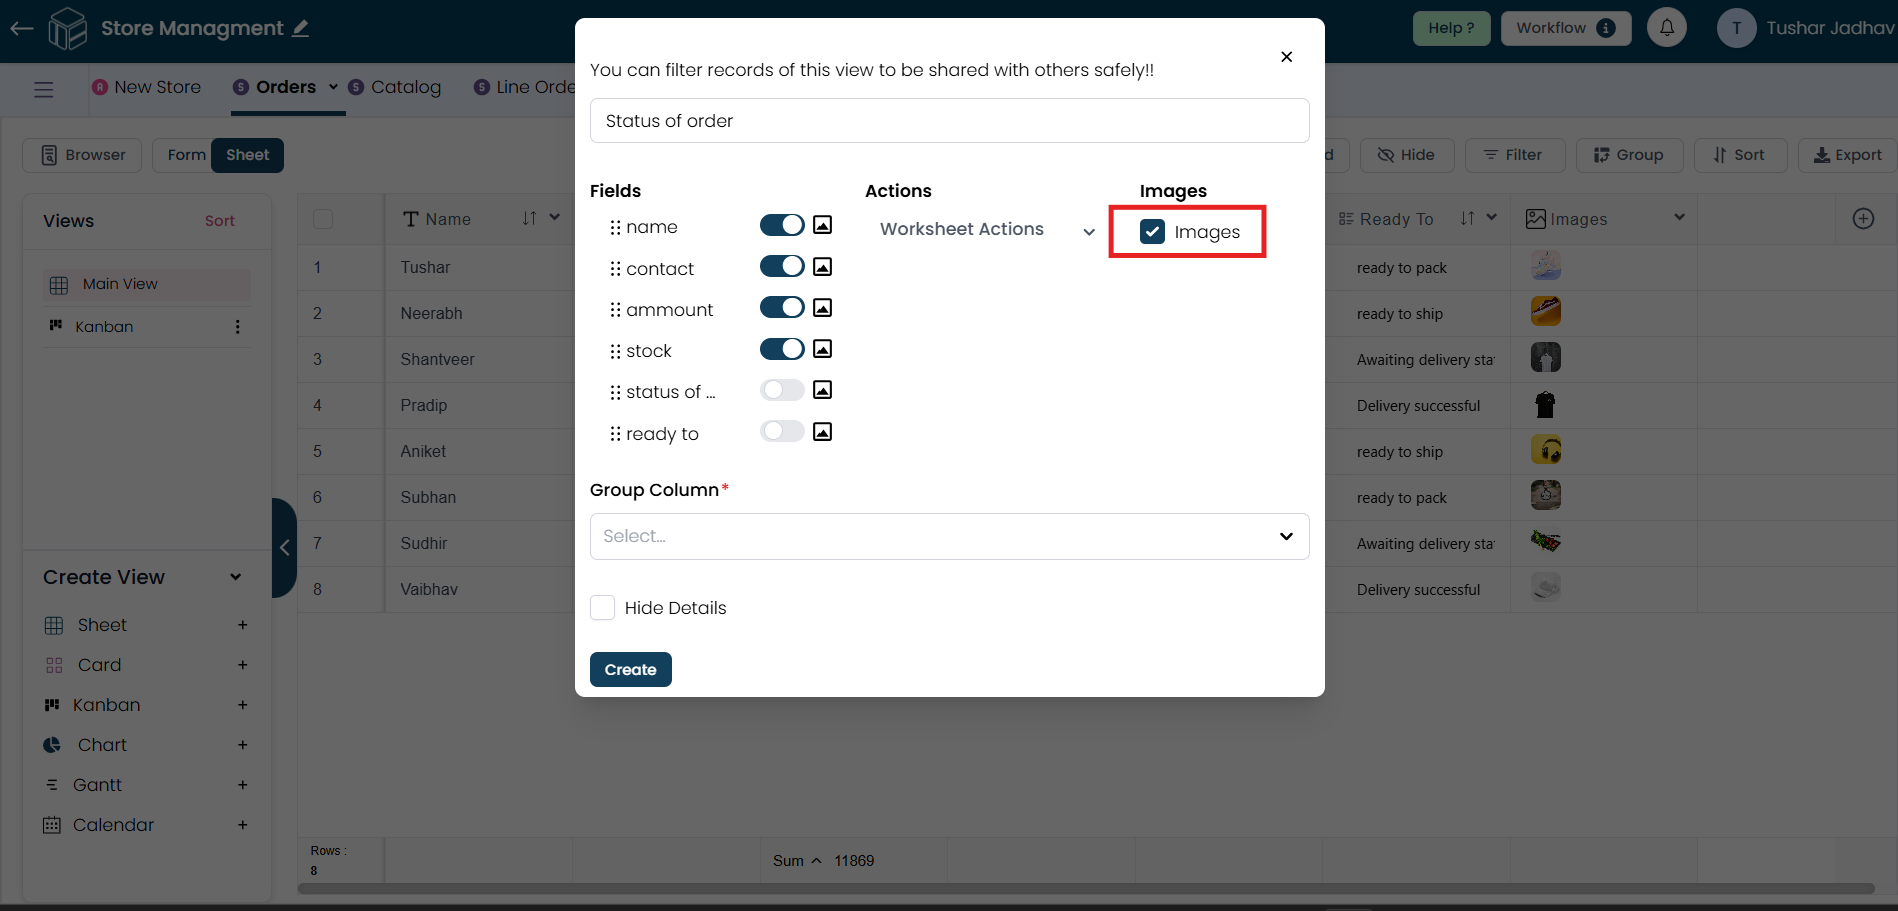
After entering the Kanban view name, select at least one field to generate a Kanban view.
Step 4
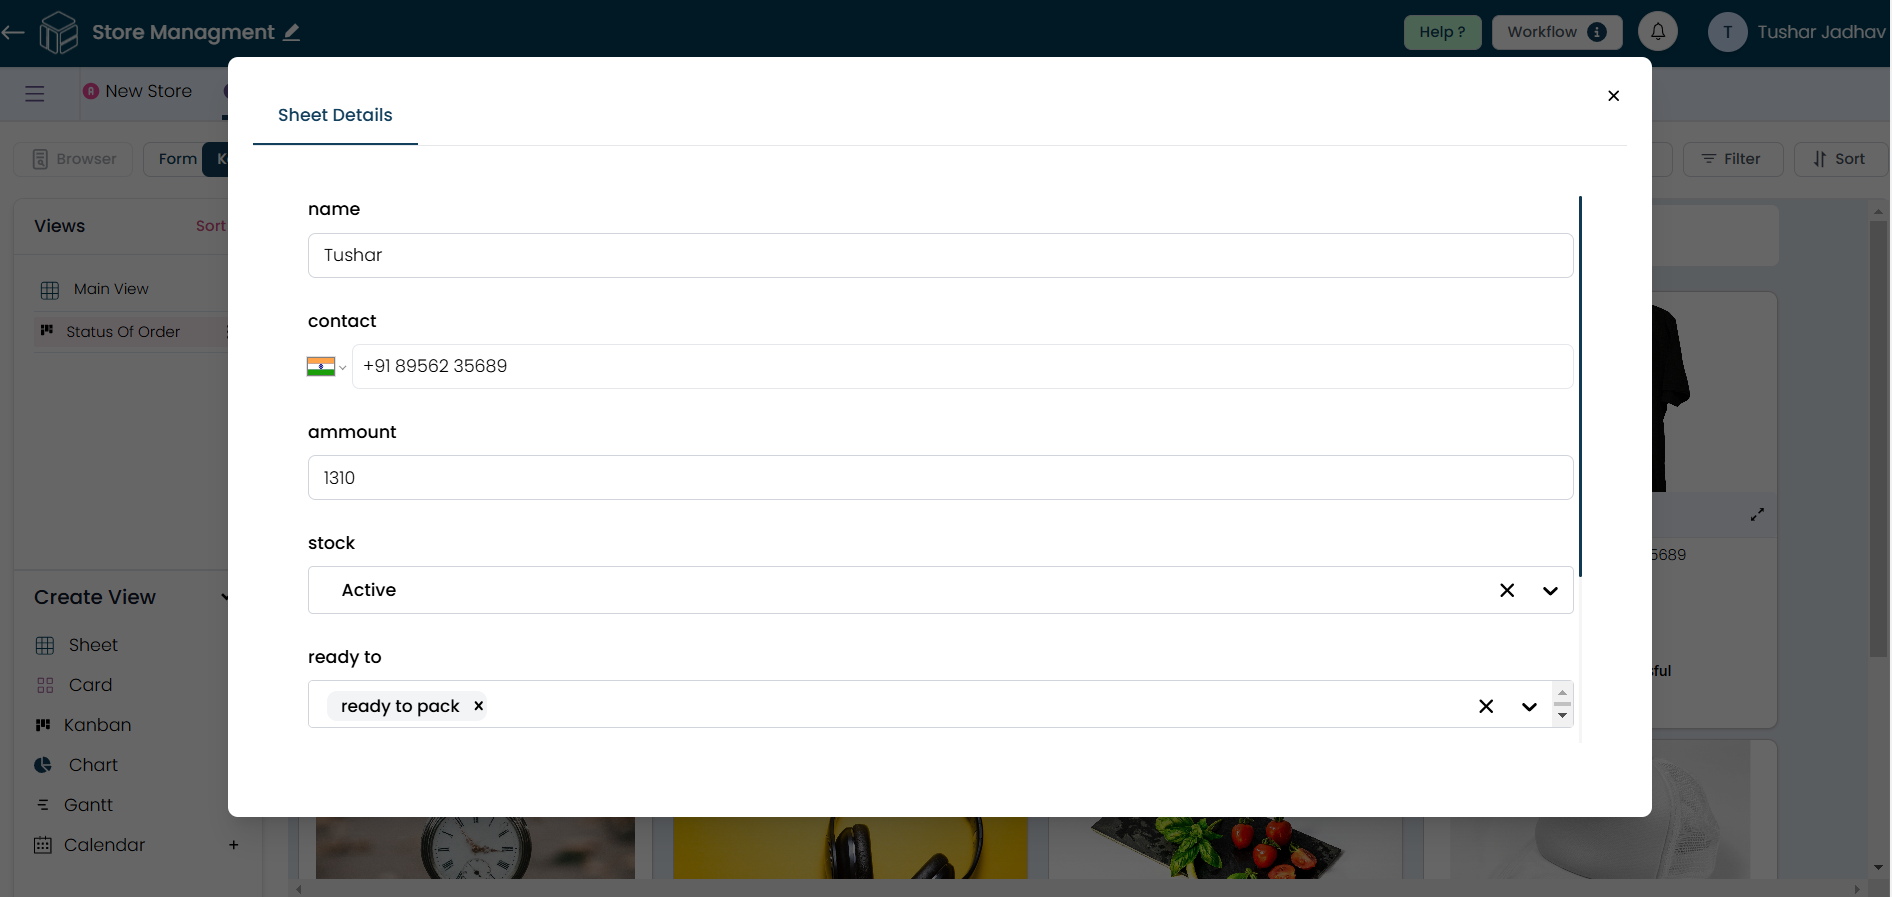
If you have an image field, you can select the image field if you wish to display it.
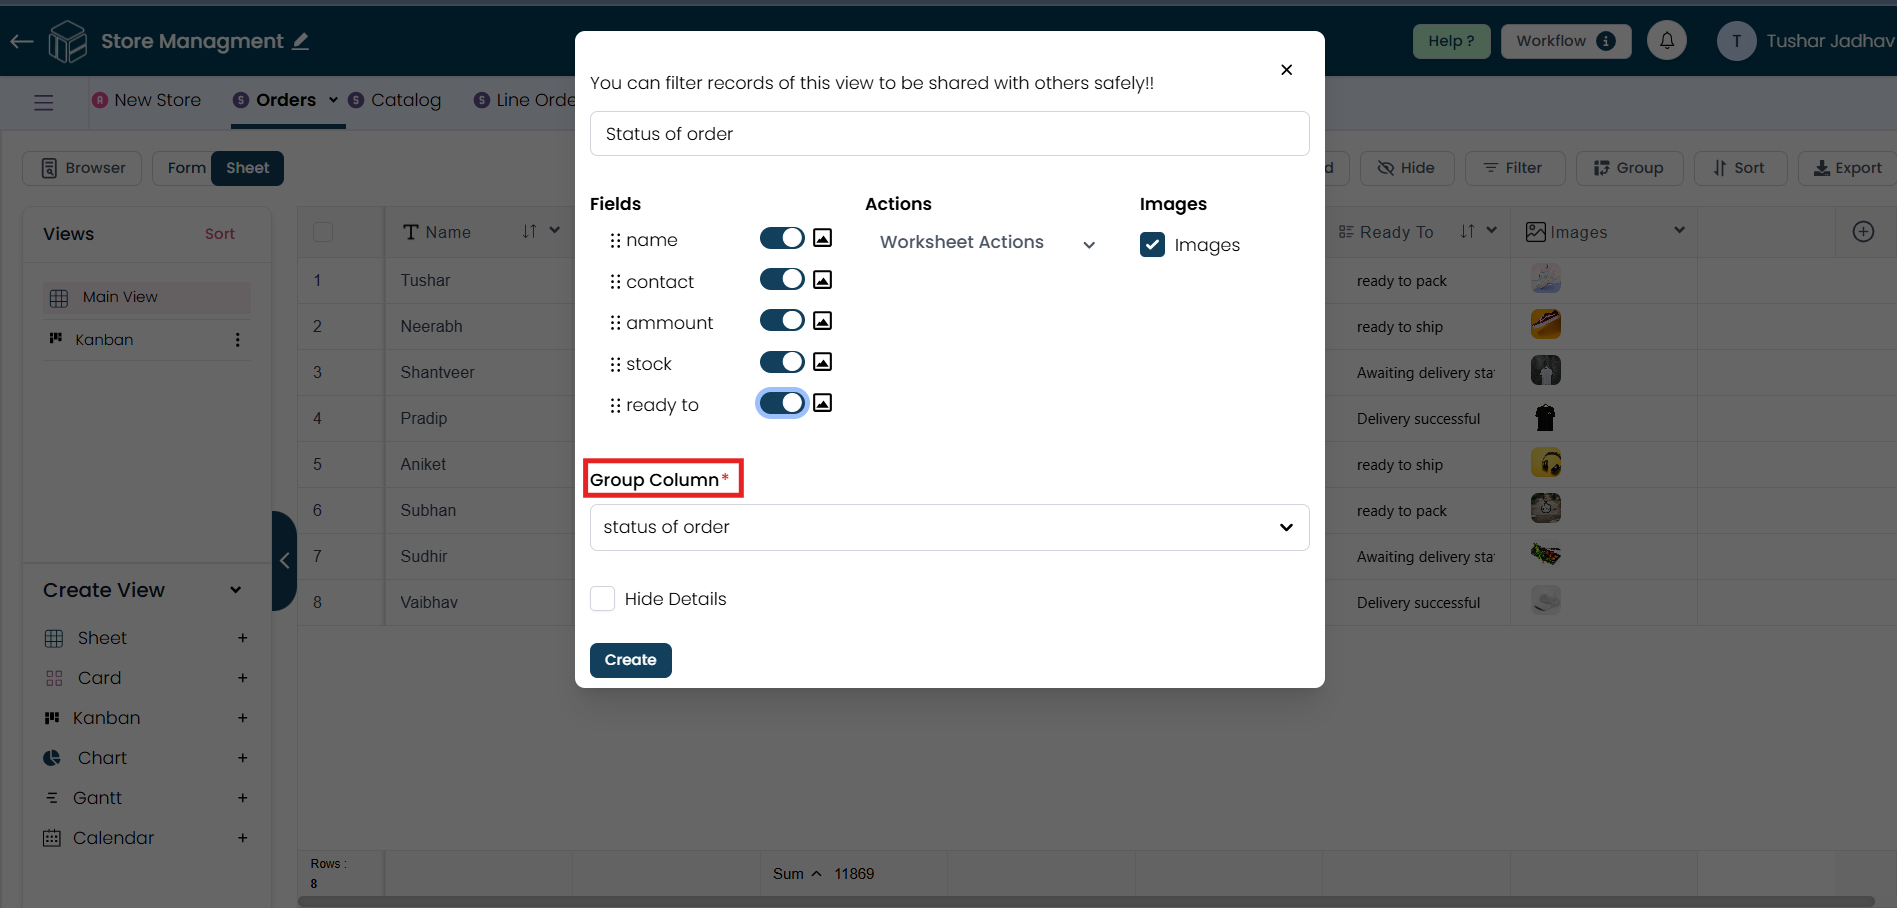
Step 5
The 'Group' column is a mandatory field, so it will only allow either the Link Dropdown or Dropdown fields from the worksheet. Select one of the fields, depending on which will present the data in a structured manner.
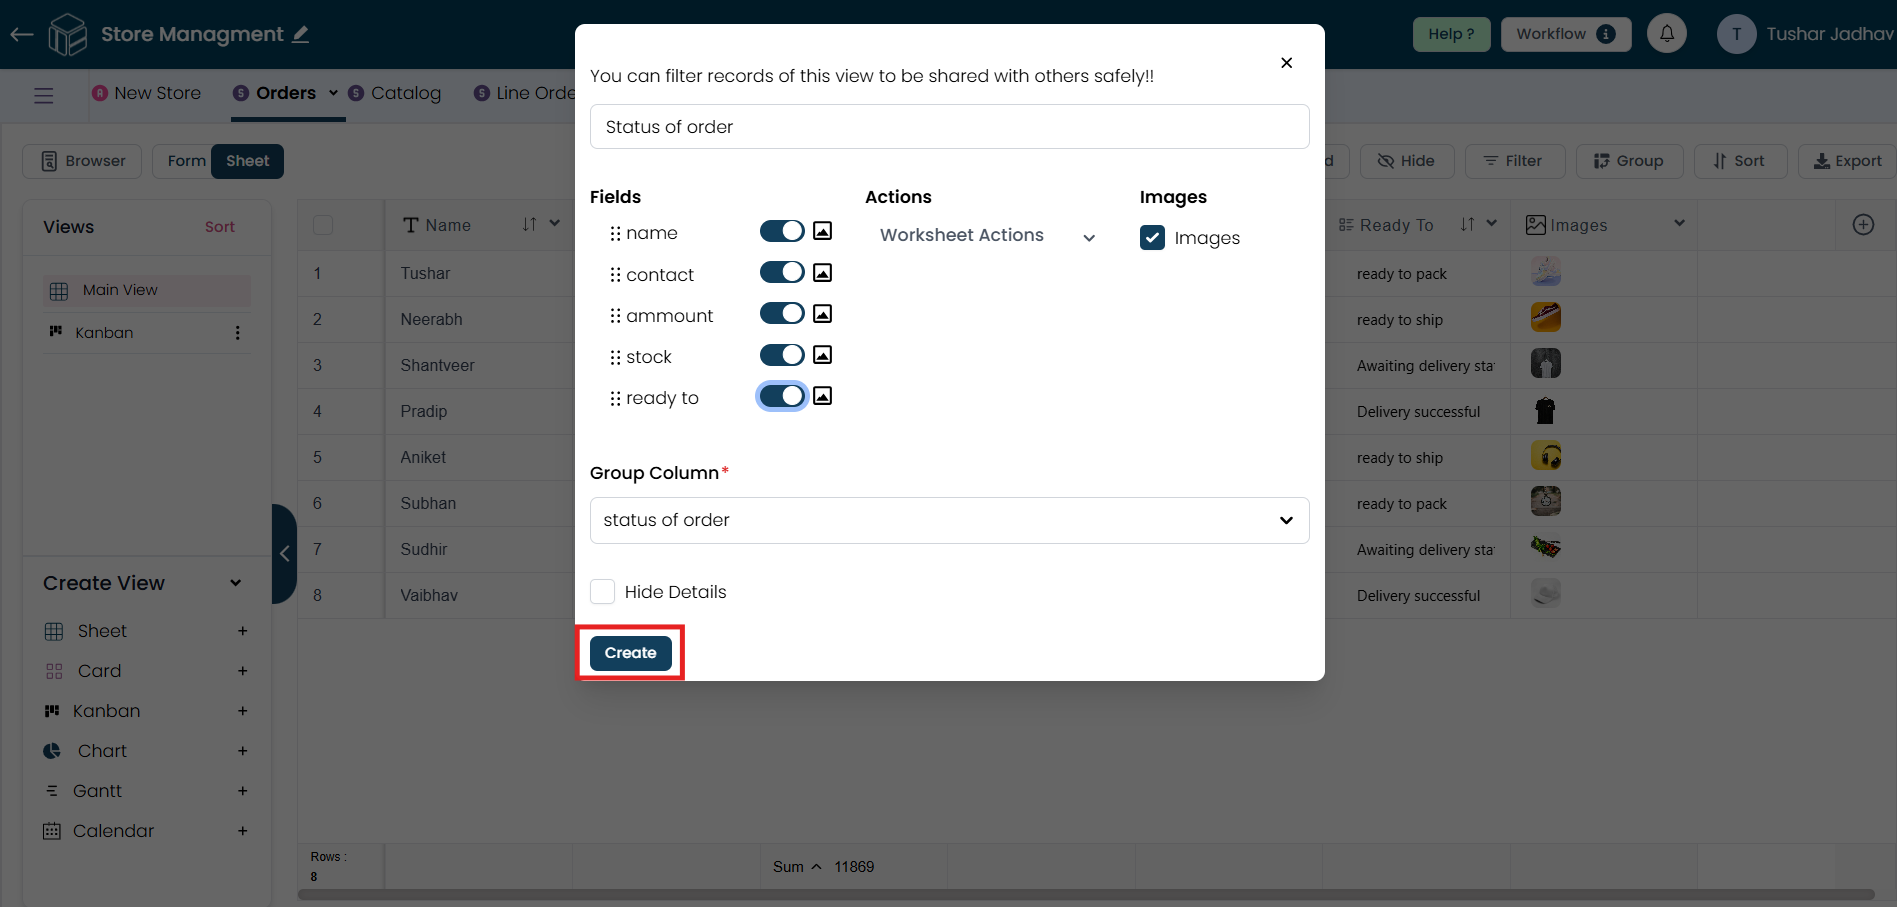
Step 6
After configuring, click on "Create."
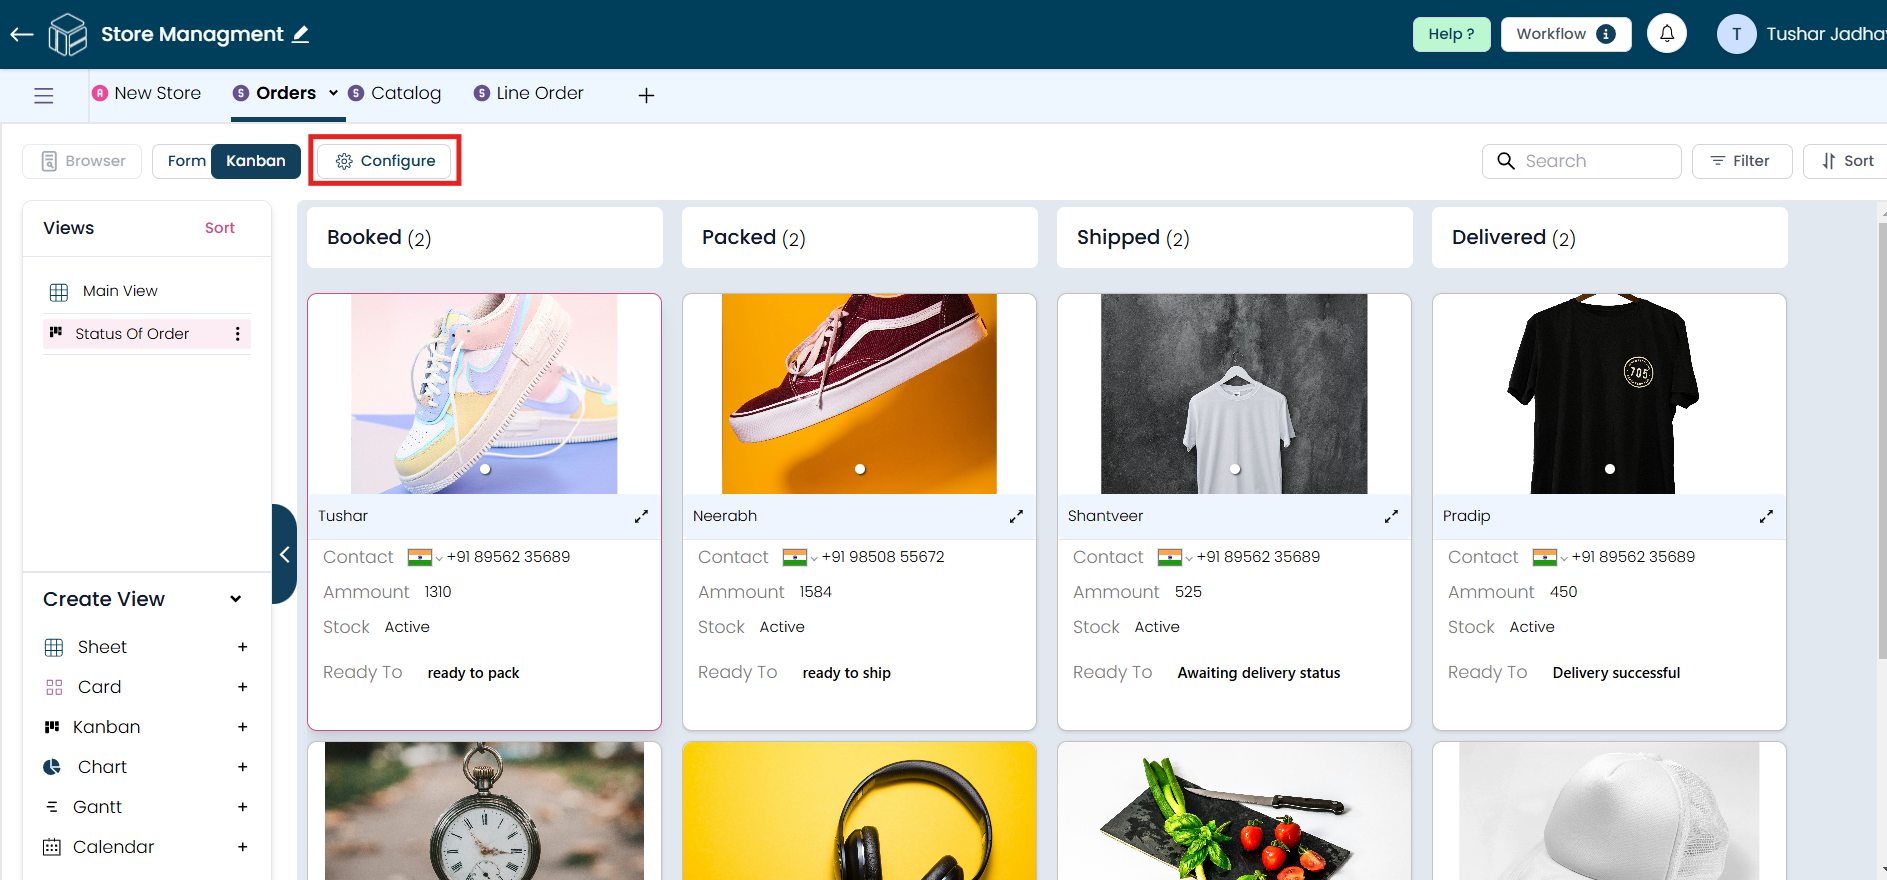
Step 7
After clicking "Create," your Kanban view will be created. To make any changes in the created Kanban view, click on the "Configure" button.
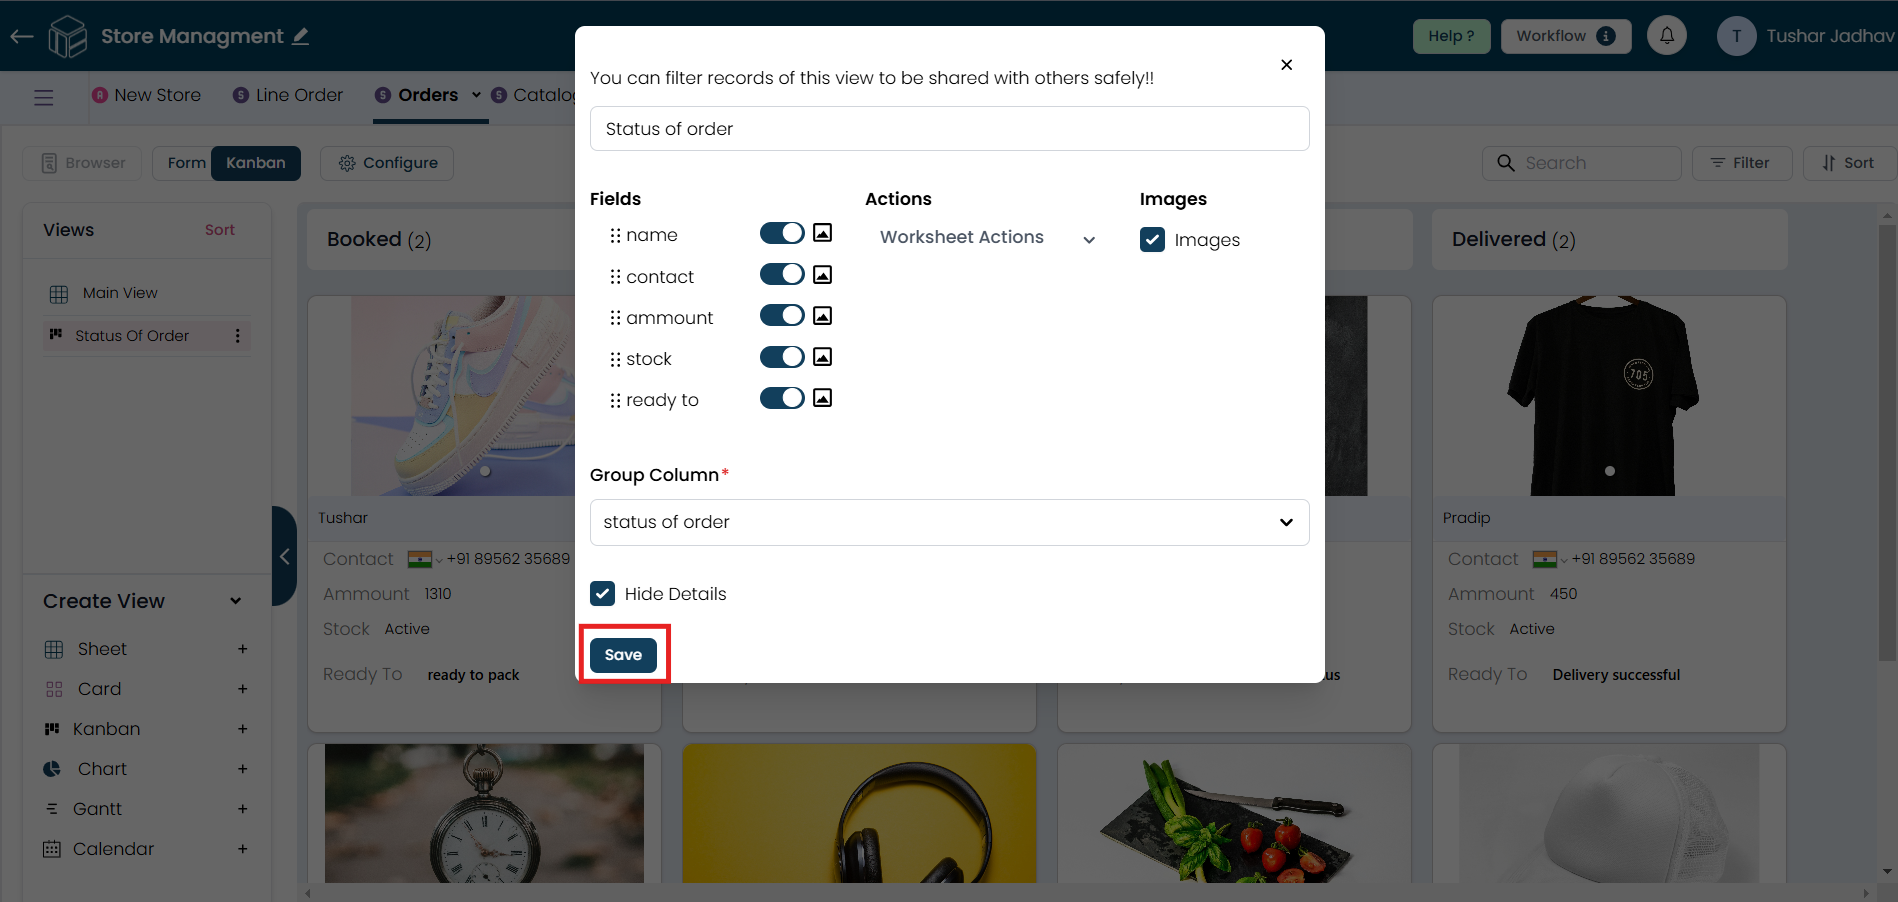
Step 8
From here, you can enable or disable the 'Hide Details' option, which will be reflected in your Kanban view. If you disable the 'Hide Details' option, users will see the 'Expand' option in the Kanban view, and vice versa. By clicking on it, users can view all the field data.

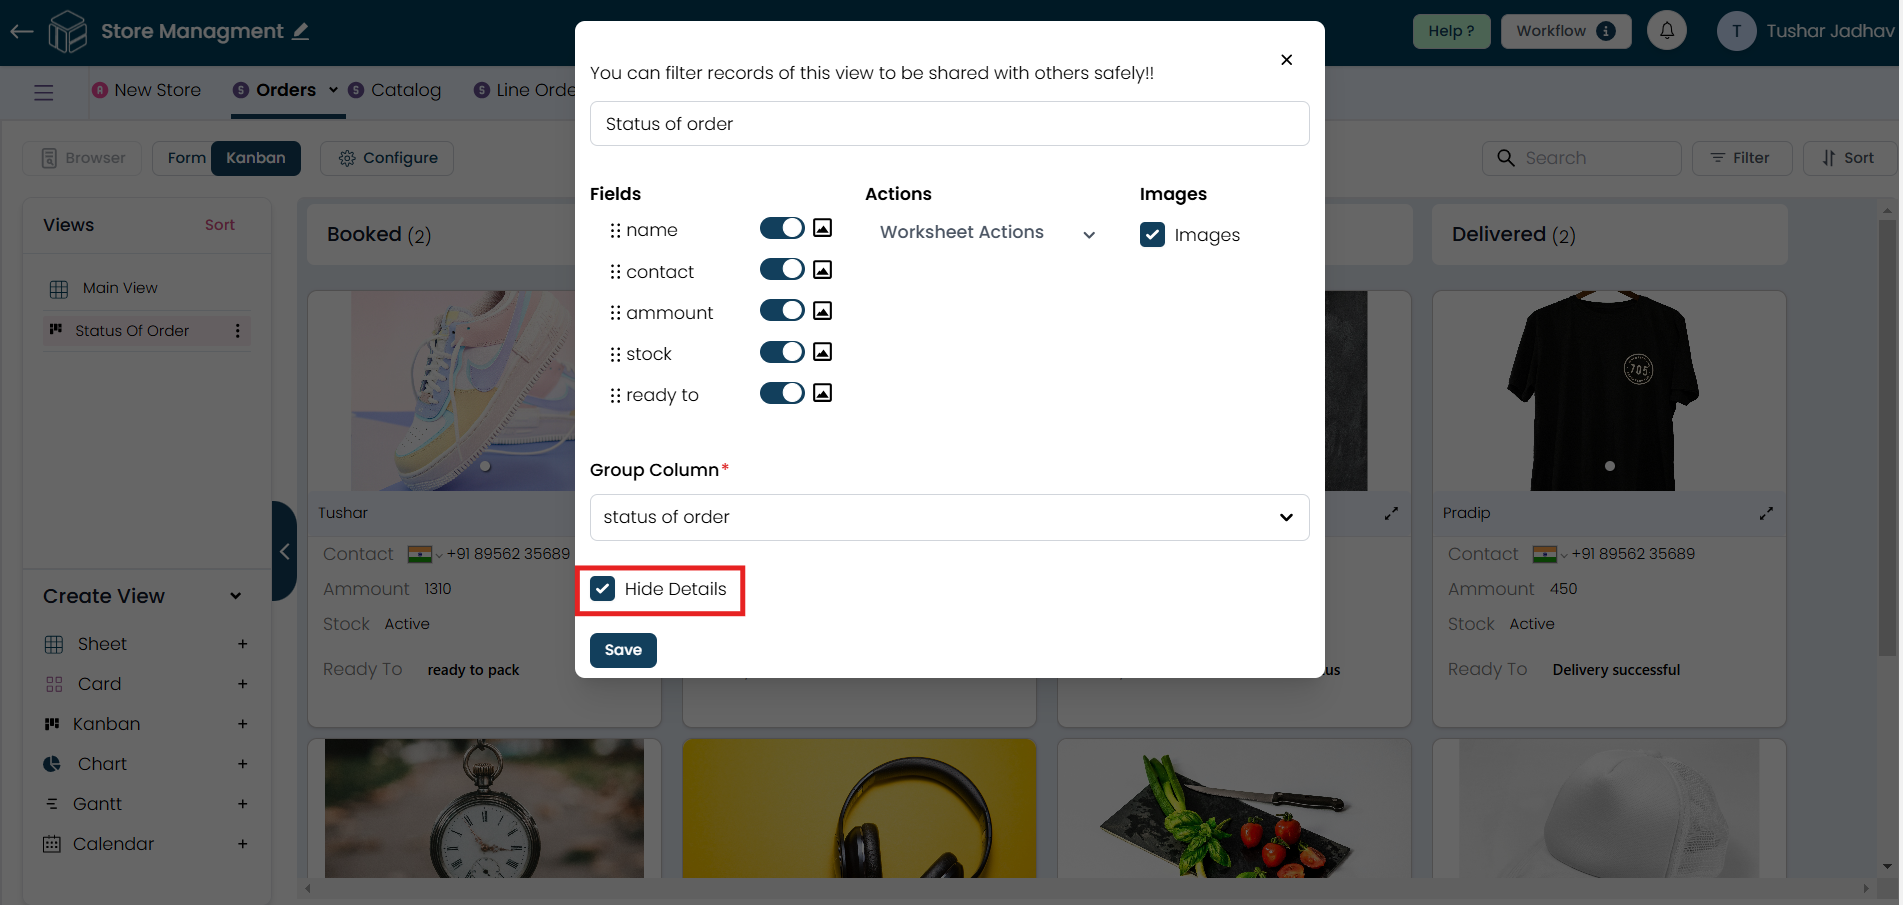

Step 9
Once you have made the necessary changes, click on "Save."