Creating a Calendar View
This guide will walk you through the step-by-step process of creating a Calendar view. Follow these instructions carefully to successfully create and customize your Calendar view to your preferences.
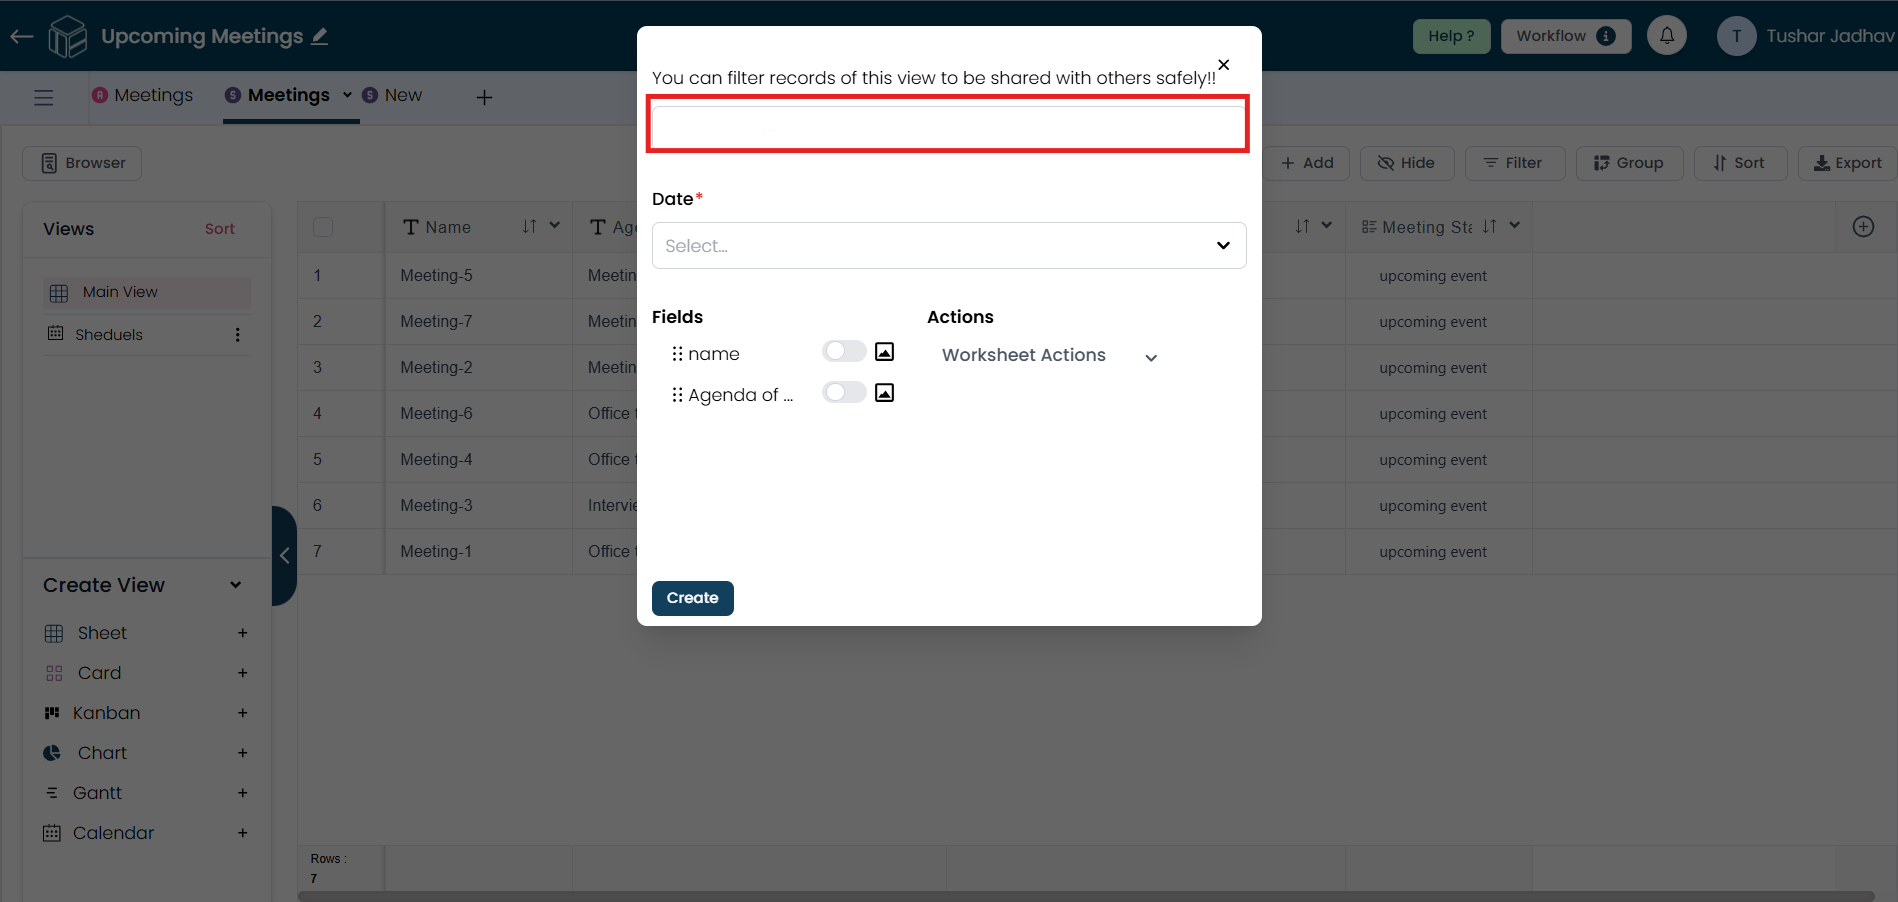
Step 1
Click on the plus icon to start creating a new Calendar view.
Step 2
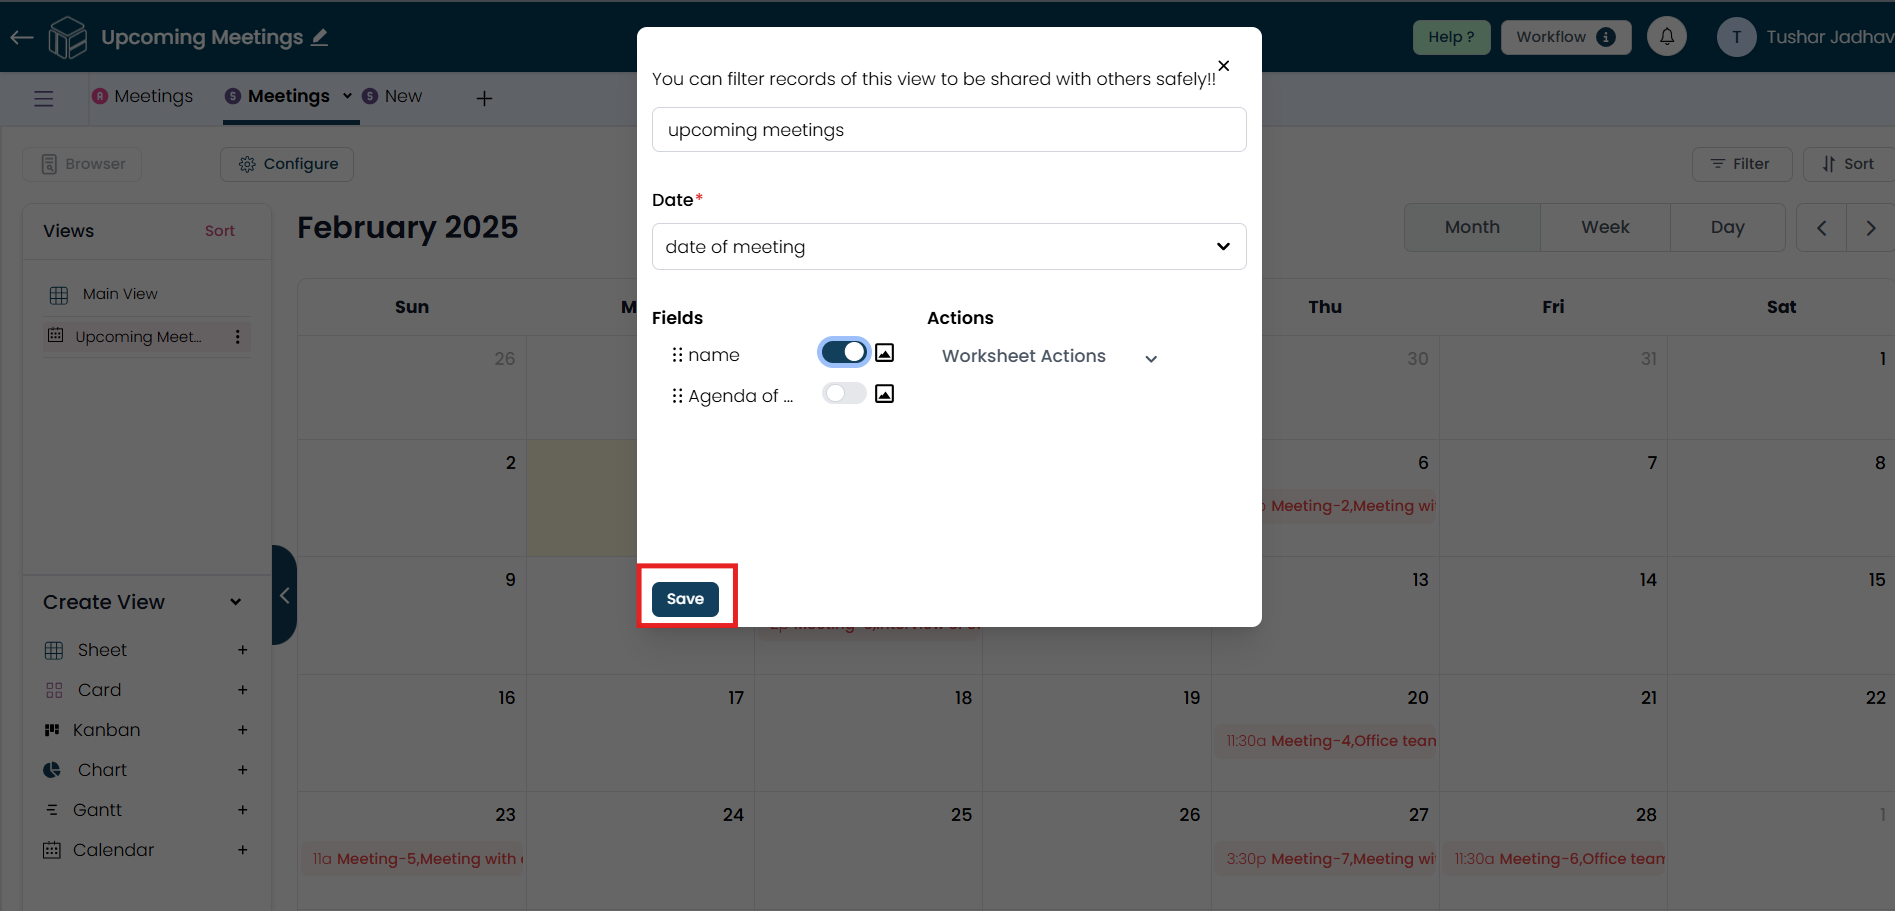
In the pop-up window, enter a name for your Calendar view according to your preferences.
Note: At least one date column is required to create a Calendar view.
Step 3
After entering the calendar view name, select the date field from your worksheet. According to that events will be created in the Calendar view based on the dates in this field. Note: Only date-type fields from the worksheet will be available in the date field selection.
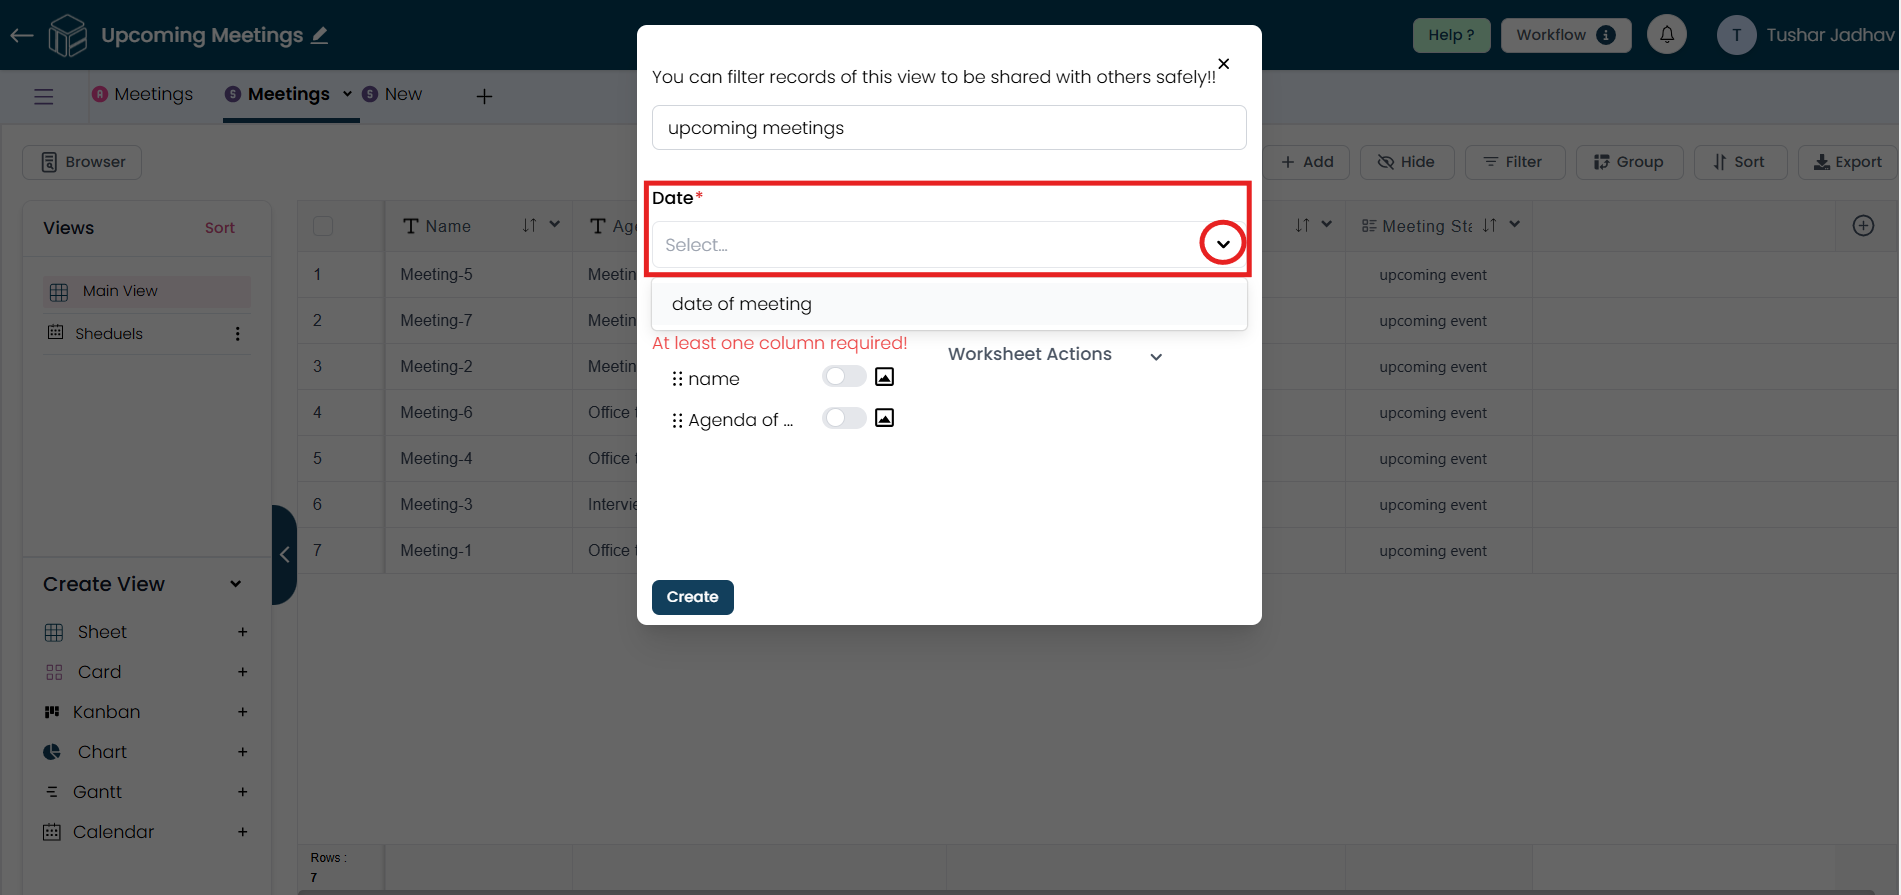
Step 4
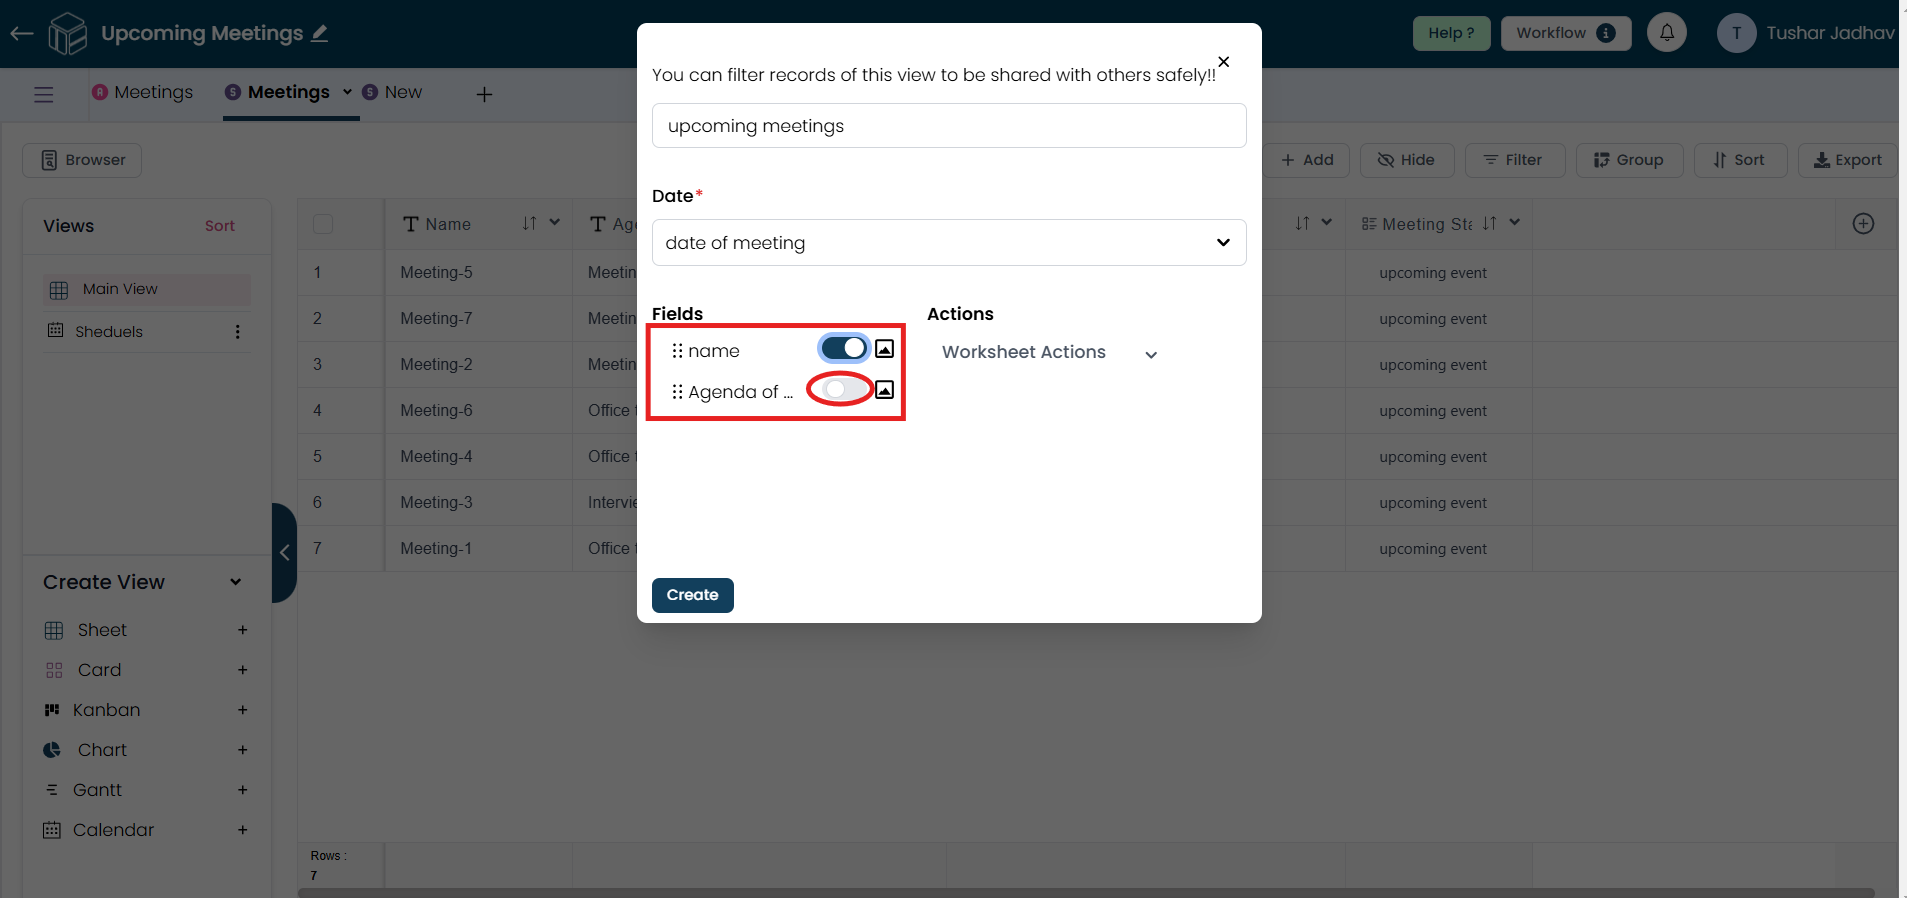
Once you've selected the date field, choose at least one field to display in the calendar. (Note: Only text and number fields will be available for selection.)
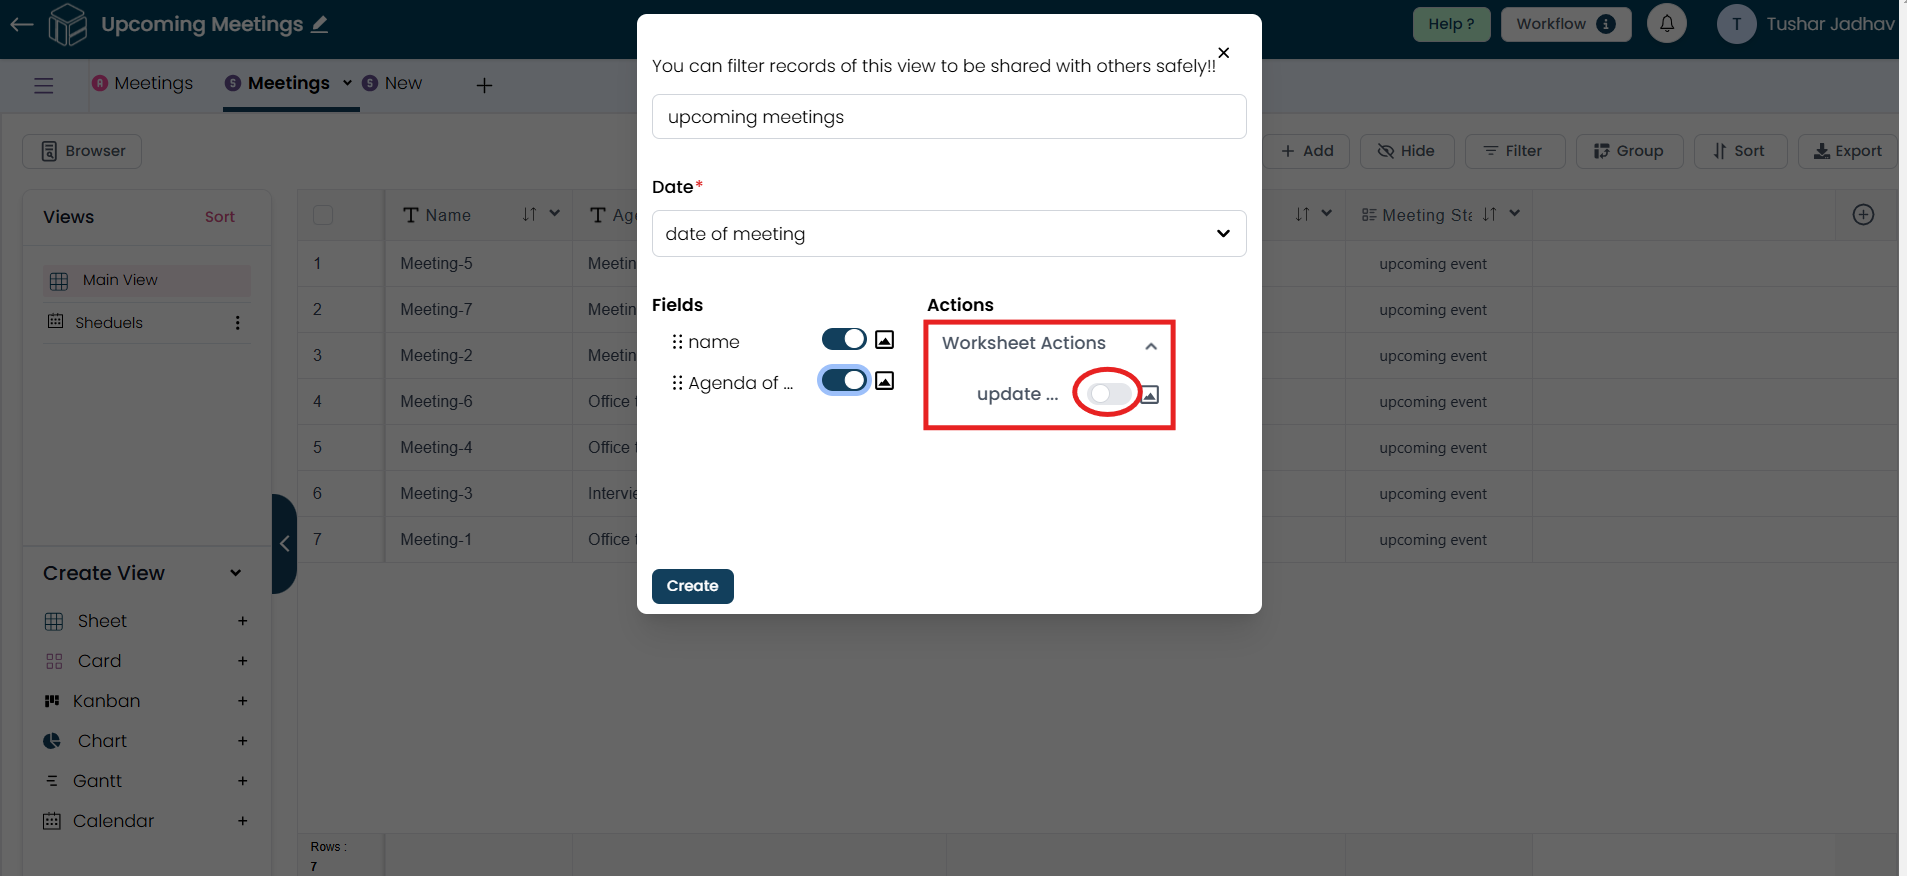
Step 5
If you've already created actions in your worksheet, you can enable that action.
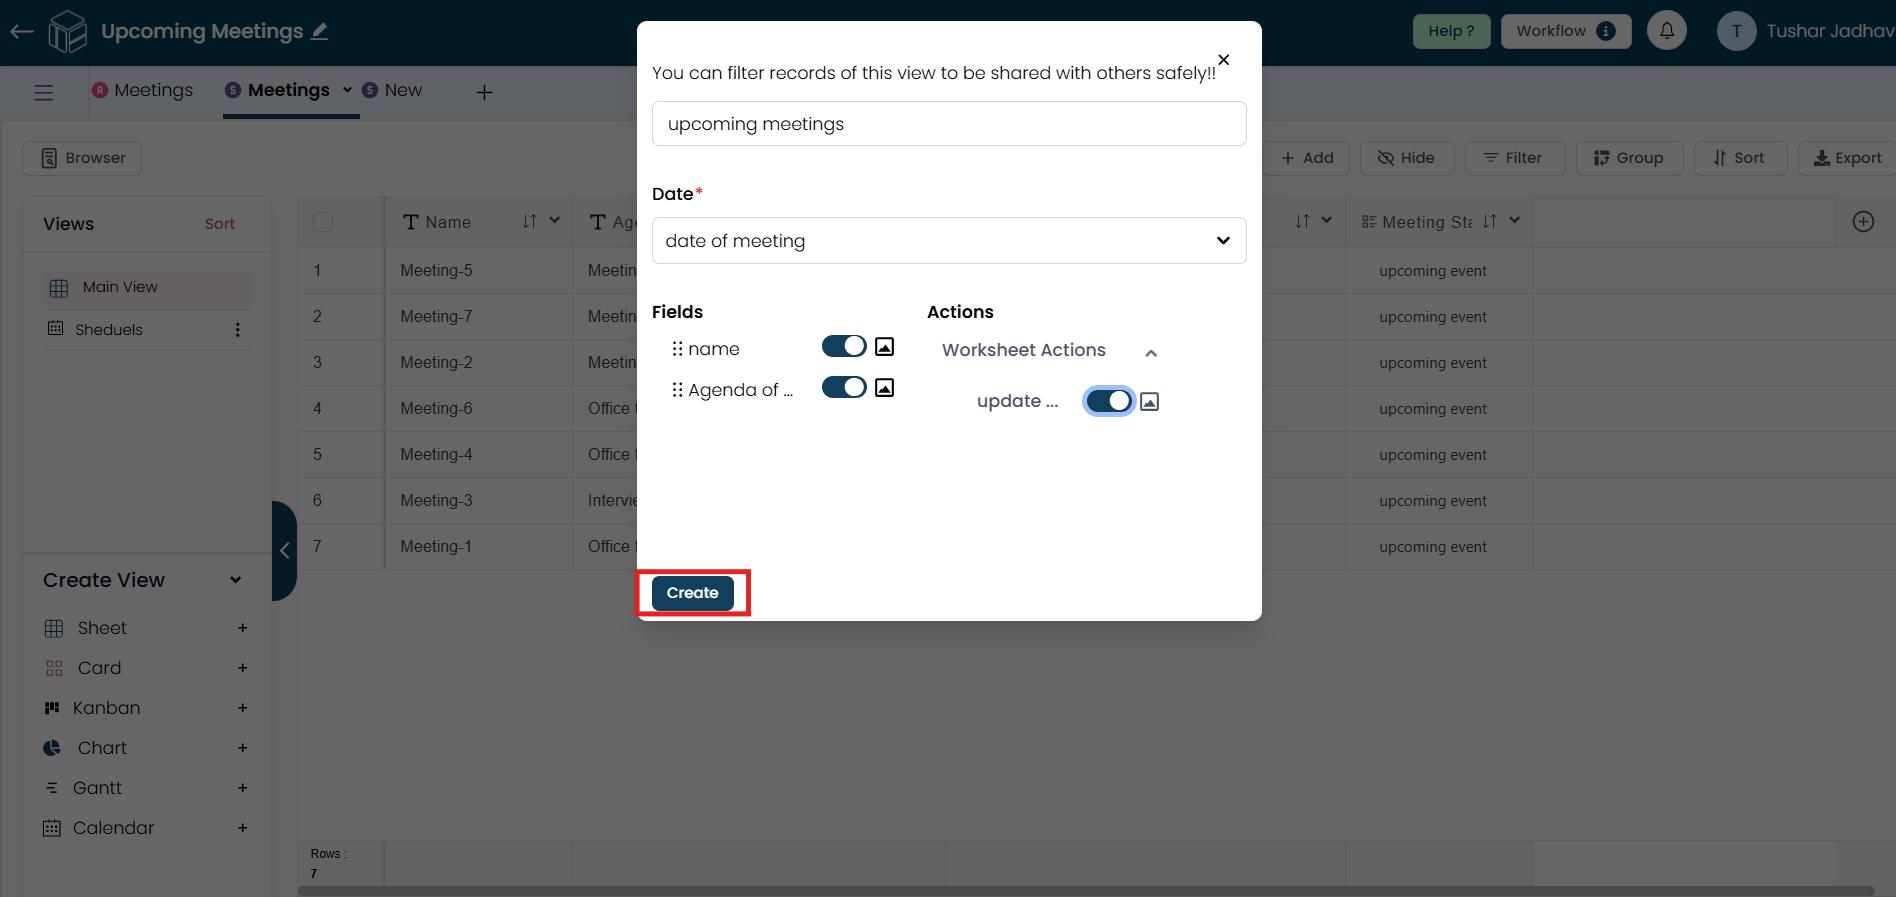
Step 6
Once you’ve configured your calendar settings, click on Create.
Step 7
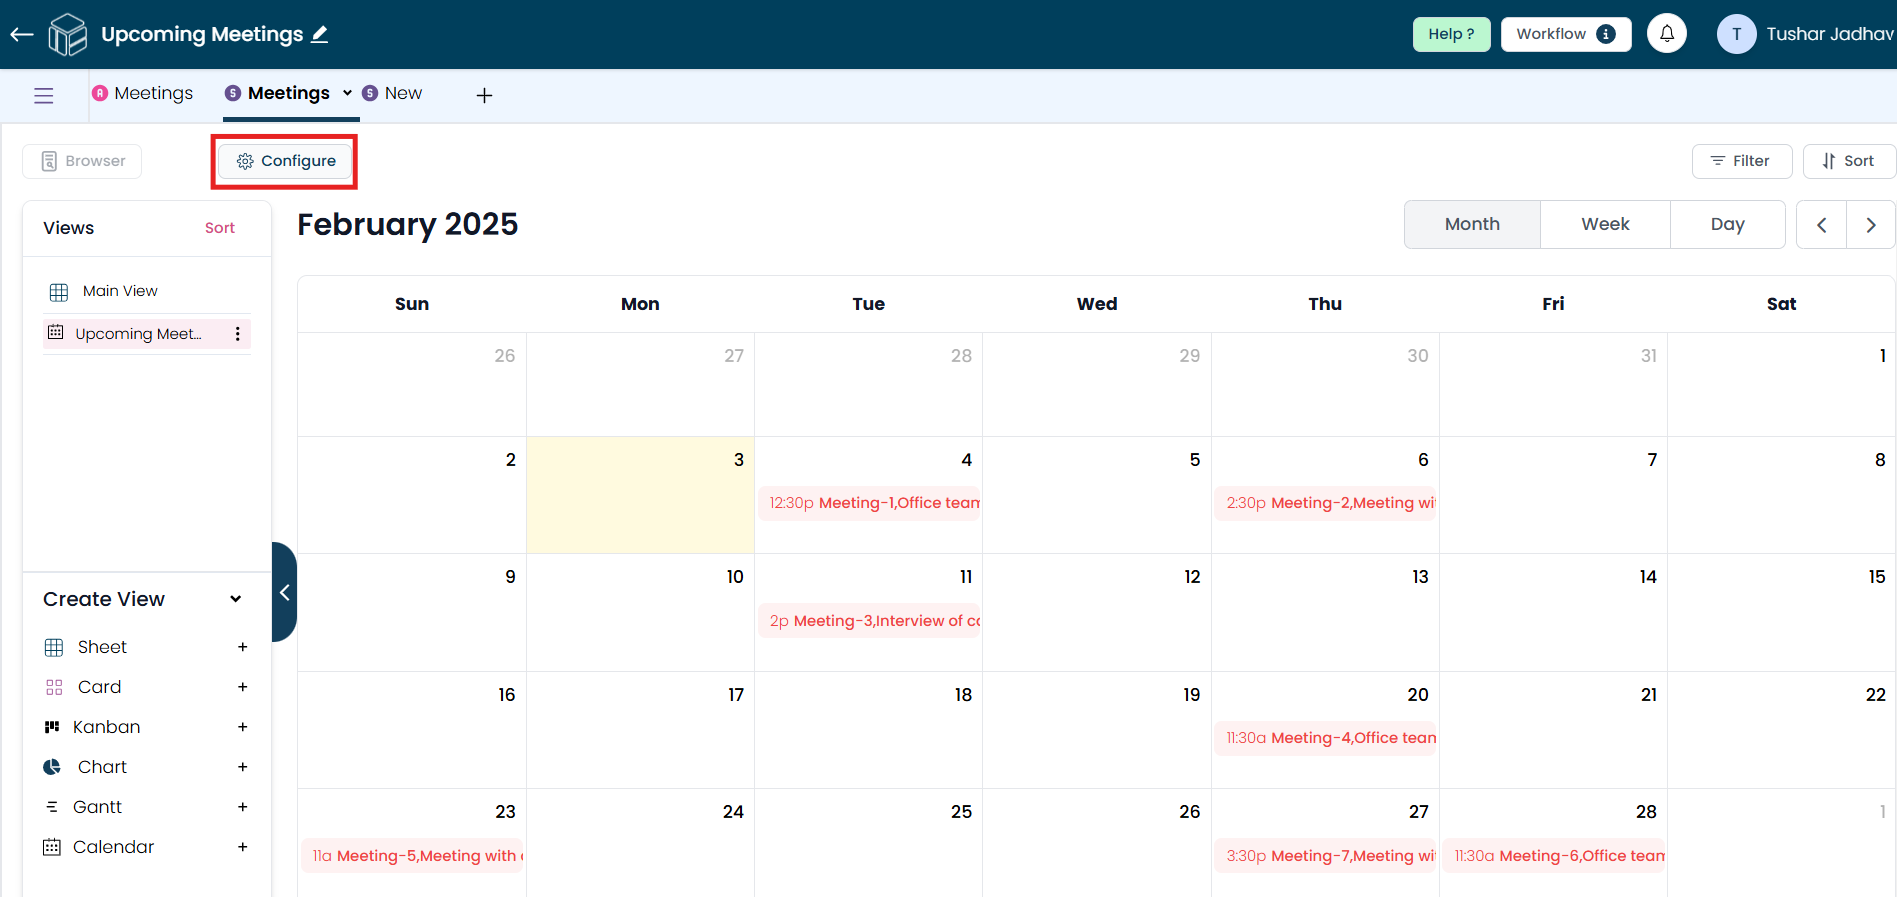
After clicking Create, your calendar view will be generated. To make any changes to the created calendar, click the Configure button and after making changes click on save.
Step 8
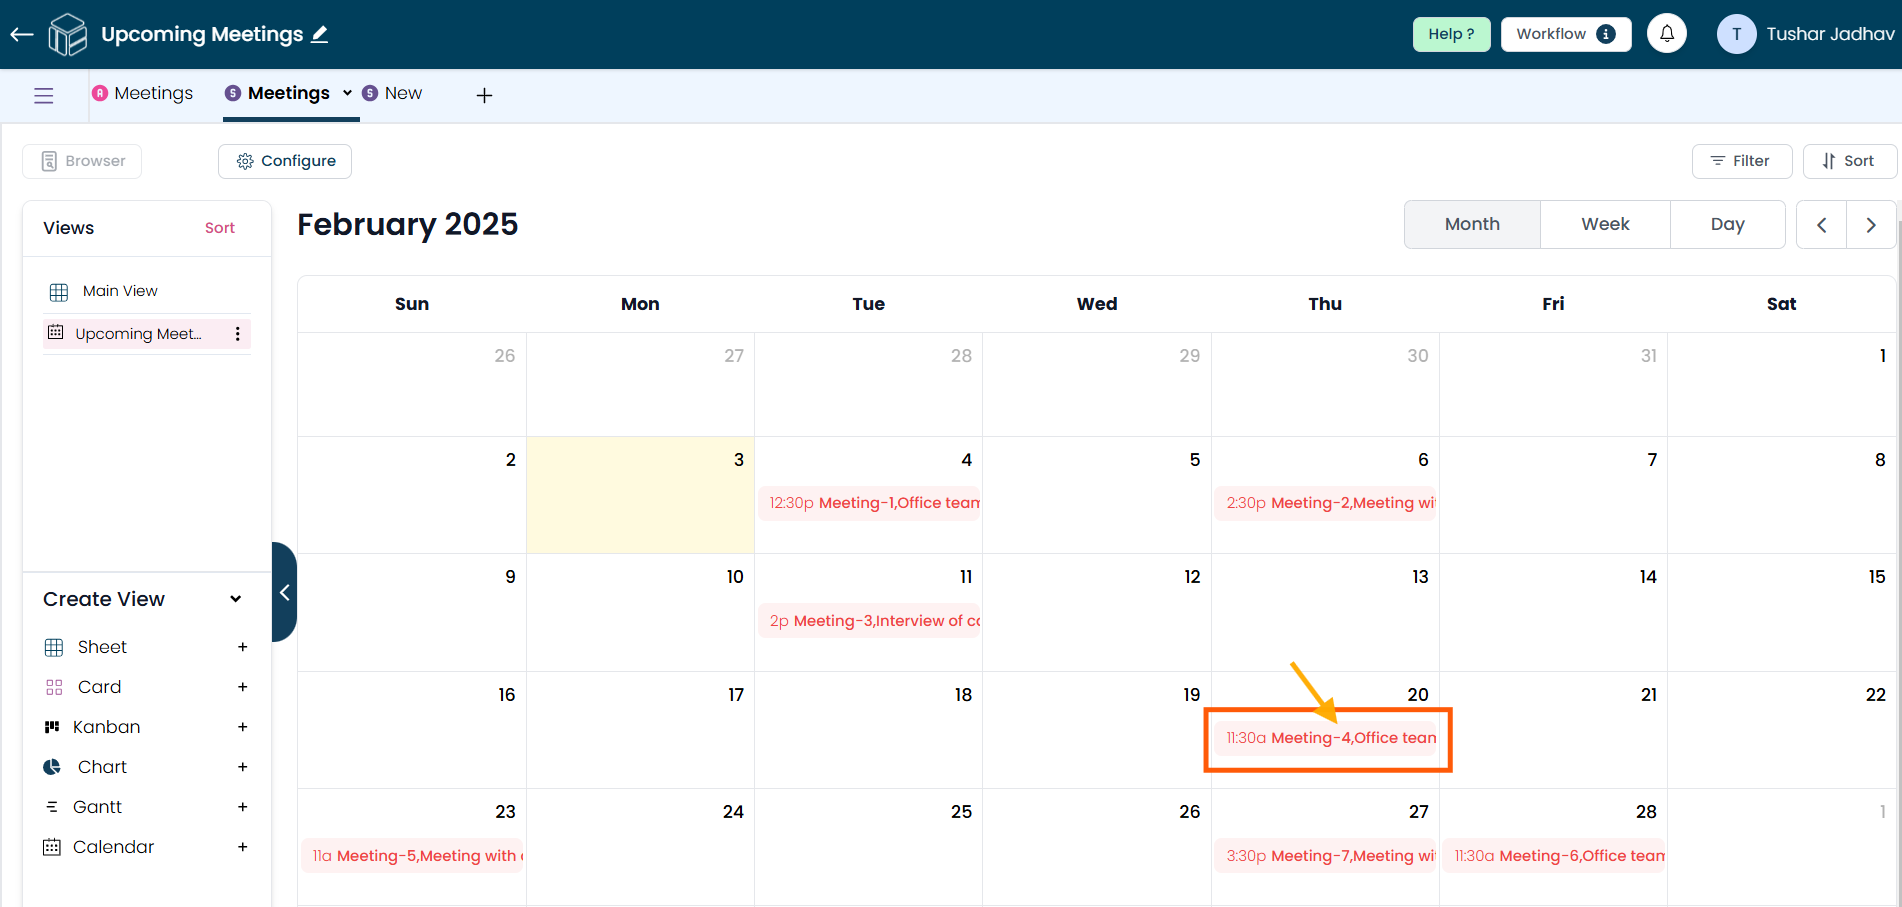
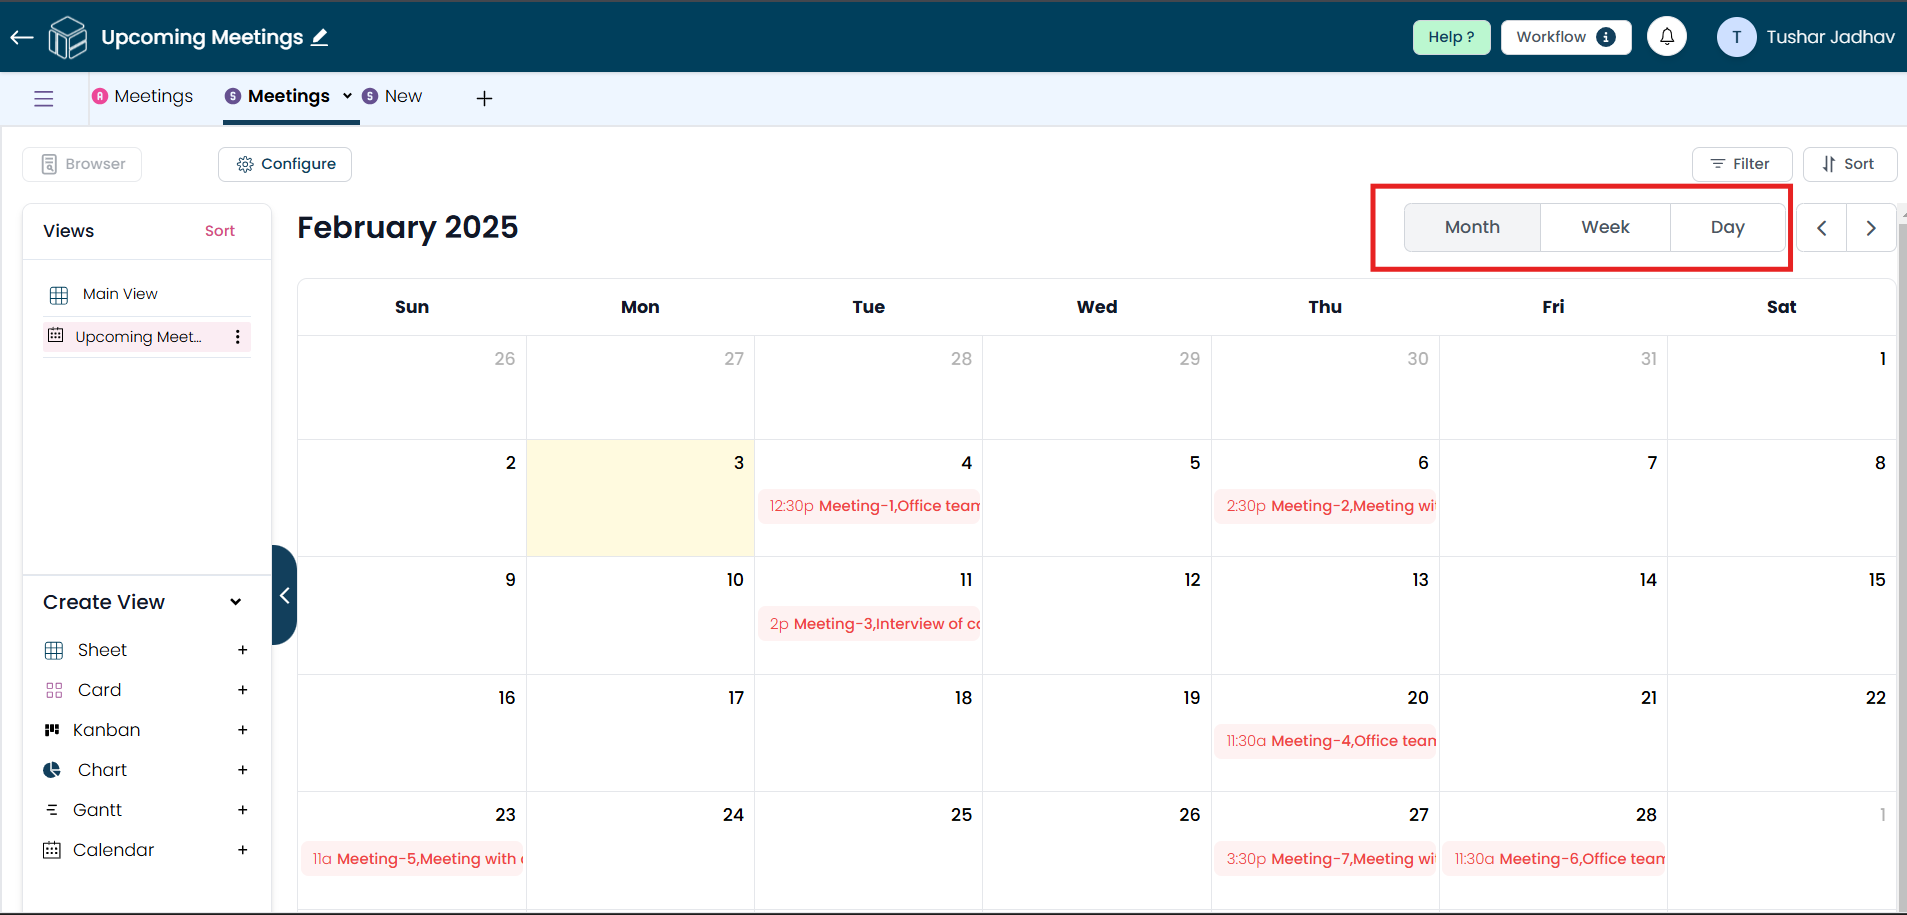
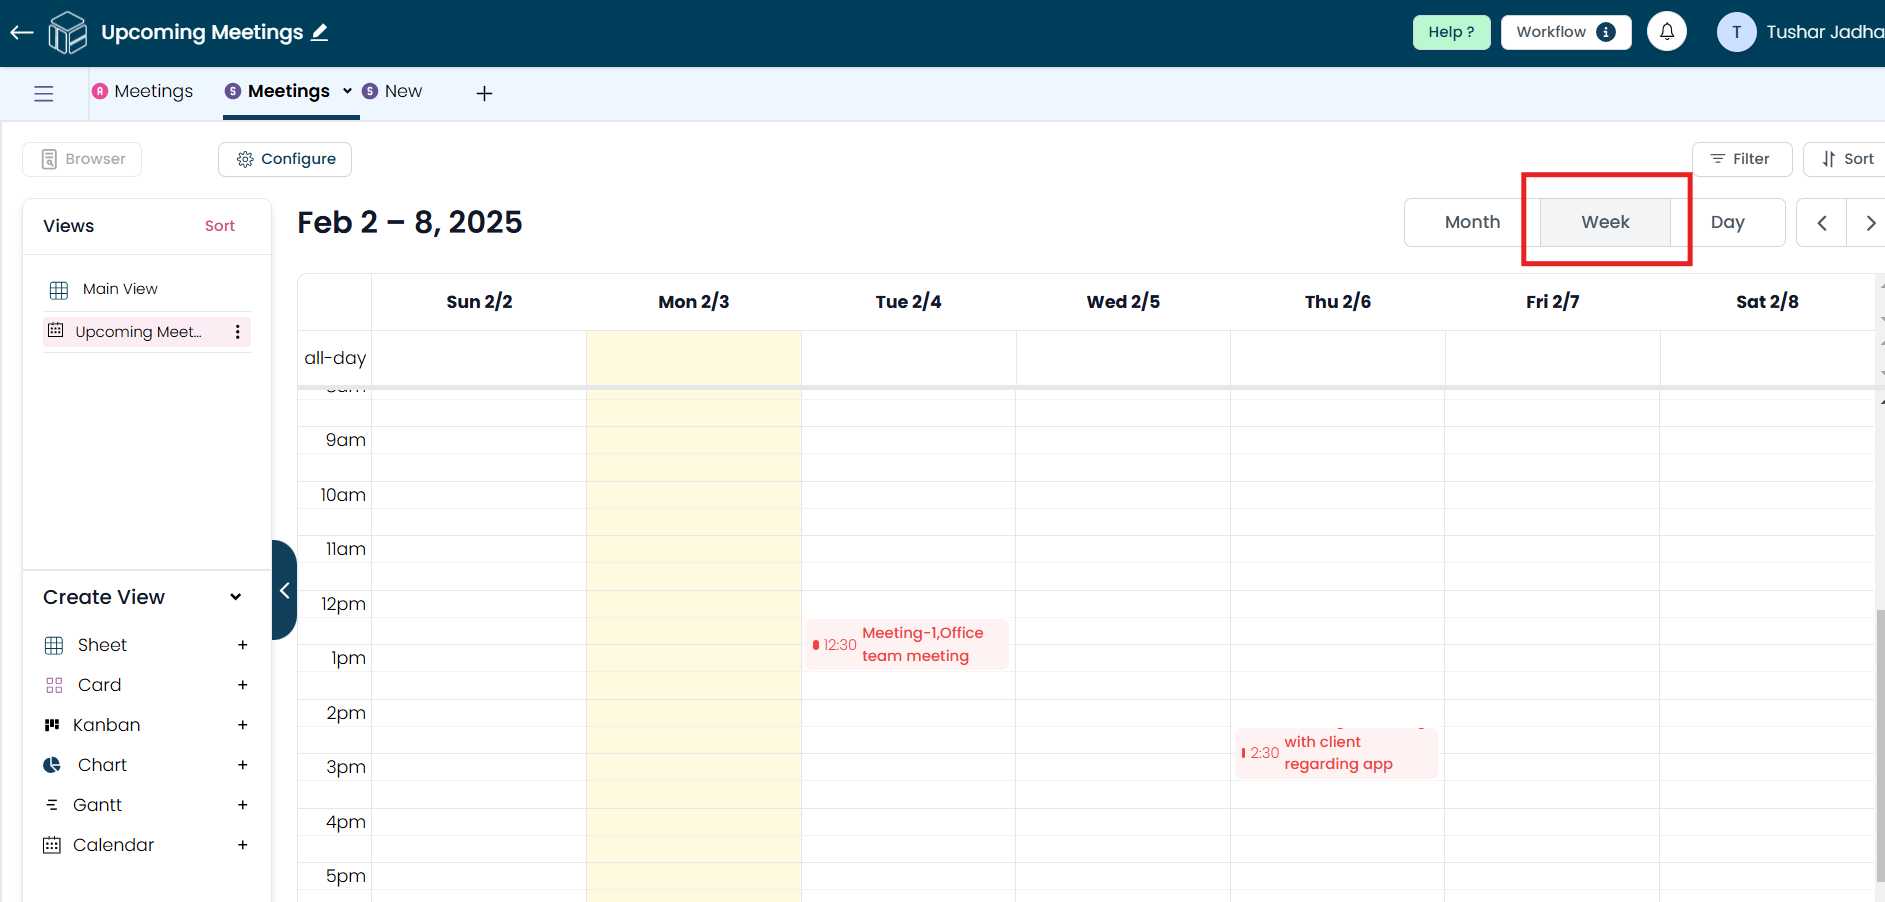
You can also switch your calendar view to display daily, weekly, or monthly, depending on your preference.
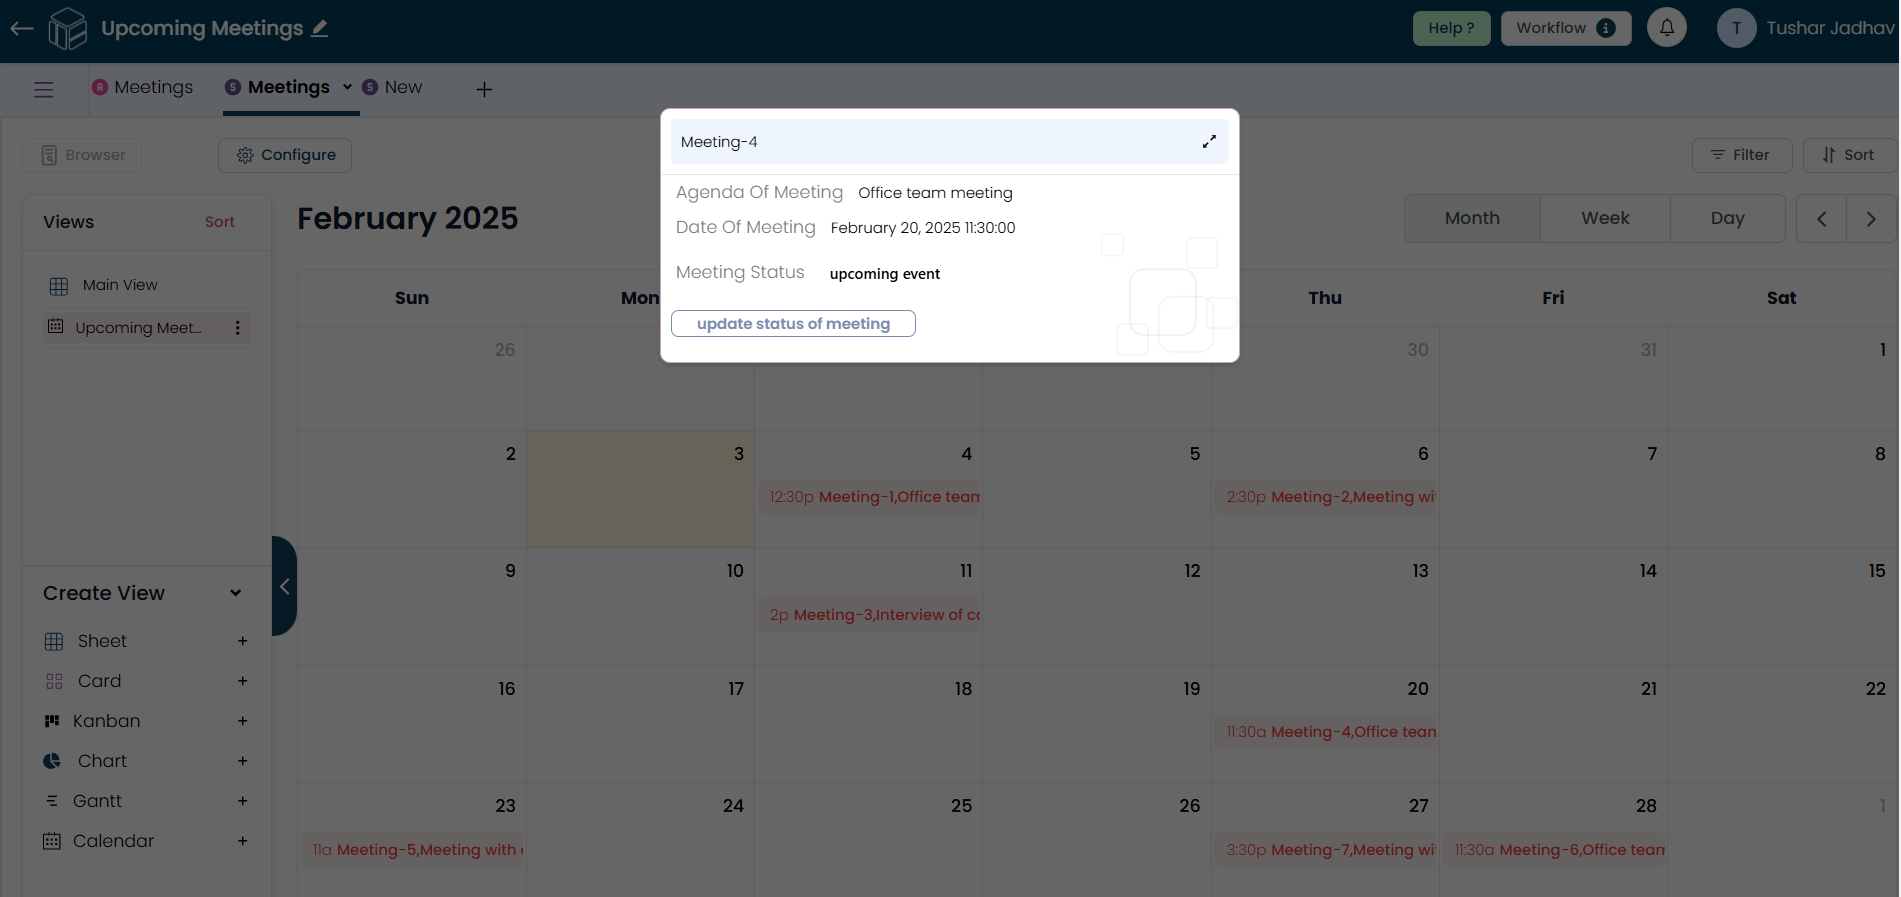
Step 9
Click on any event displayed on a specific date to view all the field data present in your worksheet.