Triggers
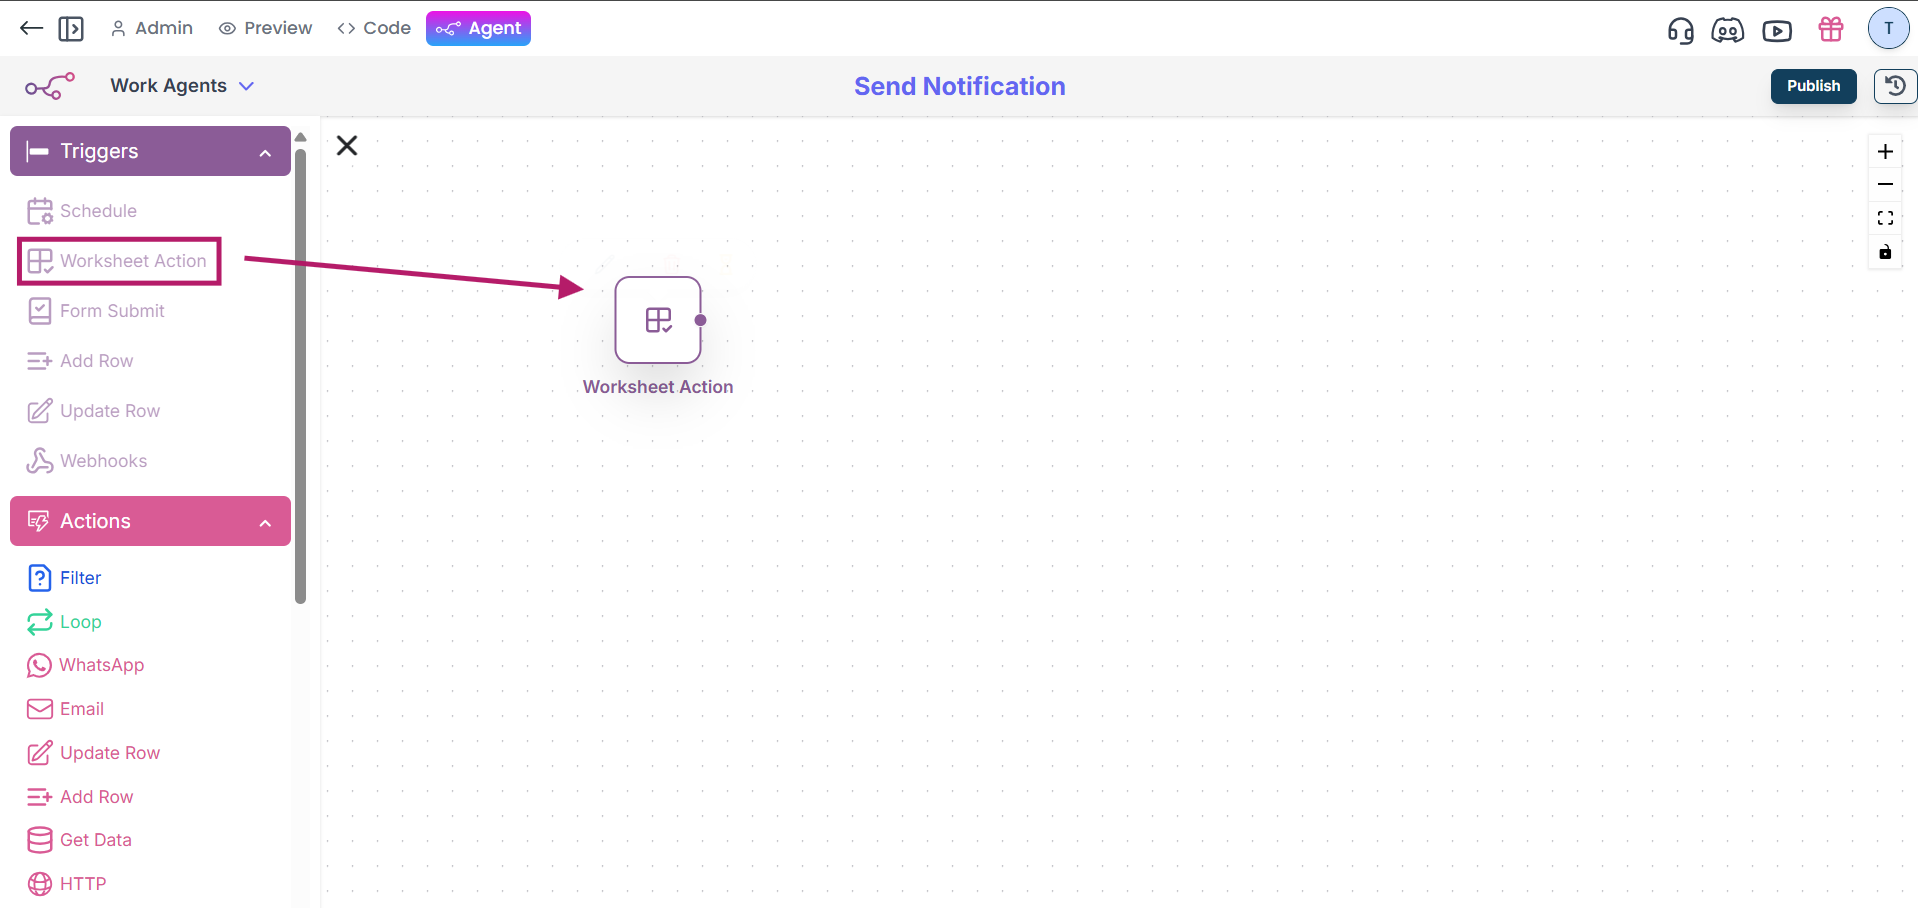
Create Worksheet Action Trigger
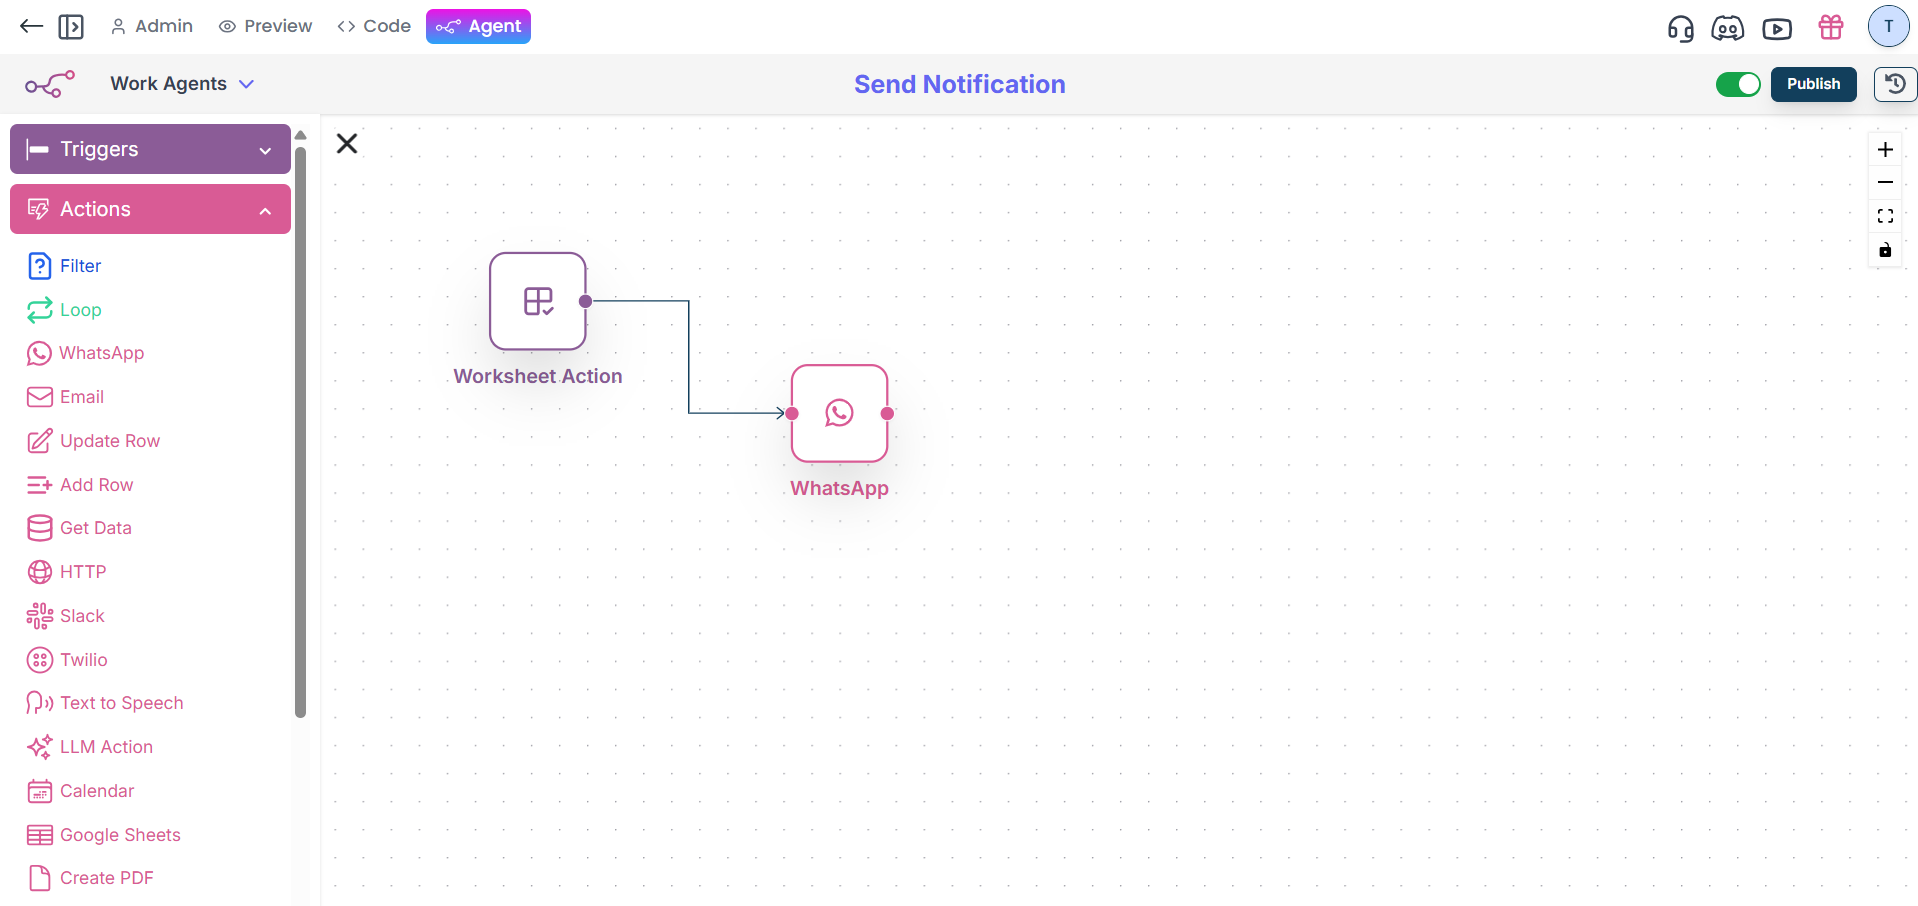
1.After creating your workflow, drag the “Worksheet Action” button from the Triggers section onto the canvas.
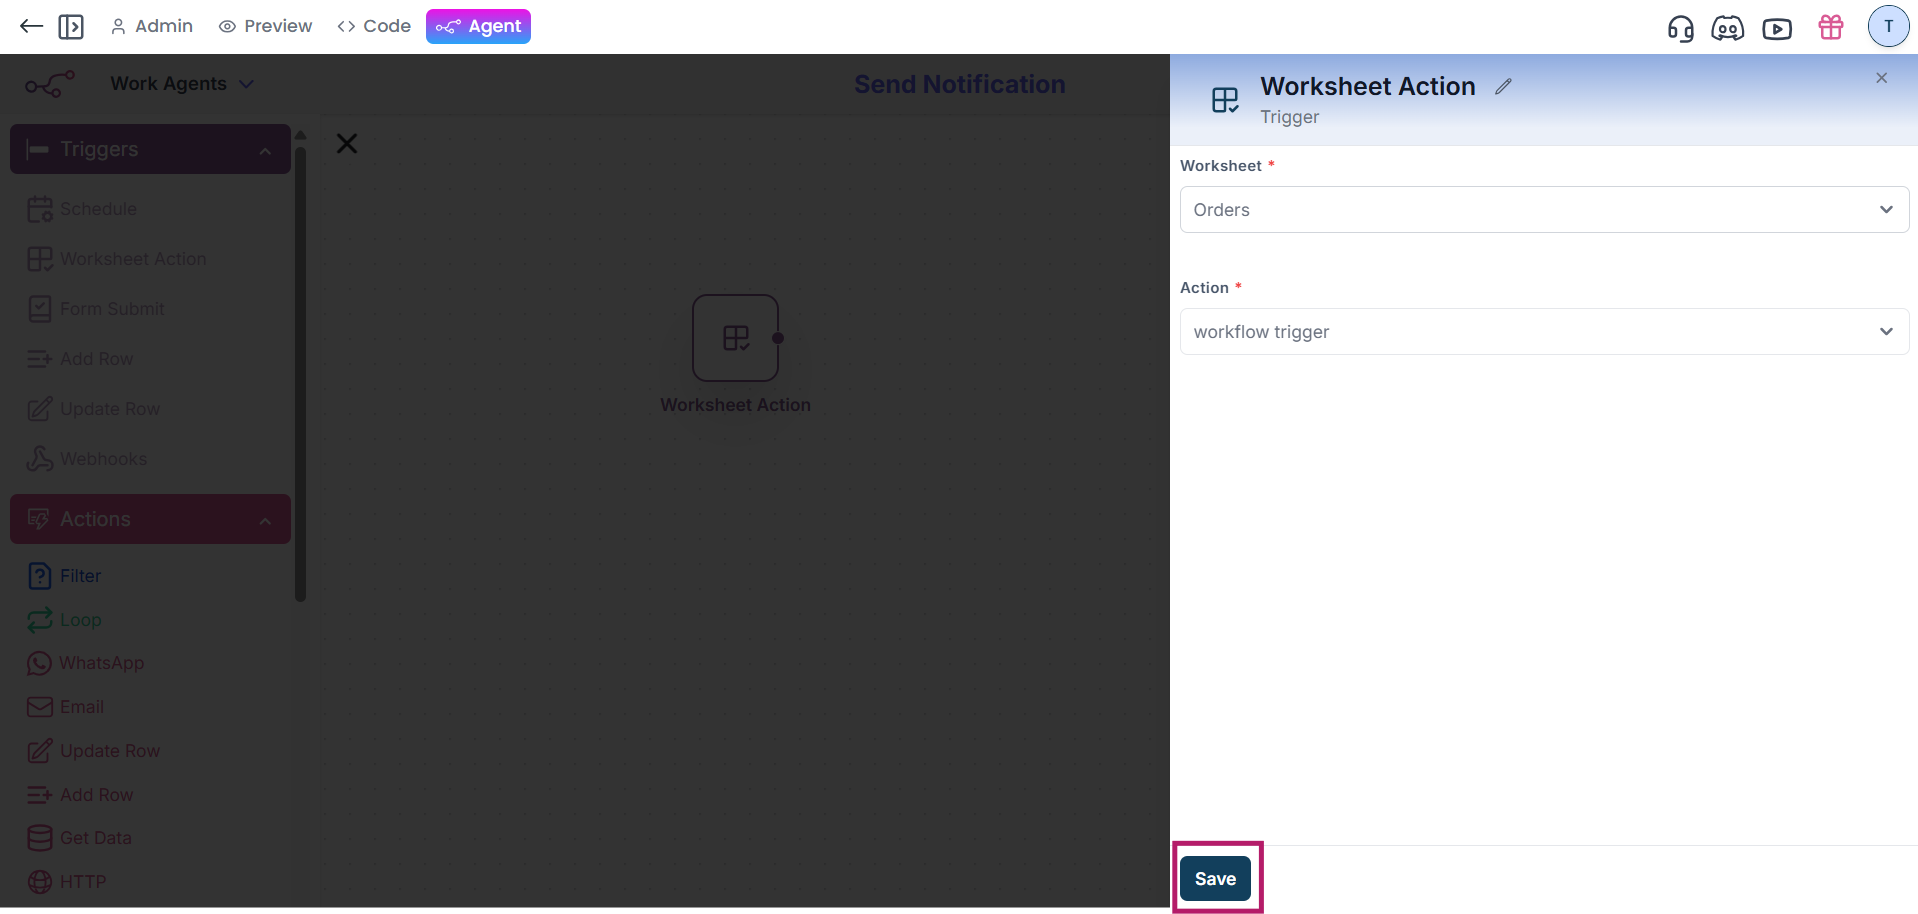
2.Now you have to select the worksheet for which you want to trigger the action. Then, choose the specific action that you have already created in worksheet (e.g., update row, workflow trigger) that will initiate the trigger. Click the Save button.
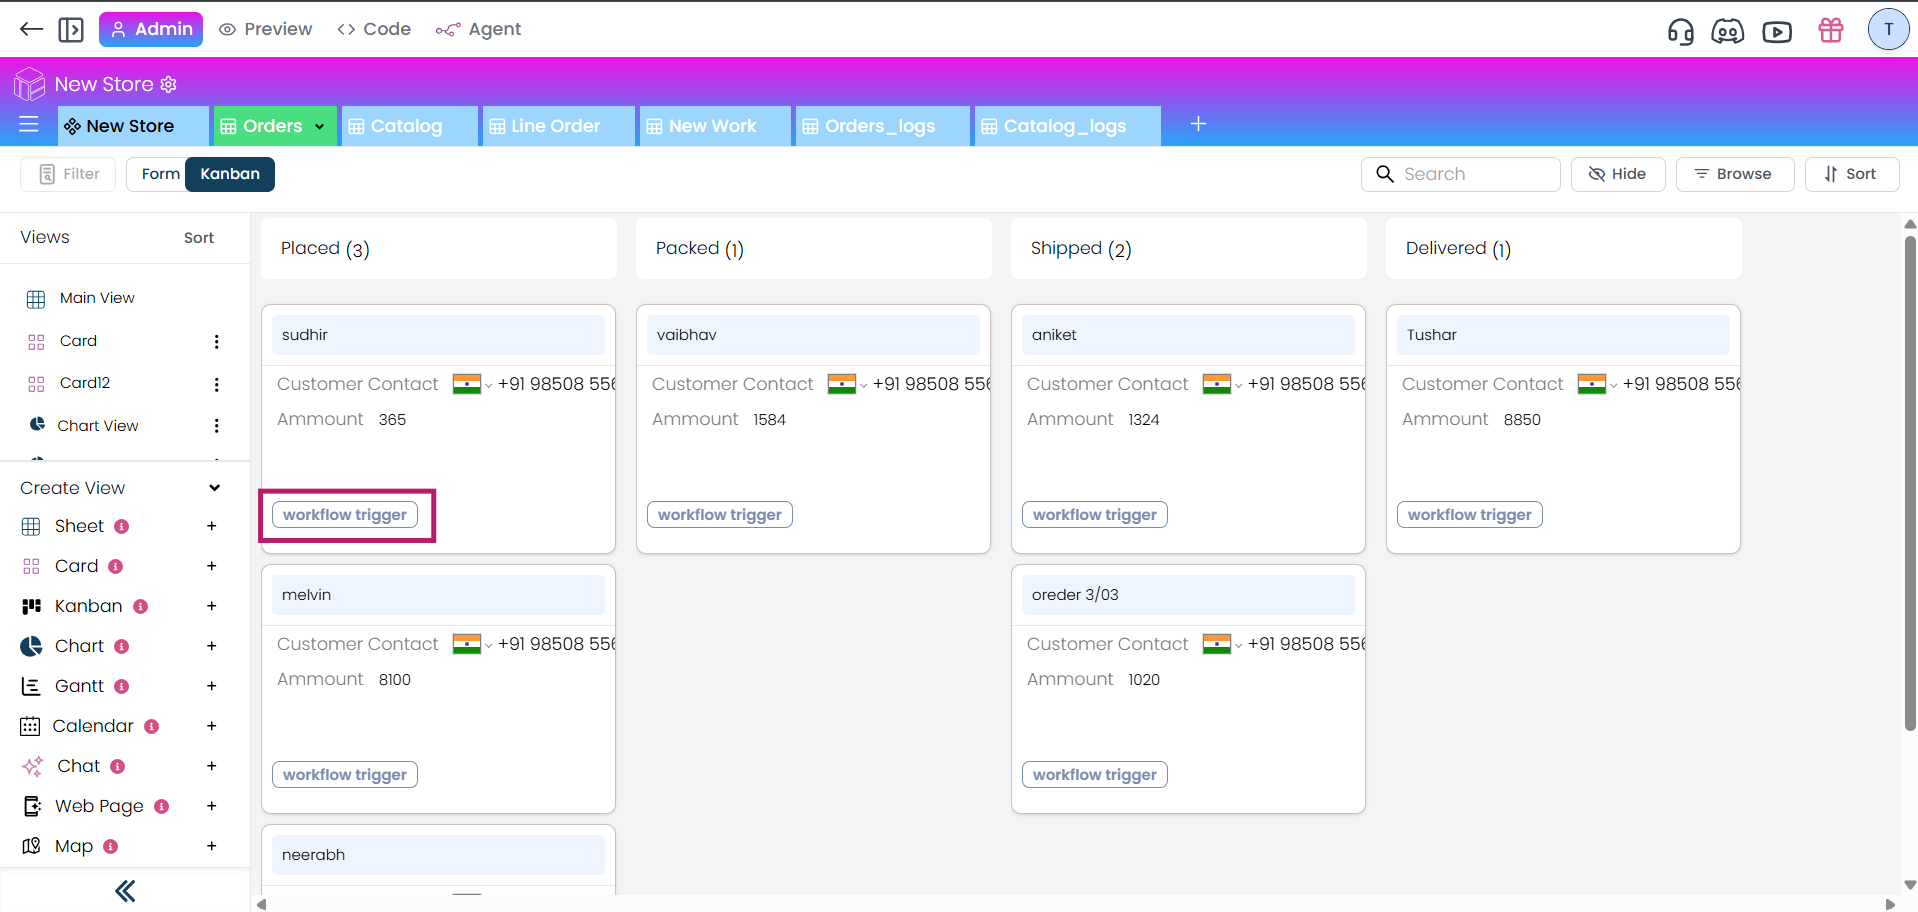
3.For example, whenever you click on that action (workflow trigger) then WhatsApp notification will be sent to the contact number specified in the contact field.
Create Form Submit Trigger
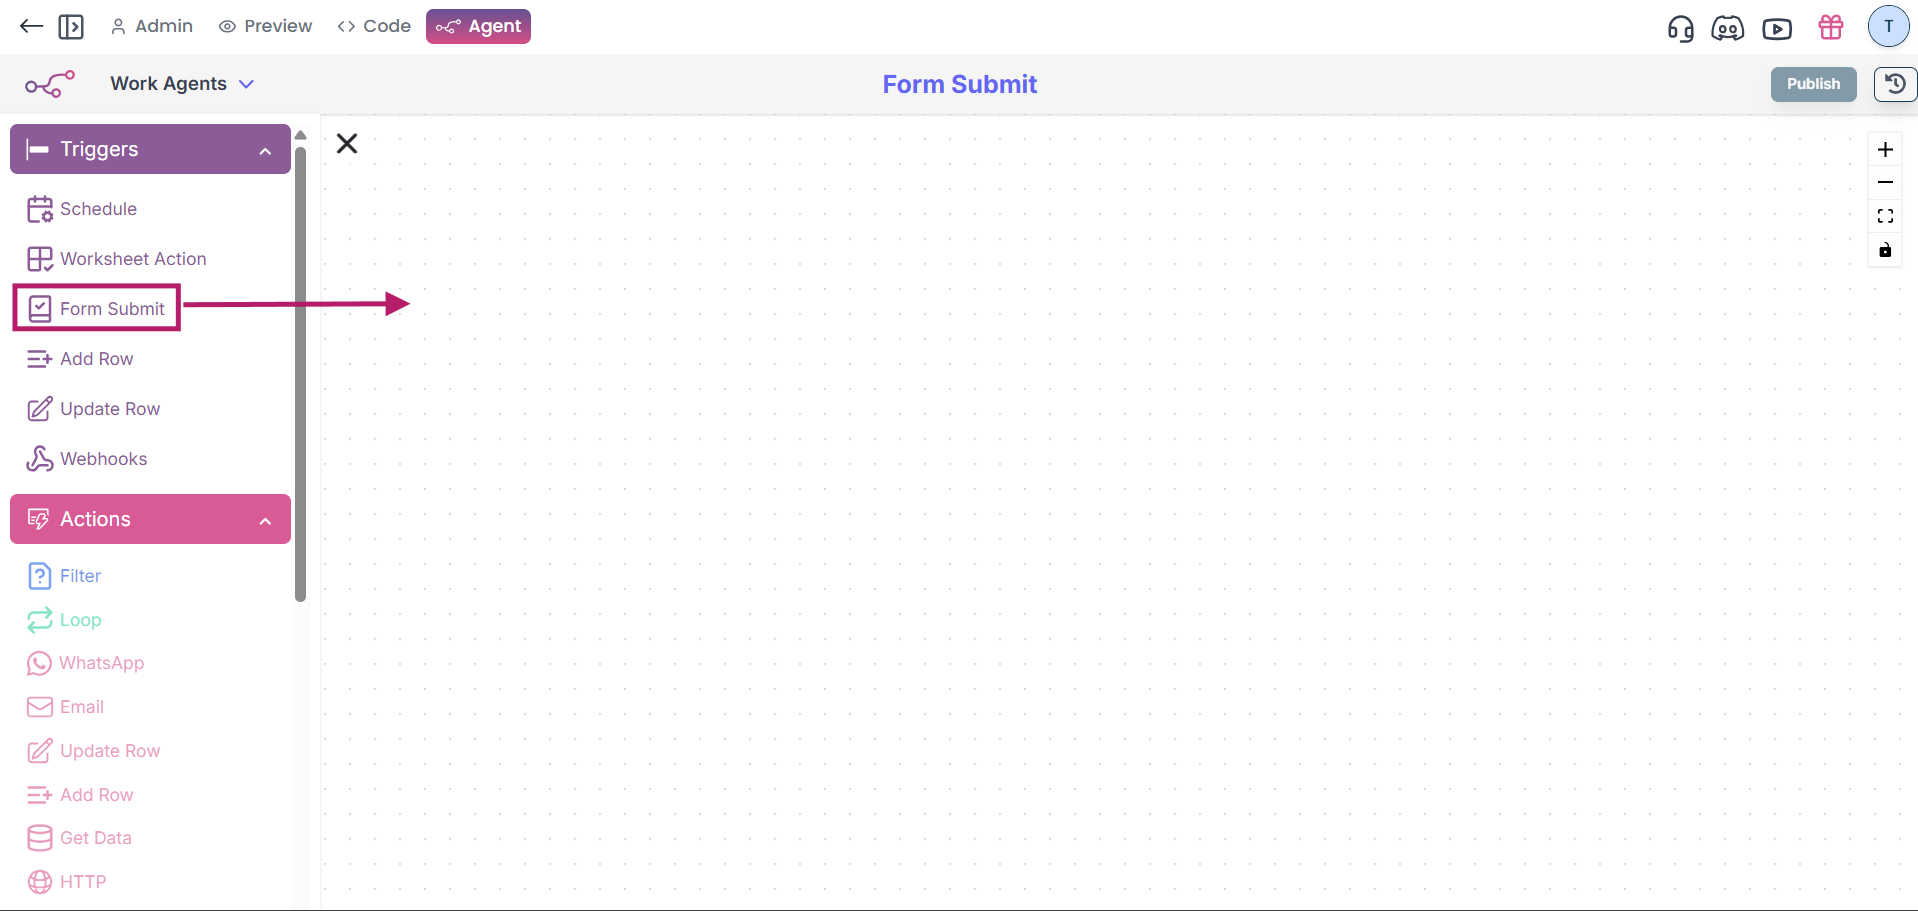
1.After creating the workflow, drag the “Form Submit” button from the Triggers section onto the canvas.
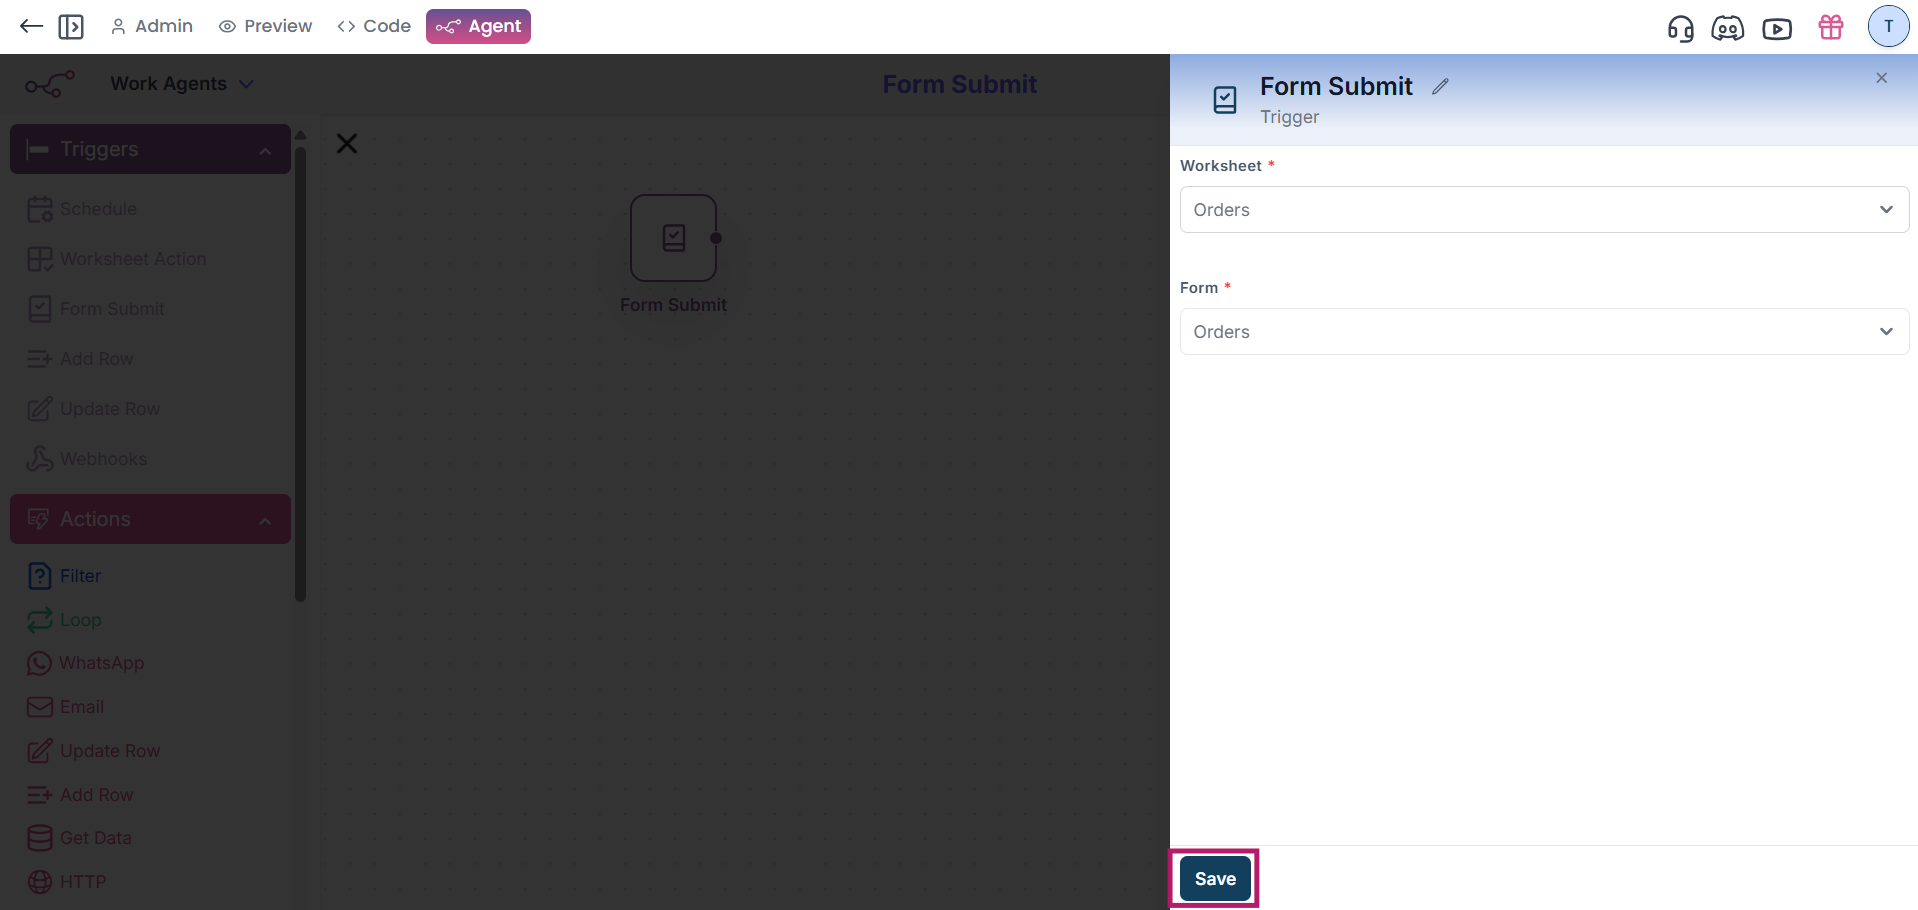
2.Now you have to select the worksheet and form you wish to use. Once you've selected the form, click the Save button.
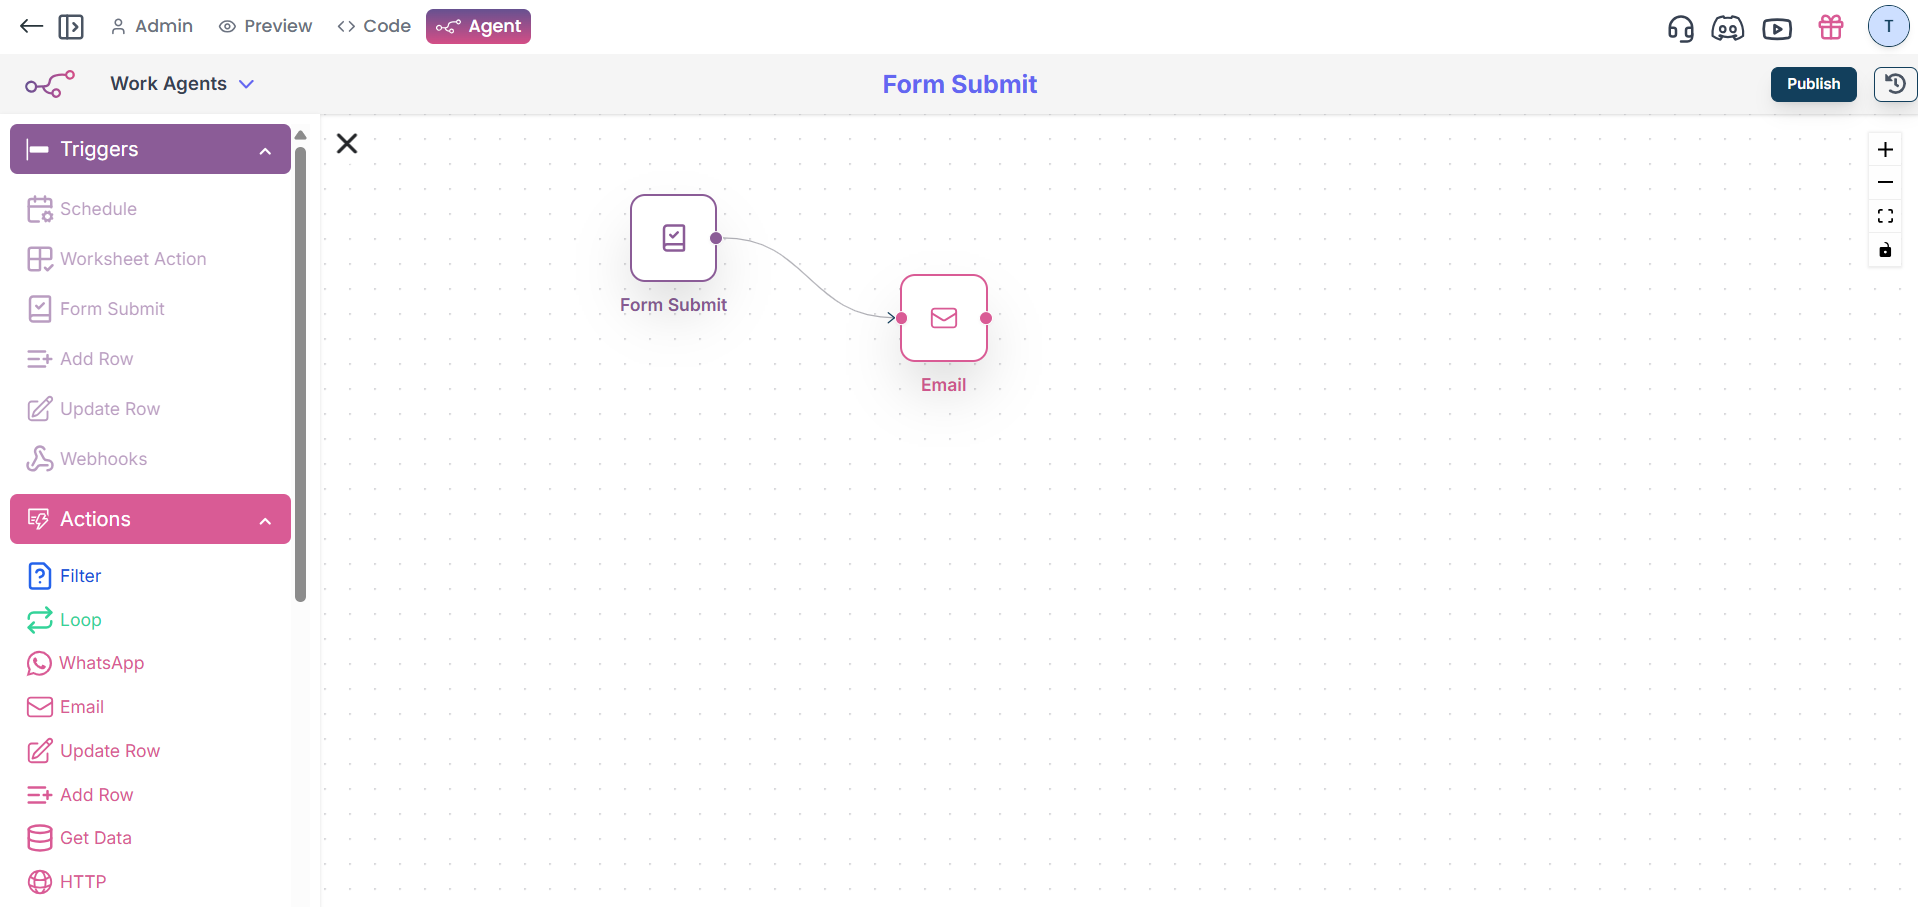
3.For example, if you want to send an email notification upon form submission, you can create a triggering action. This will ensure that every time the form is submitted, an email notification will be sent to the provided email address.
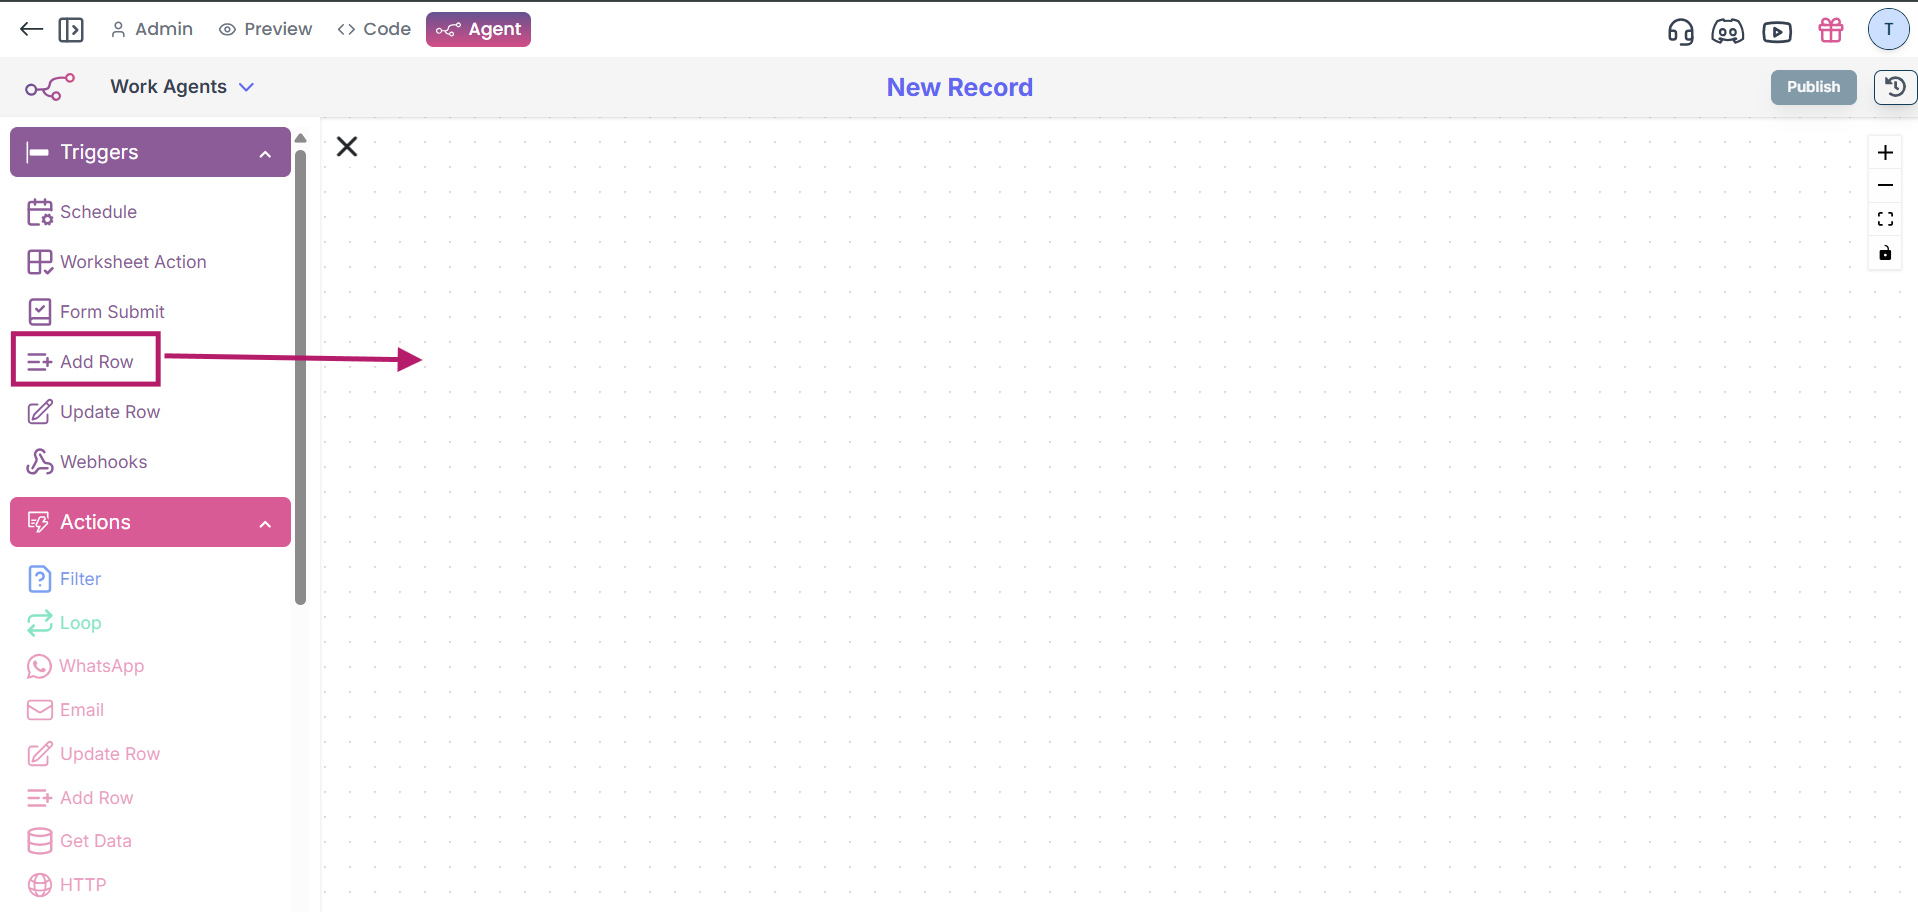
Create Add Row Trigger
1.After creating your workflow, drag the “Add Row” button from the Triggers section onto the canvas.
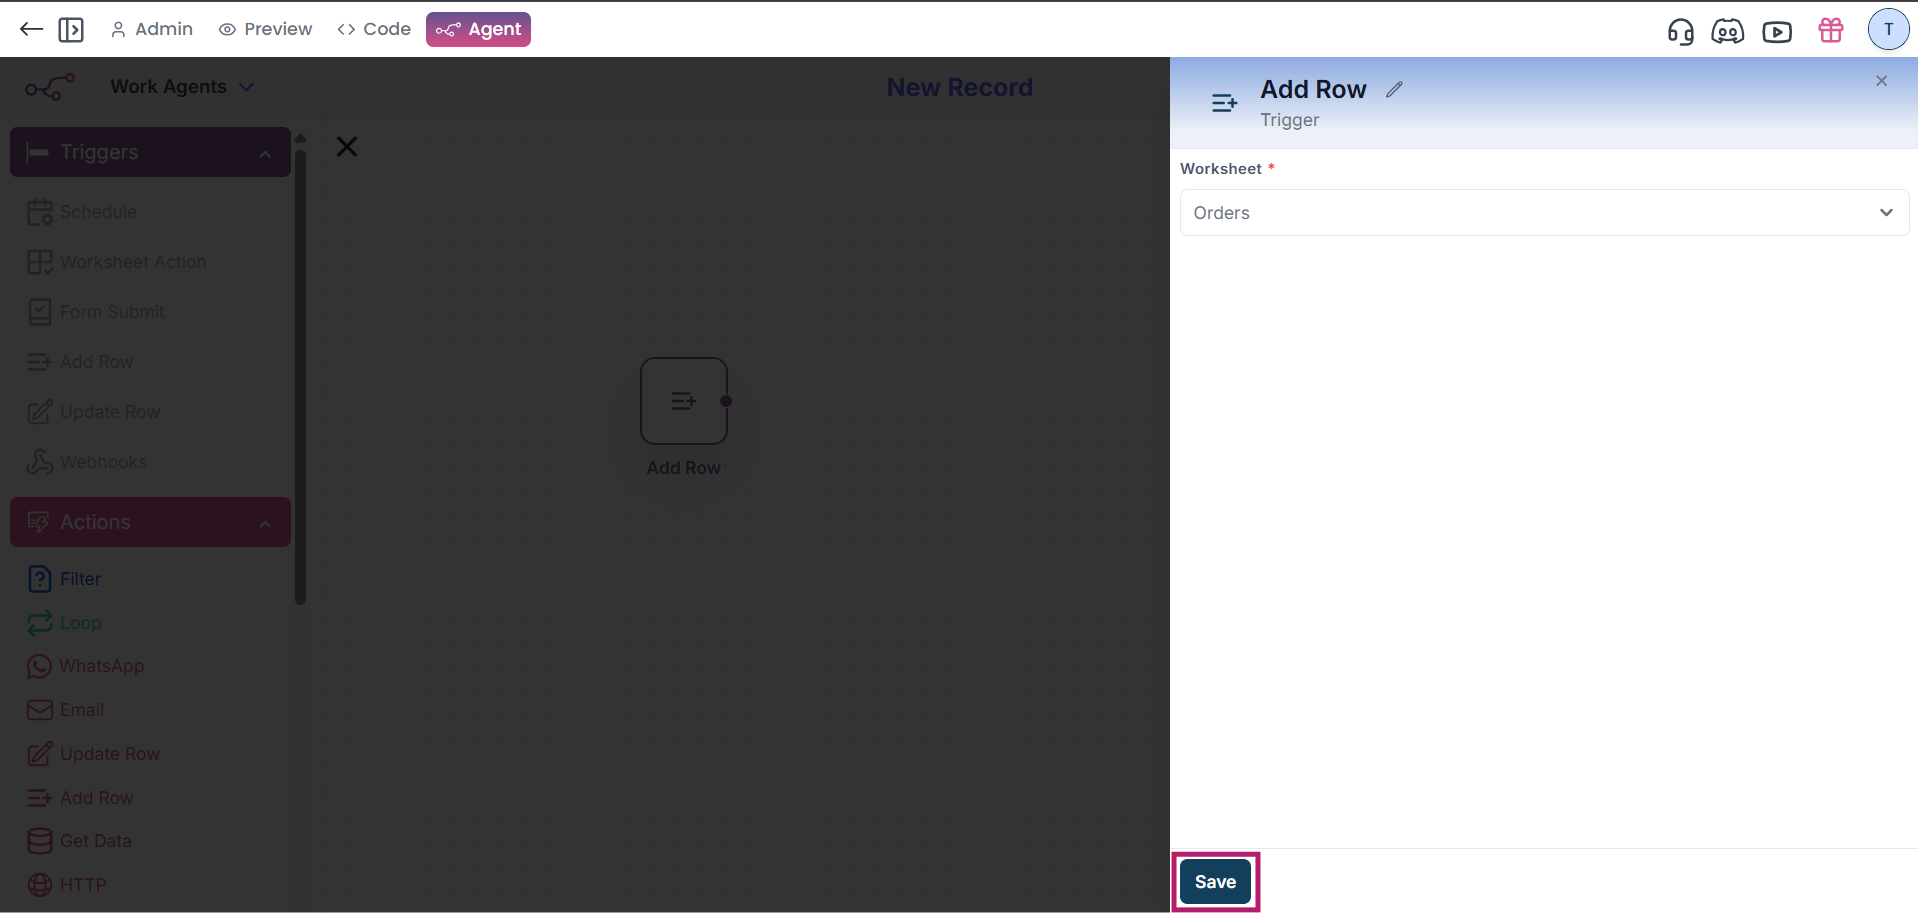
2.Select the worksheet in which the workflow should trigger whenever a new row is added,and then click the Save button.
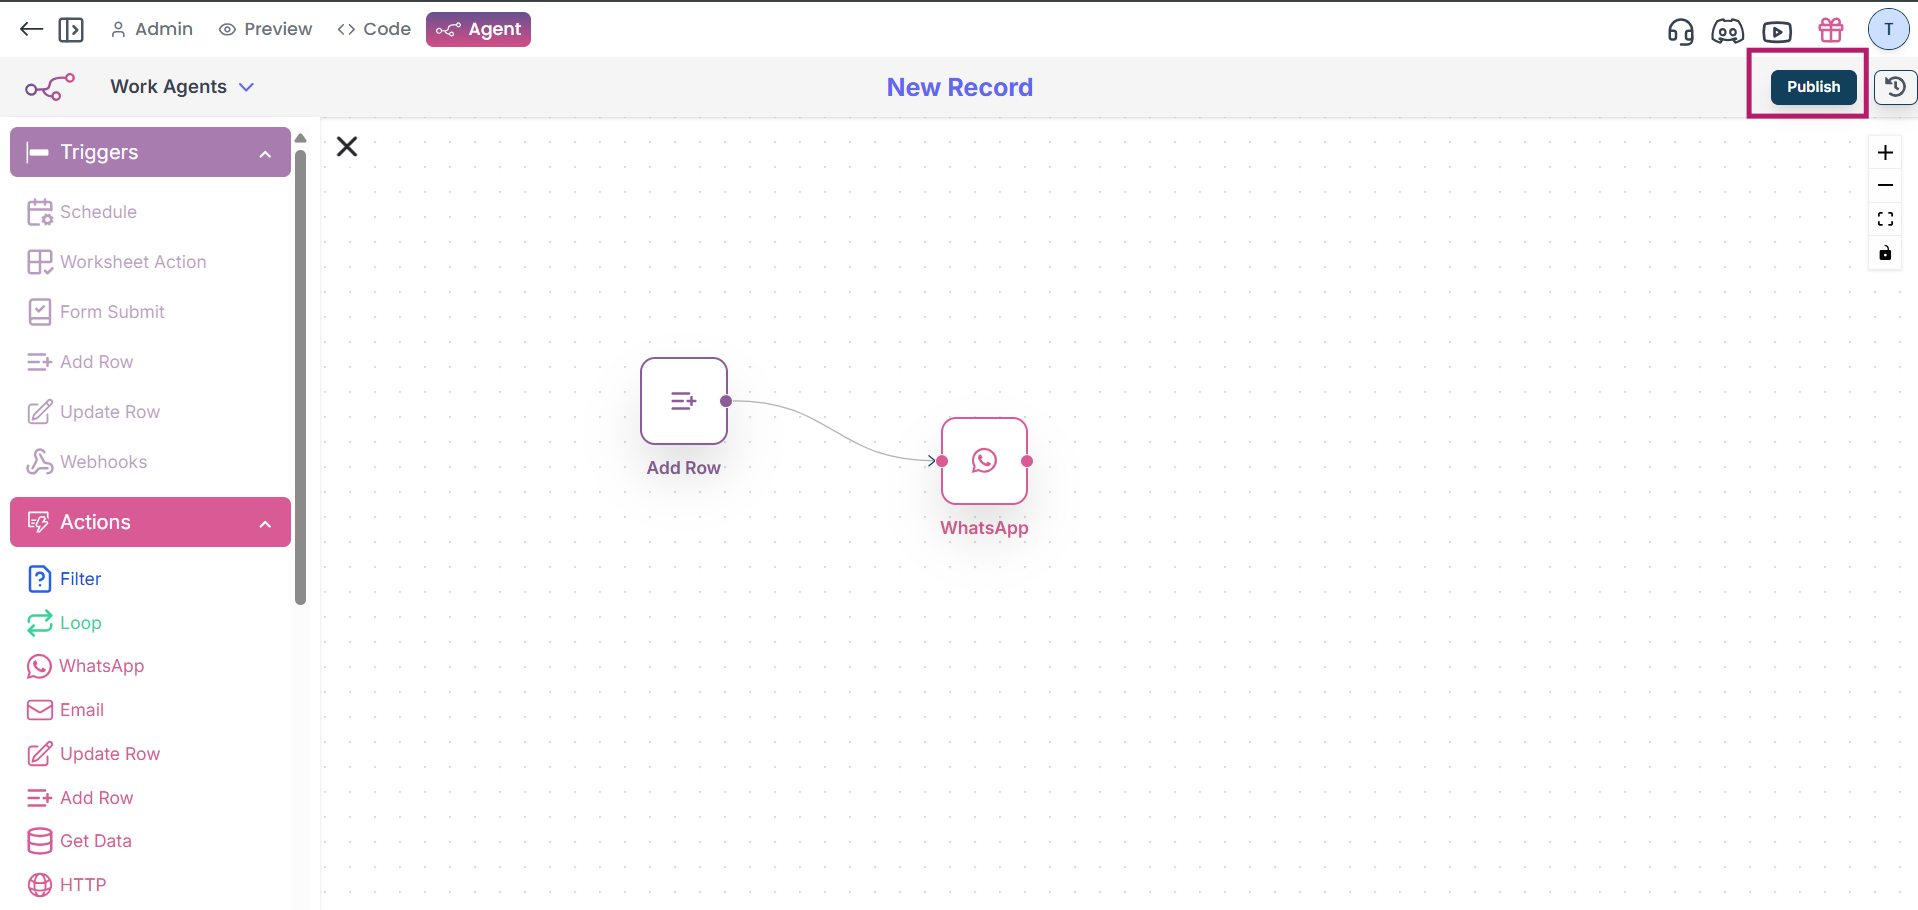
3.For example, if you want to send a WhatsApp notification when a new row is inserted, you can set up a triggering action. This will ensure that a WhatsApp notification is sent to the contact number specified in the contact field whenever a new row is added to the worksheet.
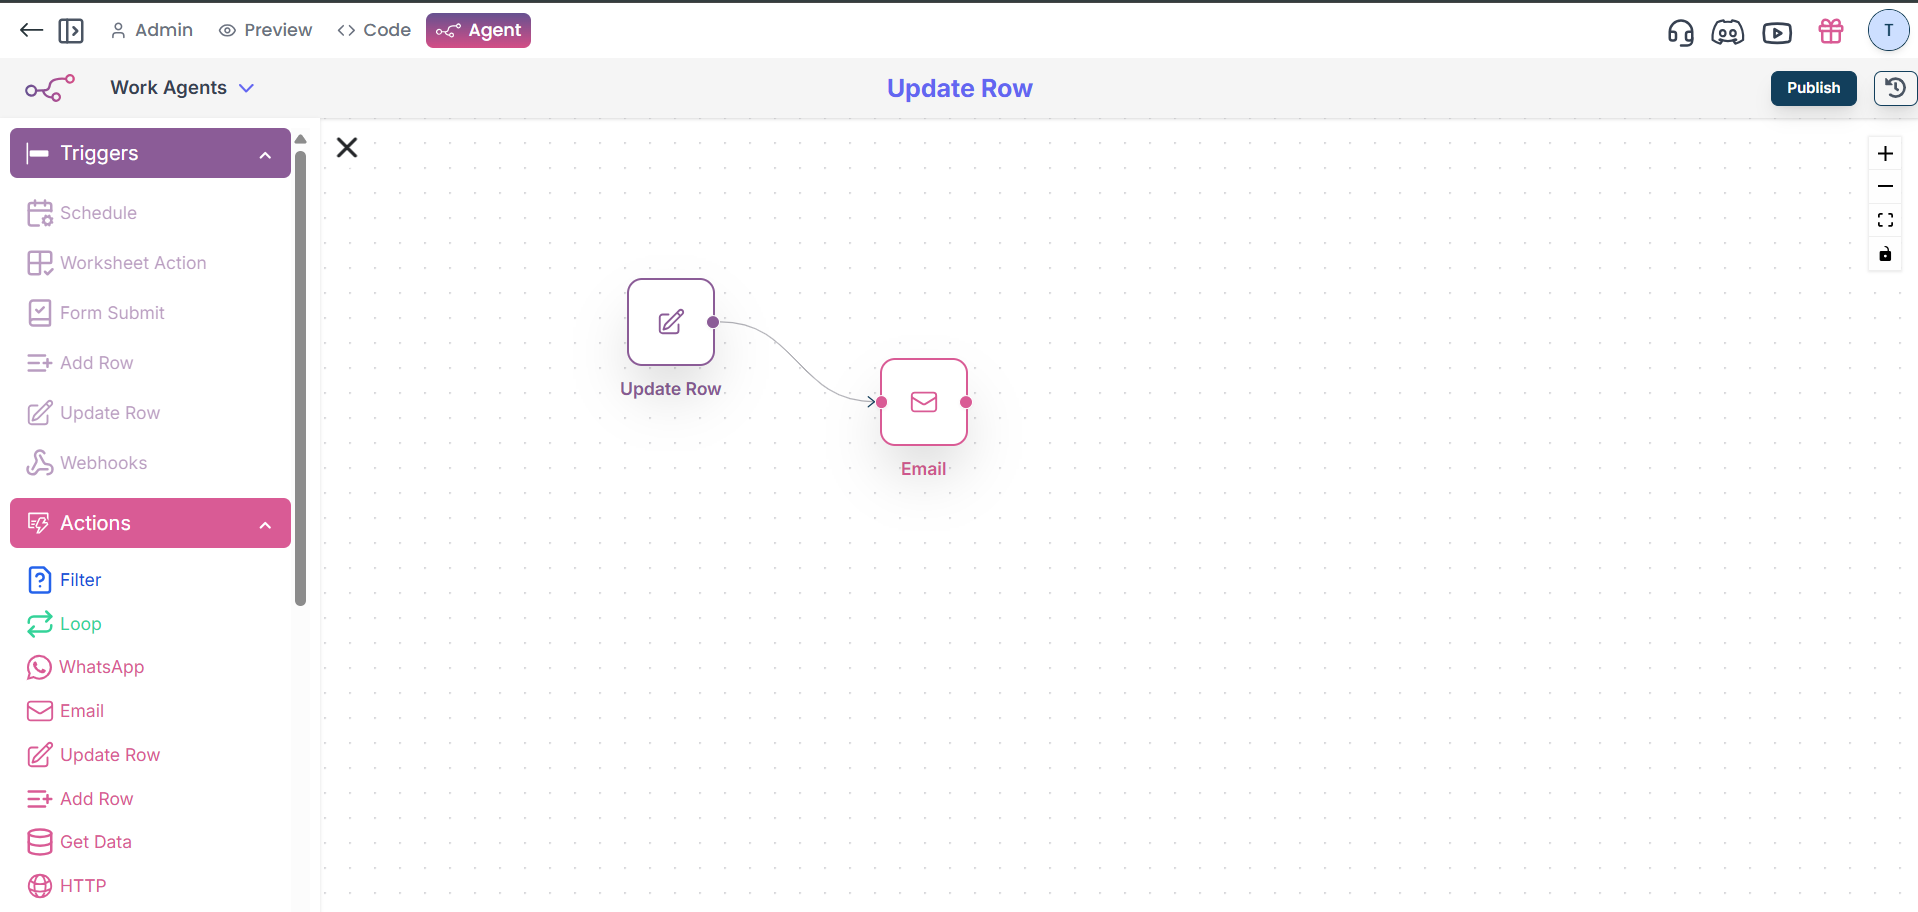
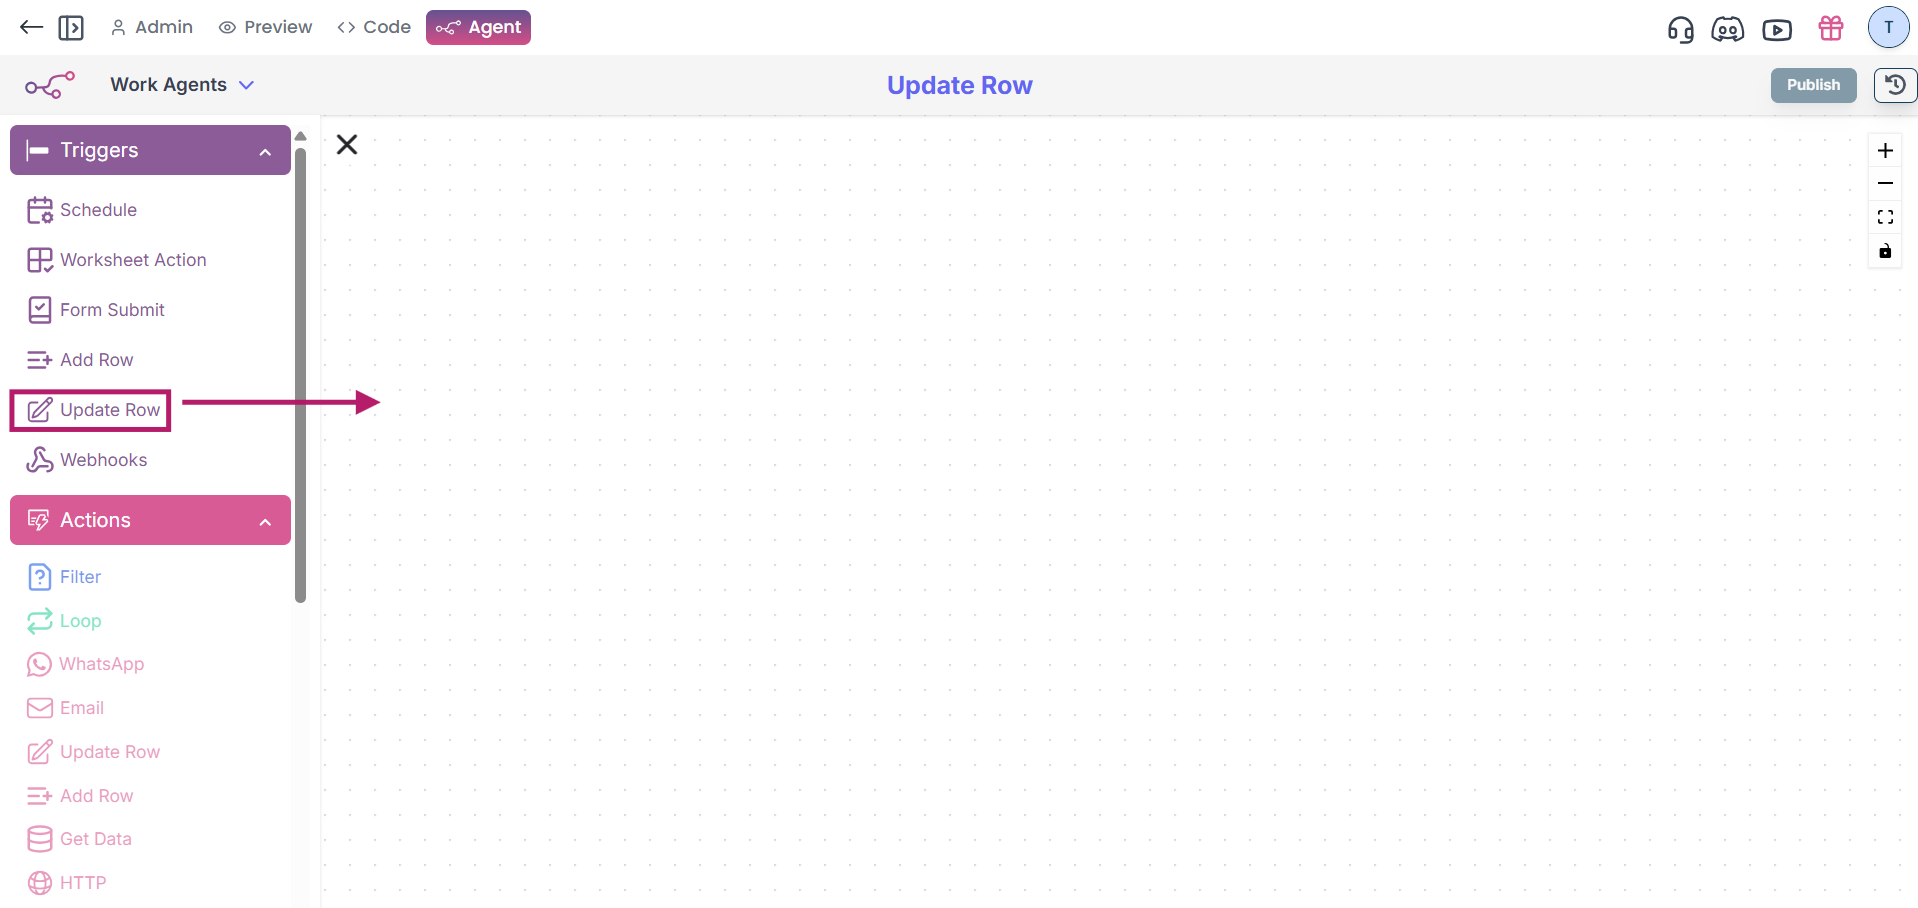
Create Update Row Trigger
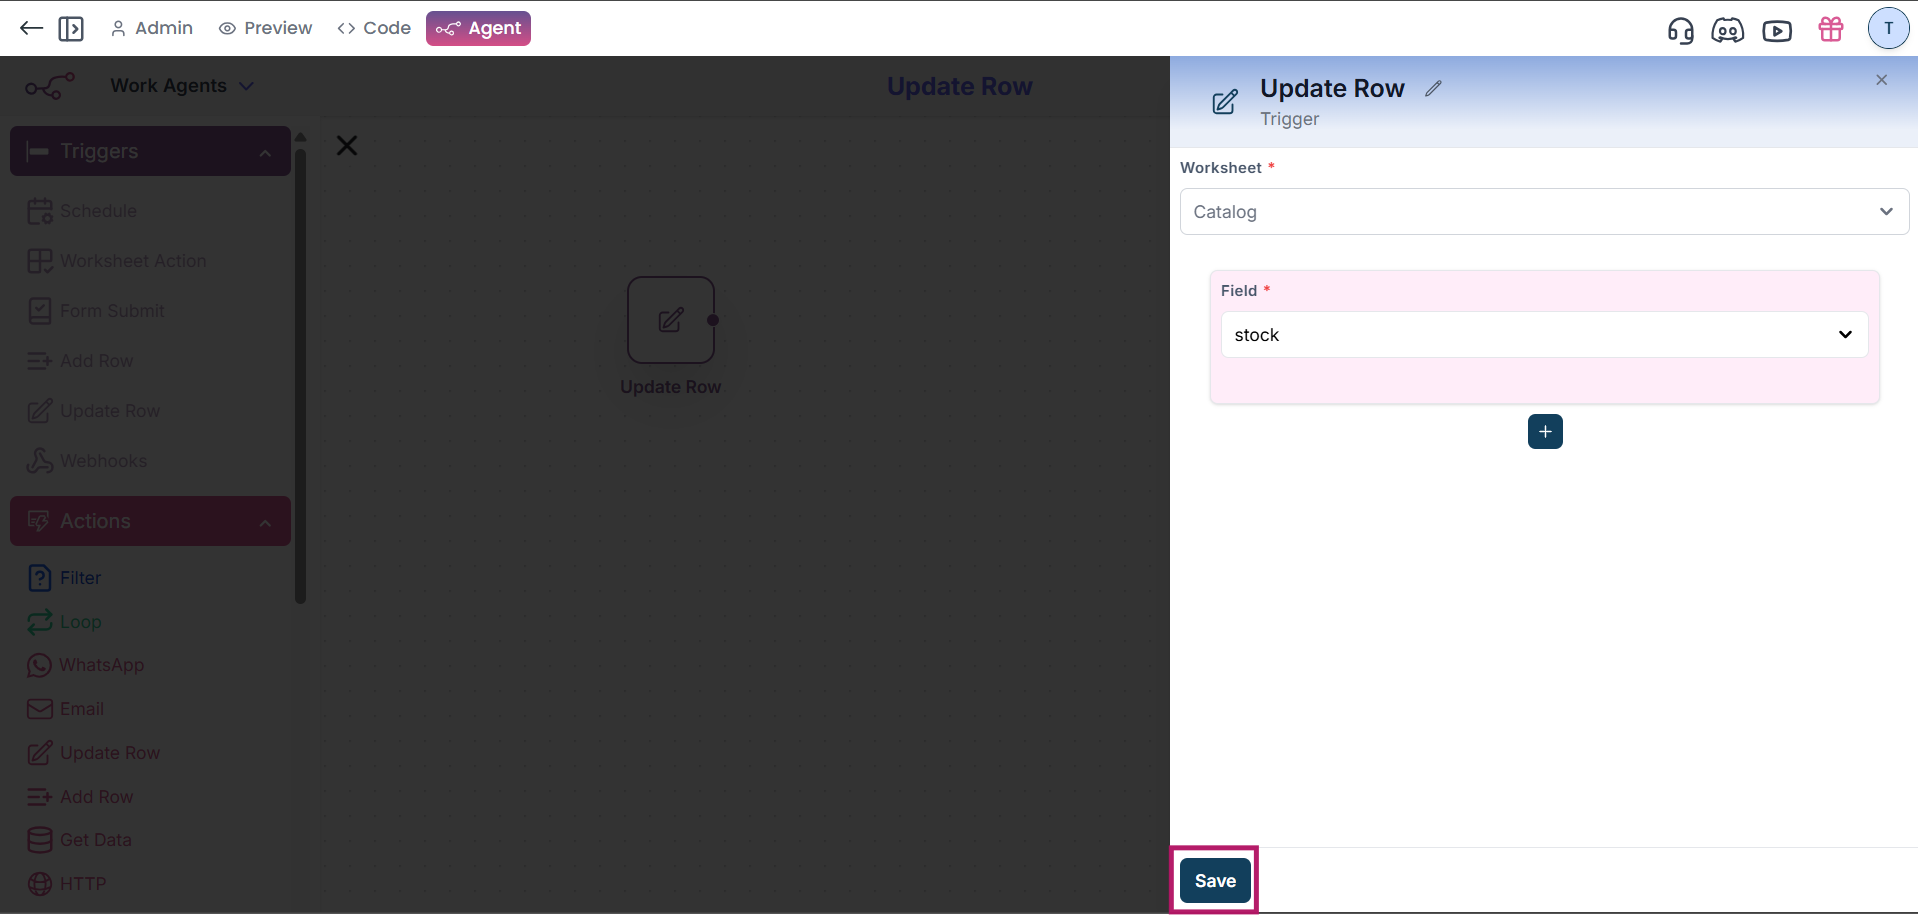
1.After creating your workflow, drag the “Update Row” button from the Triggers section onto the canvas.
2.Now select the worksheet and the field. The action will be triggered whenever the selected field is updated. Click Save.
3.For example, each time a row is updated, an email notification will be sent due to the triggered action we set up for updates.