Actions
Send WhatsApp notification
1.After creating your workflow, drag the “Form Submit” button from the Triggers section onto the canvas. Click on the “Form Submit” button you just added to the canvas to configure the form submission settings.
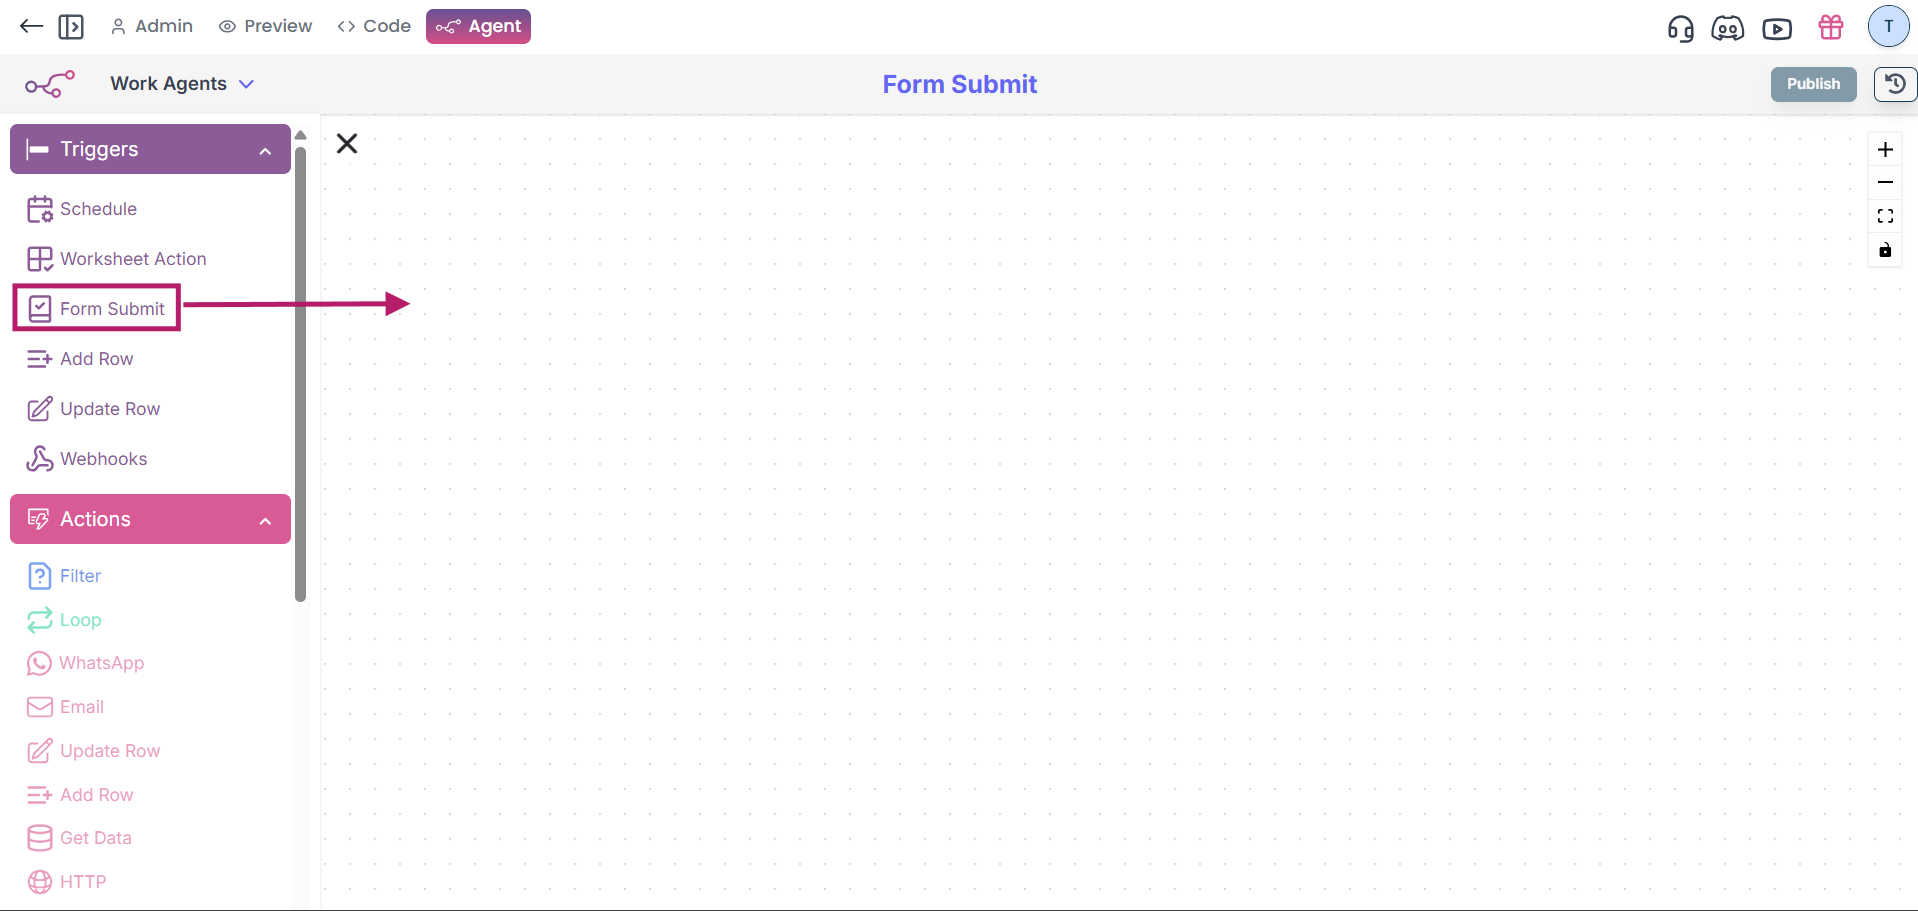
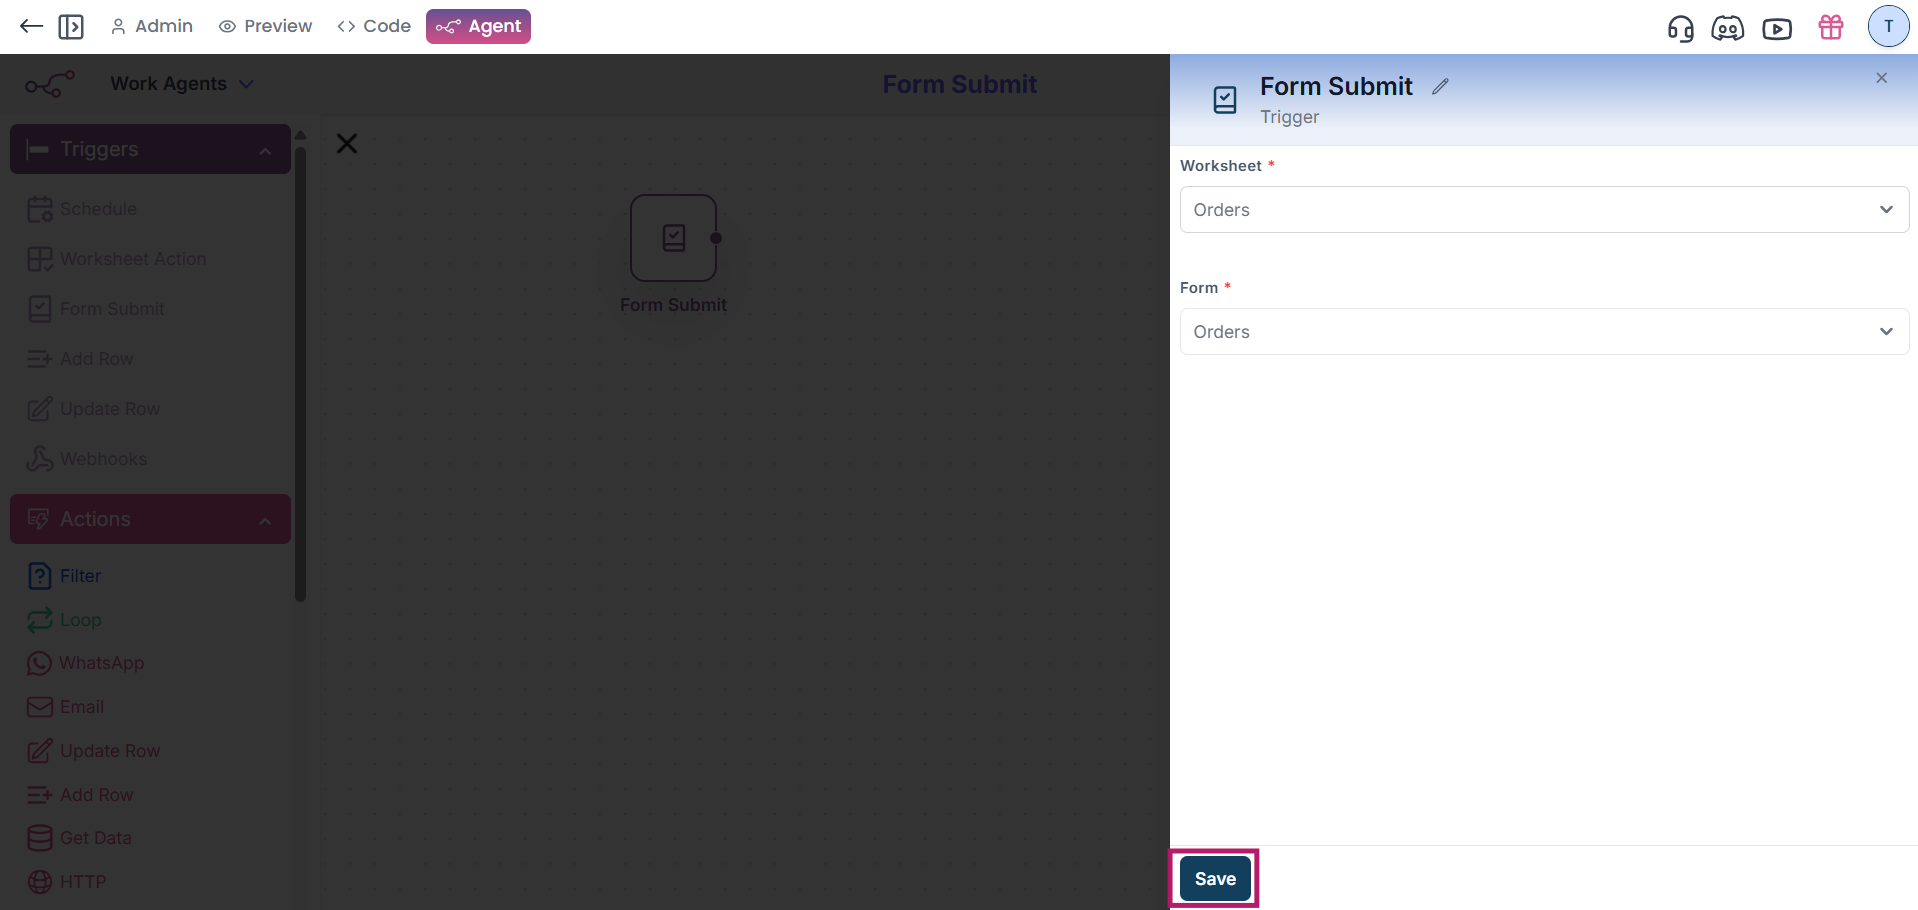
2.Select the worksheet and form that you want to trigger the action for. The form you select will be used for the trigger event.
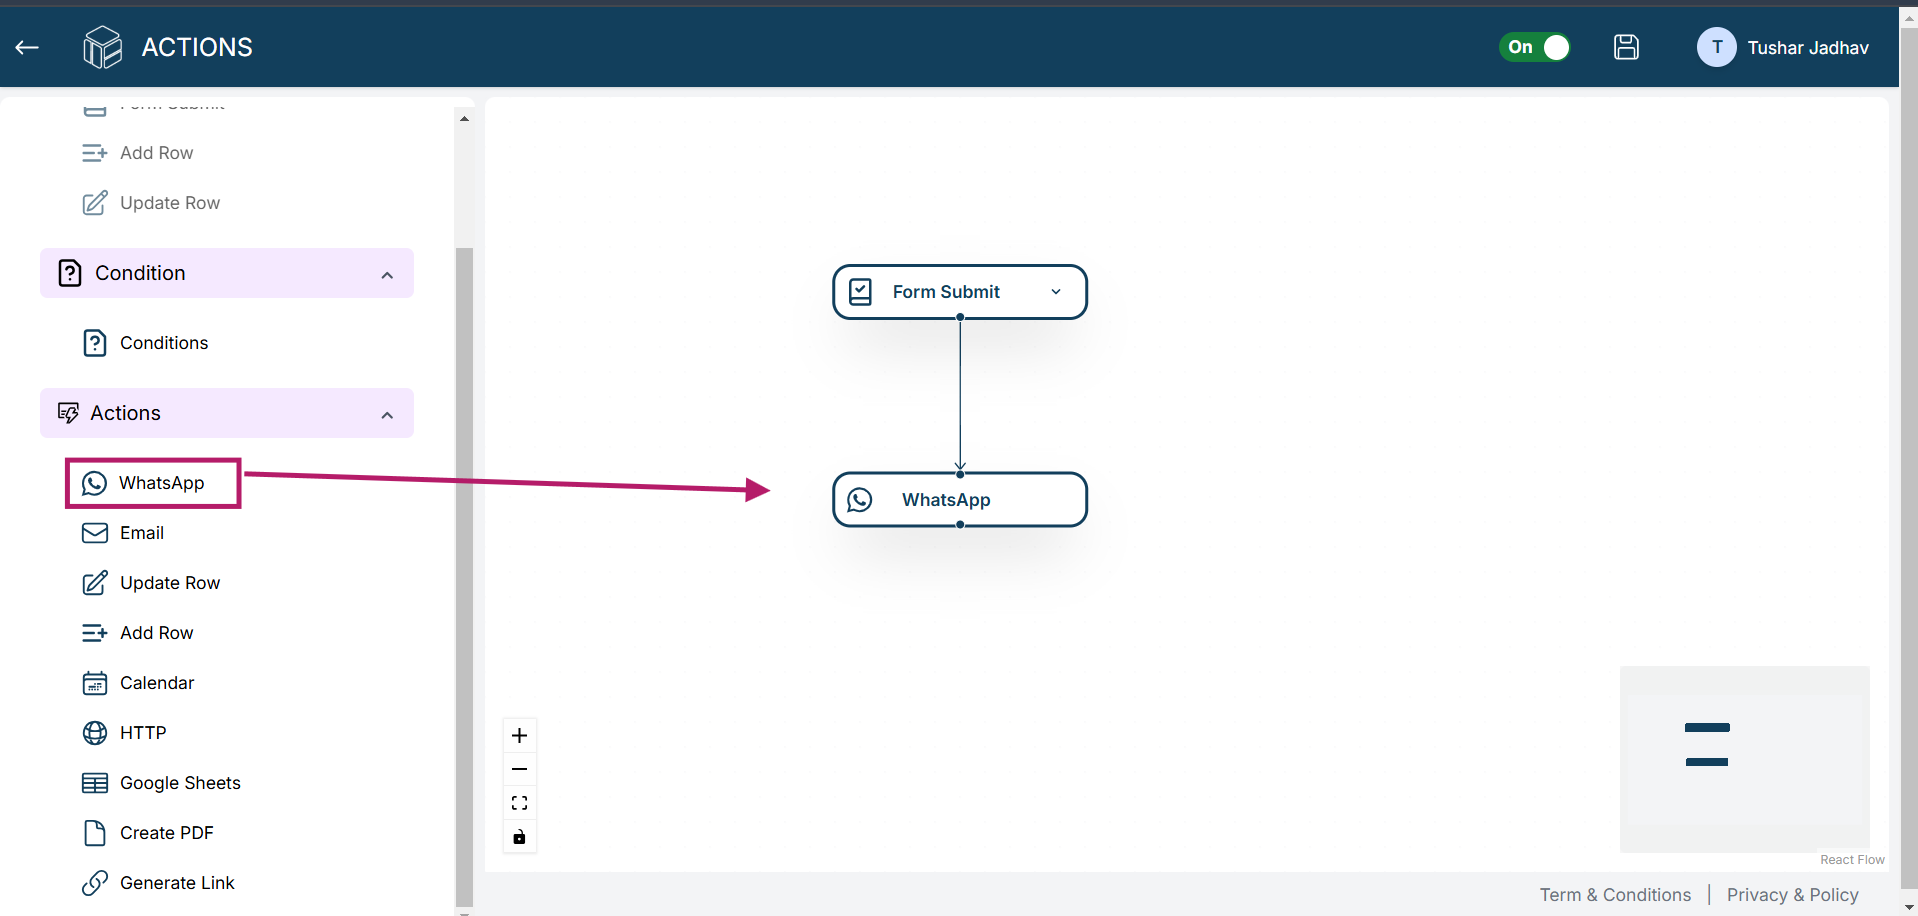
3.Now, drag the “WhatsApp Notification” button from the Actions section onto the canvas. The "WhatsApp Notification" action is used to send a WhatsApp message when the form is submitted.
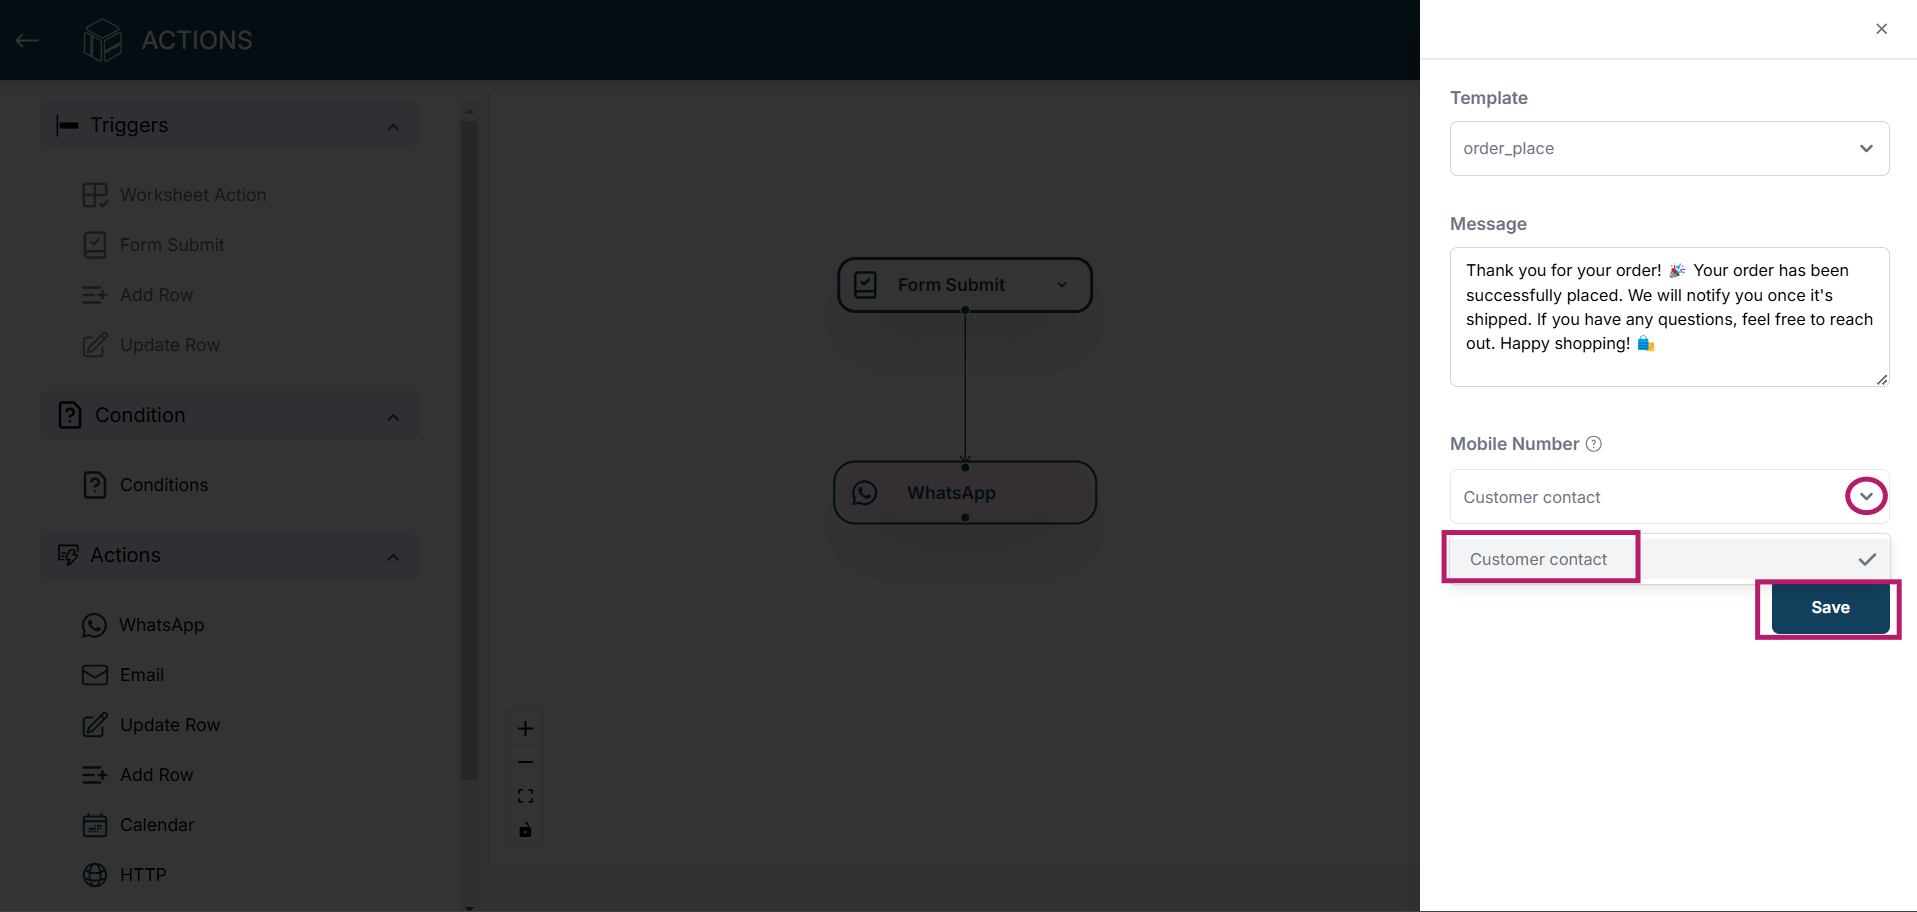
4.Click on the WhatsApp button to open the configuration settings. Set the message template or custom message to send. You can create a personalized message based on the form data.
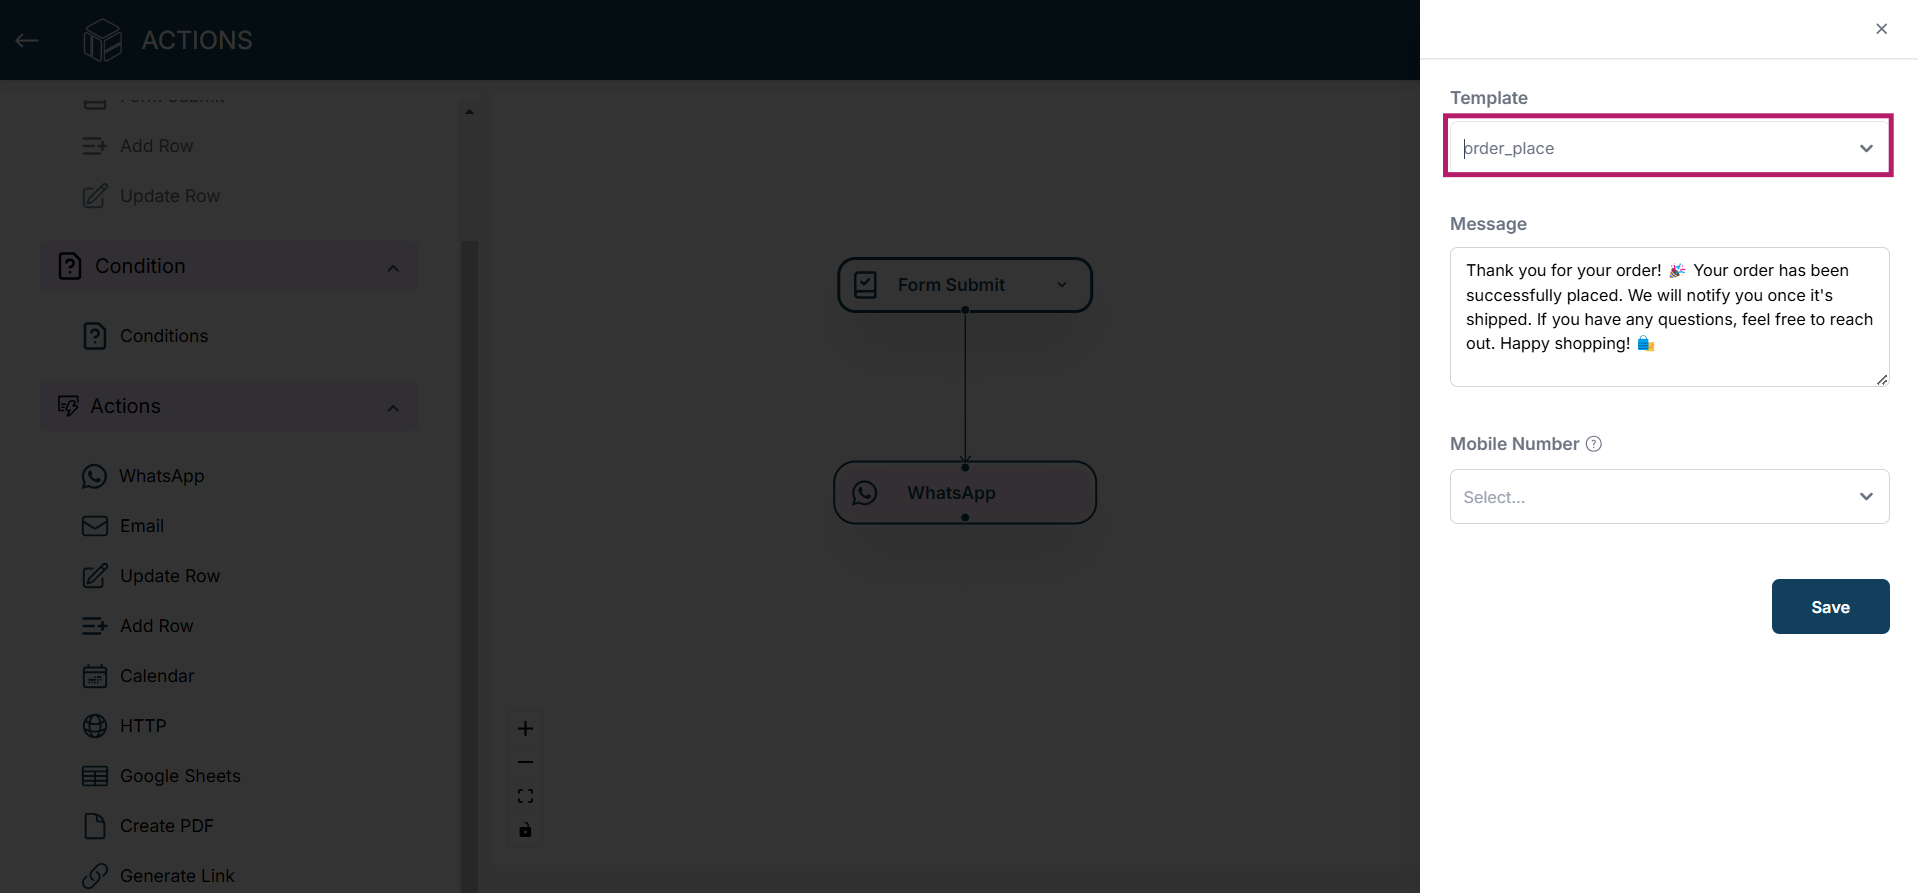
5.Choose the phone number field from the form where the WhatsApp notification should be sent. Click on save button. For example, if you’re sending the message to the customer who submitted the form, use the "Customer Phone Number" field.
Send Email notification
1.After creating your workflow, drag the “Form Submit” trigger from the Triggers section onto the canvas. Click on the "Form Submit" button to configure the form submission settings.
2.Choose the worksheet and form that will trigger the action. This form will activate the trigger event when submitted.
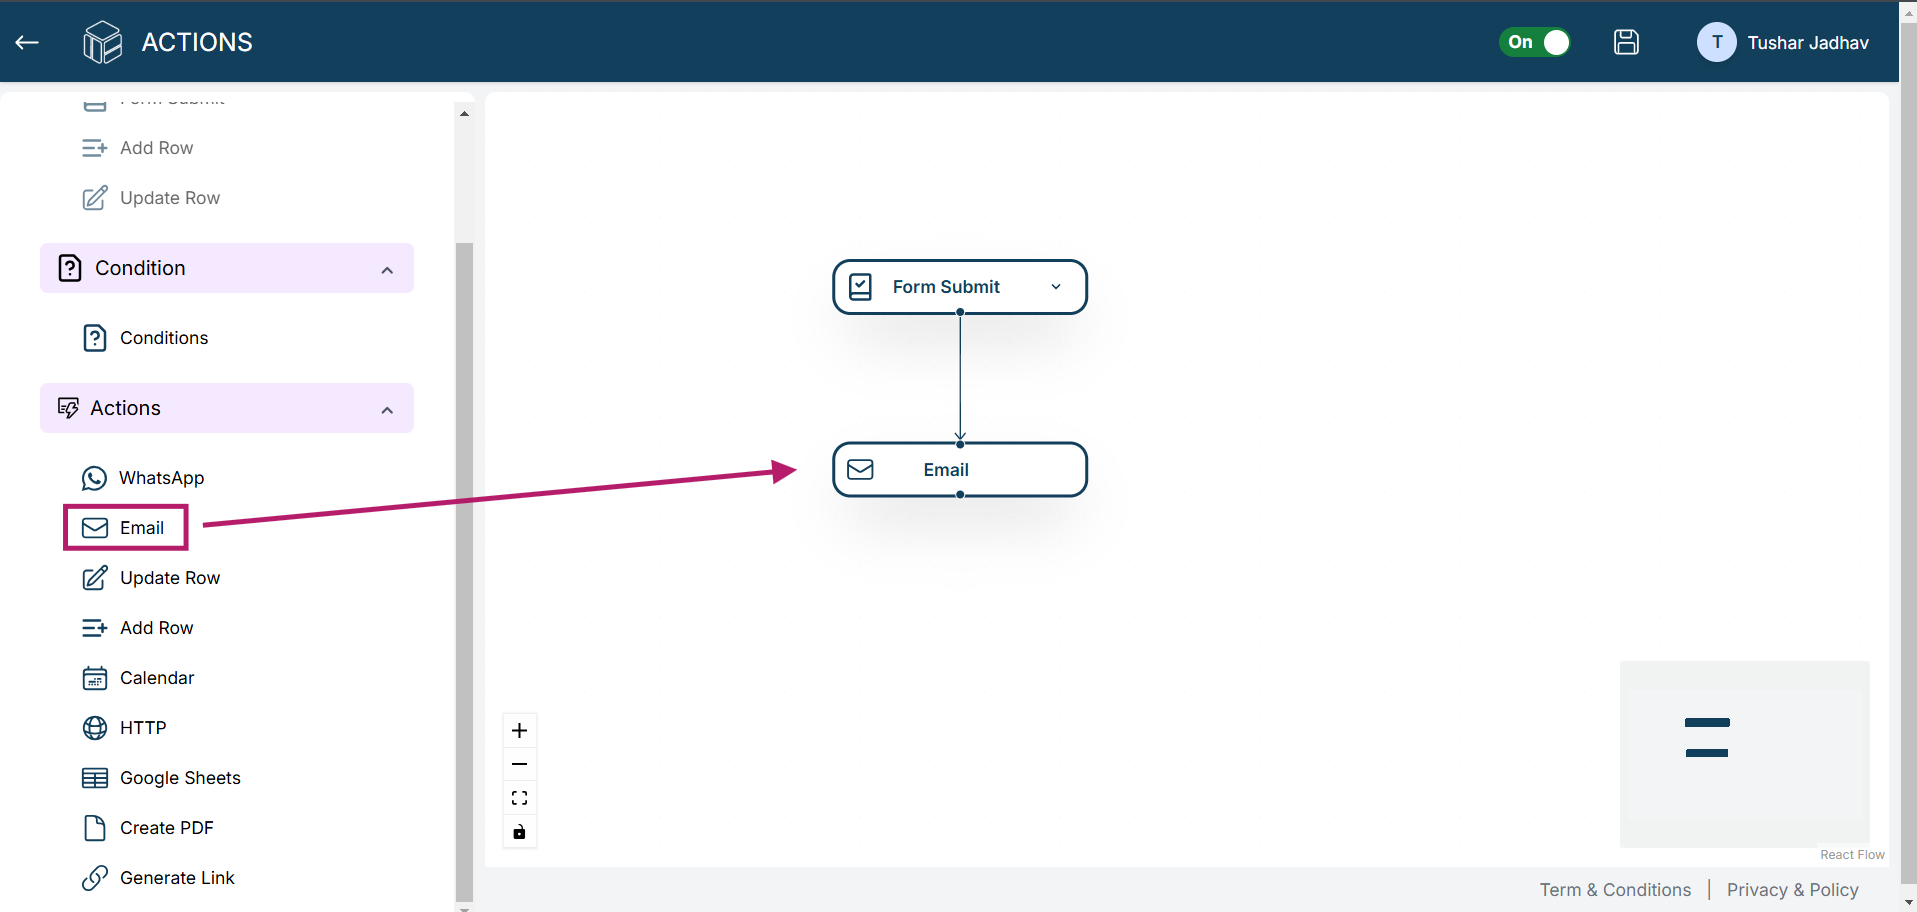
3.Next, drag the “Email Notification” action from the Actions section onto the canvas. This will enable an email to be sent upon form submission.
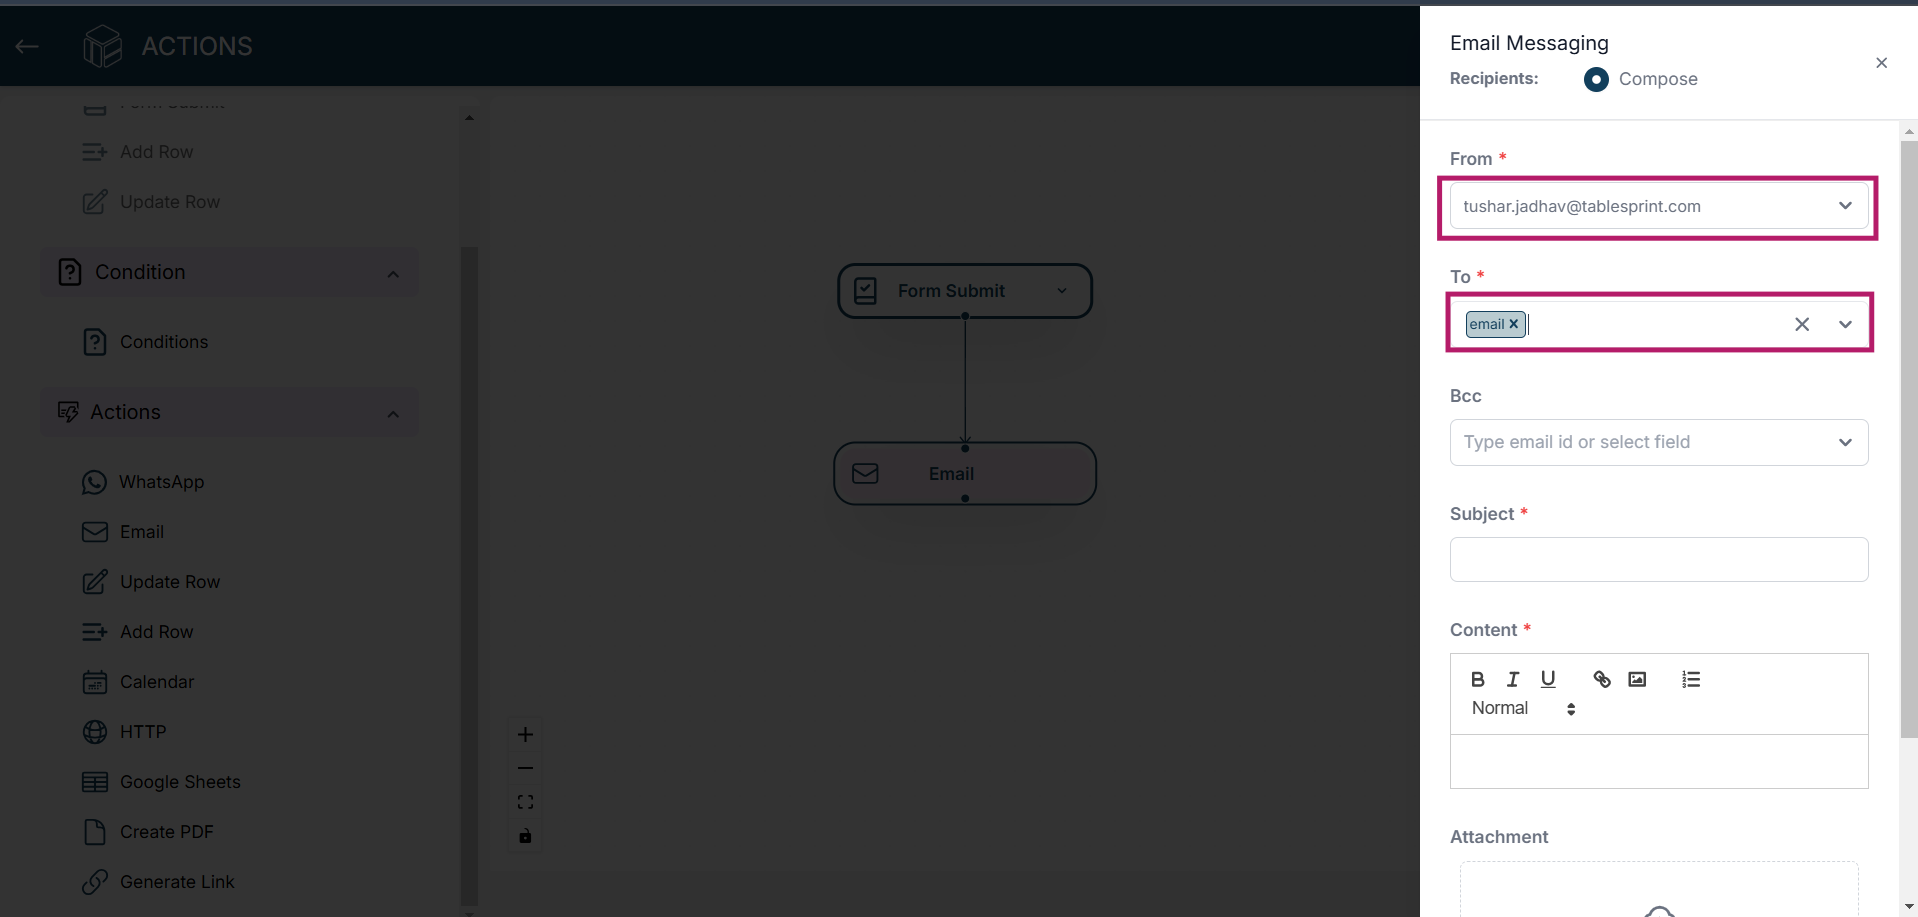
4.Click on the Email Notification button to open the email settings. In the "From" field, select the email address you’ve integrated with Tablesprint. In the "To" field, choose the email field from the form where the notification should be sent.
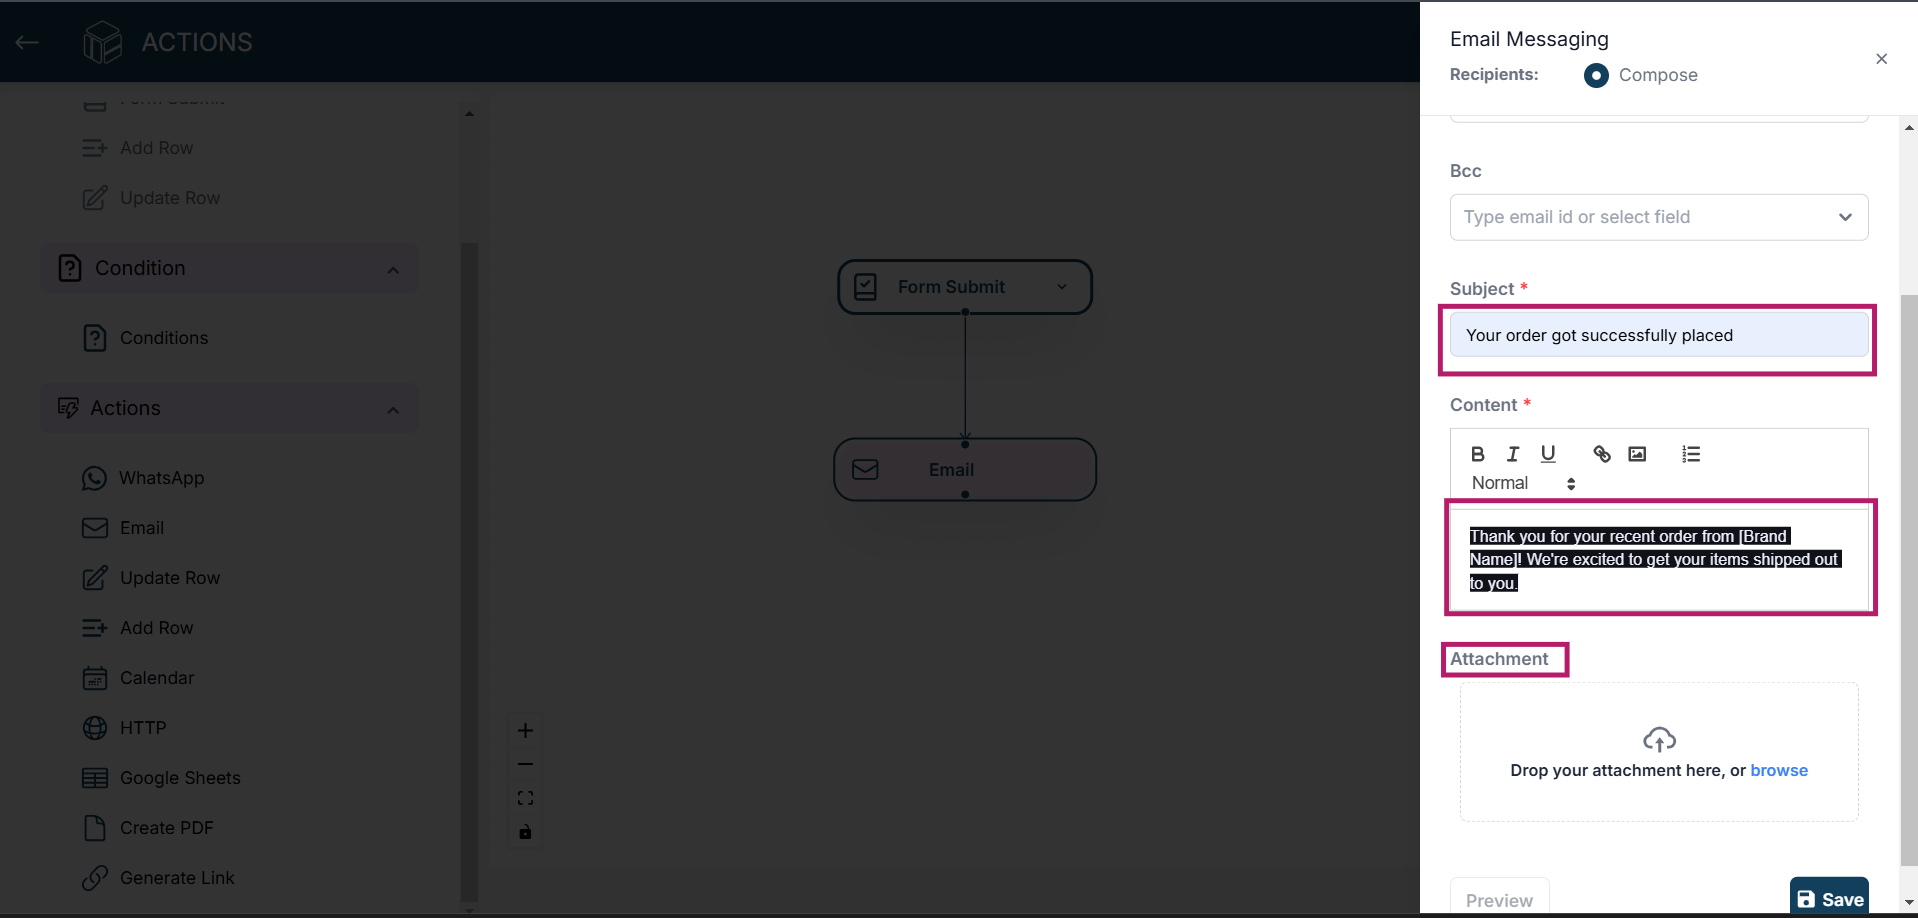
5.Enter the subject and body of the email according to your preferences. If needed, you can also attach a document. Click the Save button to apply the email notification settings.
Calendar
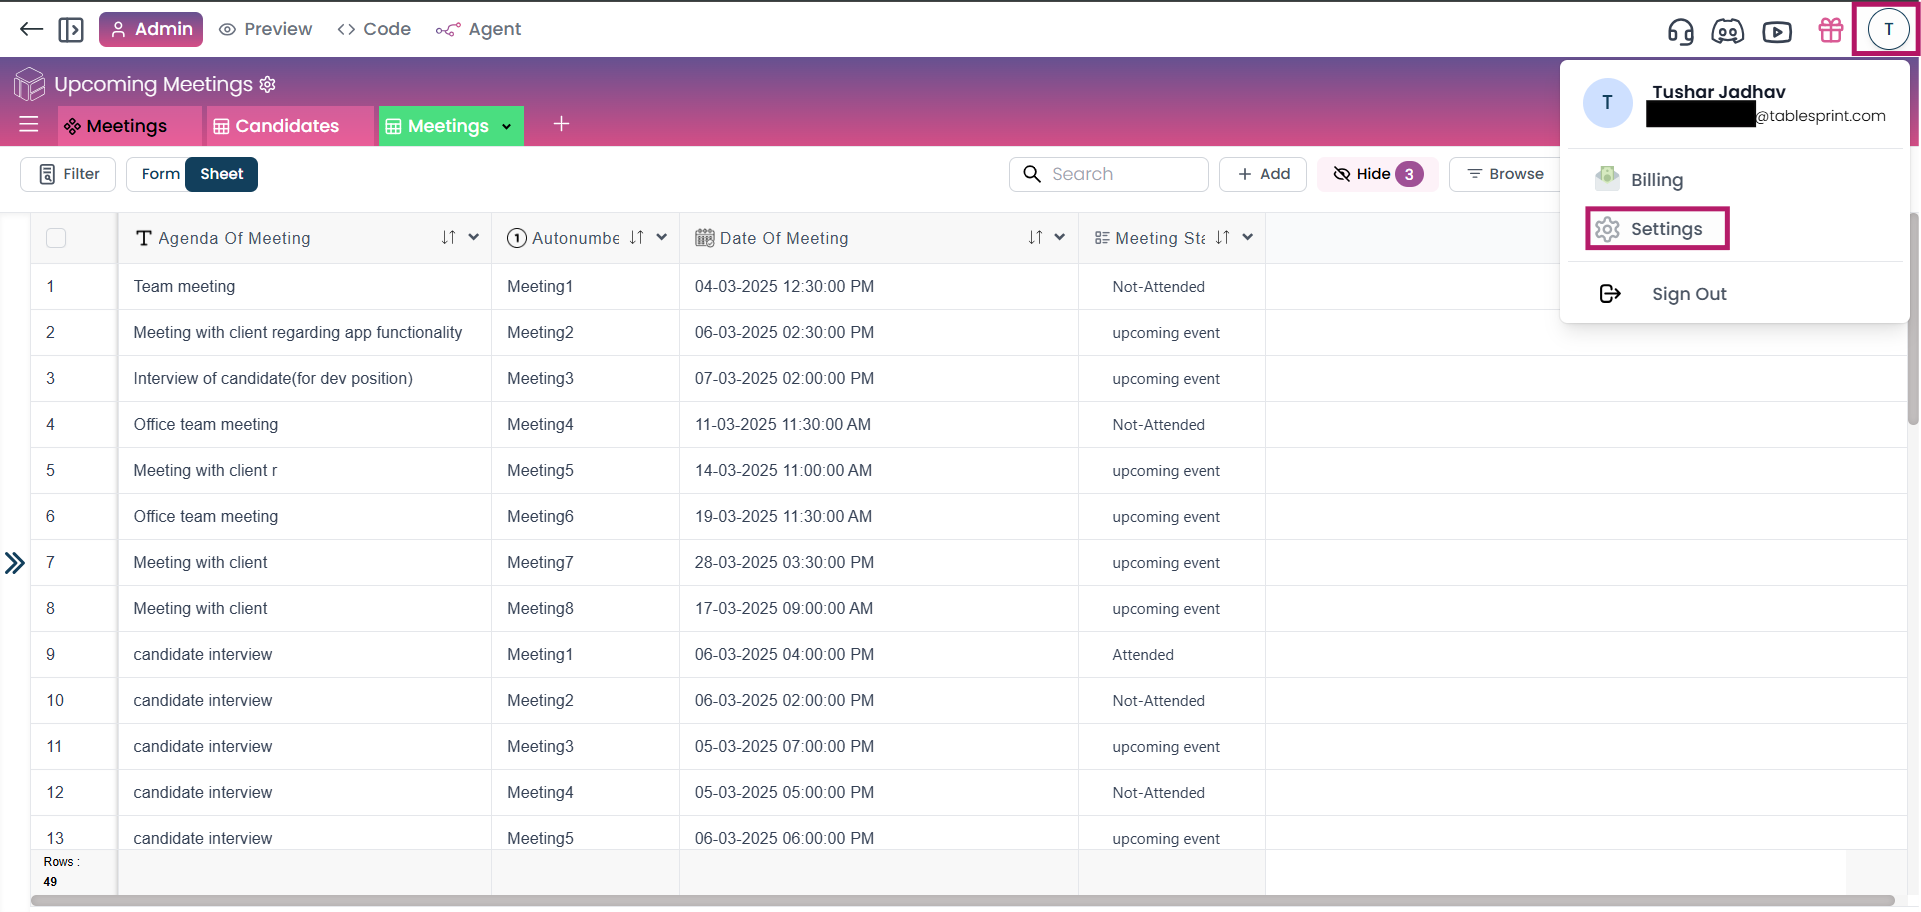
1.The Calendar Action in TableSprint app allows users to easily manage and track time-based events and schedule tasks within the app. Whether you're scheduling a meeting, tracking a project deadline, or setting up an event, the Calendar Action streamlines time management. To integrate with Google or Outlook Calendar, follow the steps below to link your TableSprint app to your calendar account. Click on your profile icon in the top-right corner of the app, then click on the Settings button.
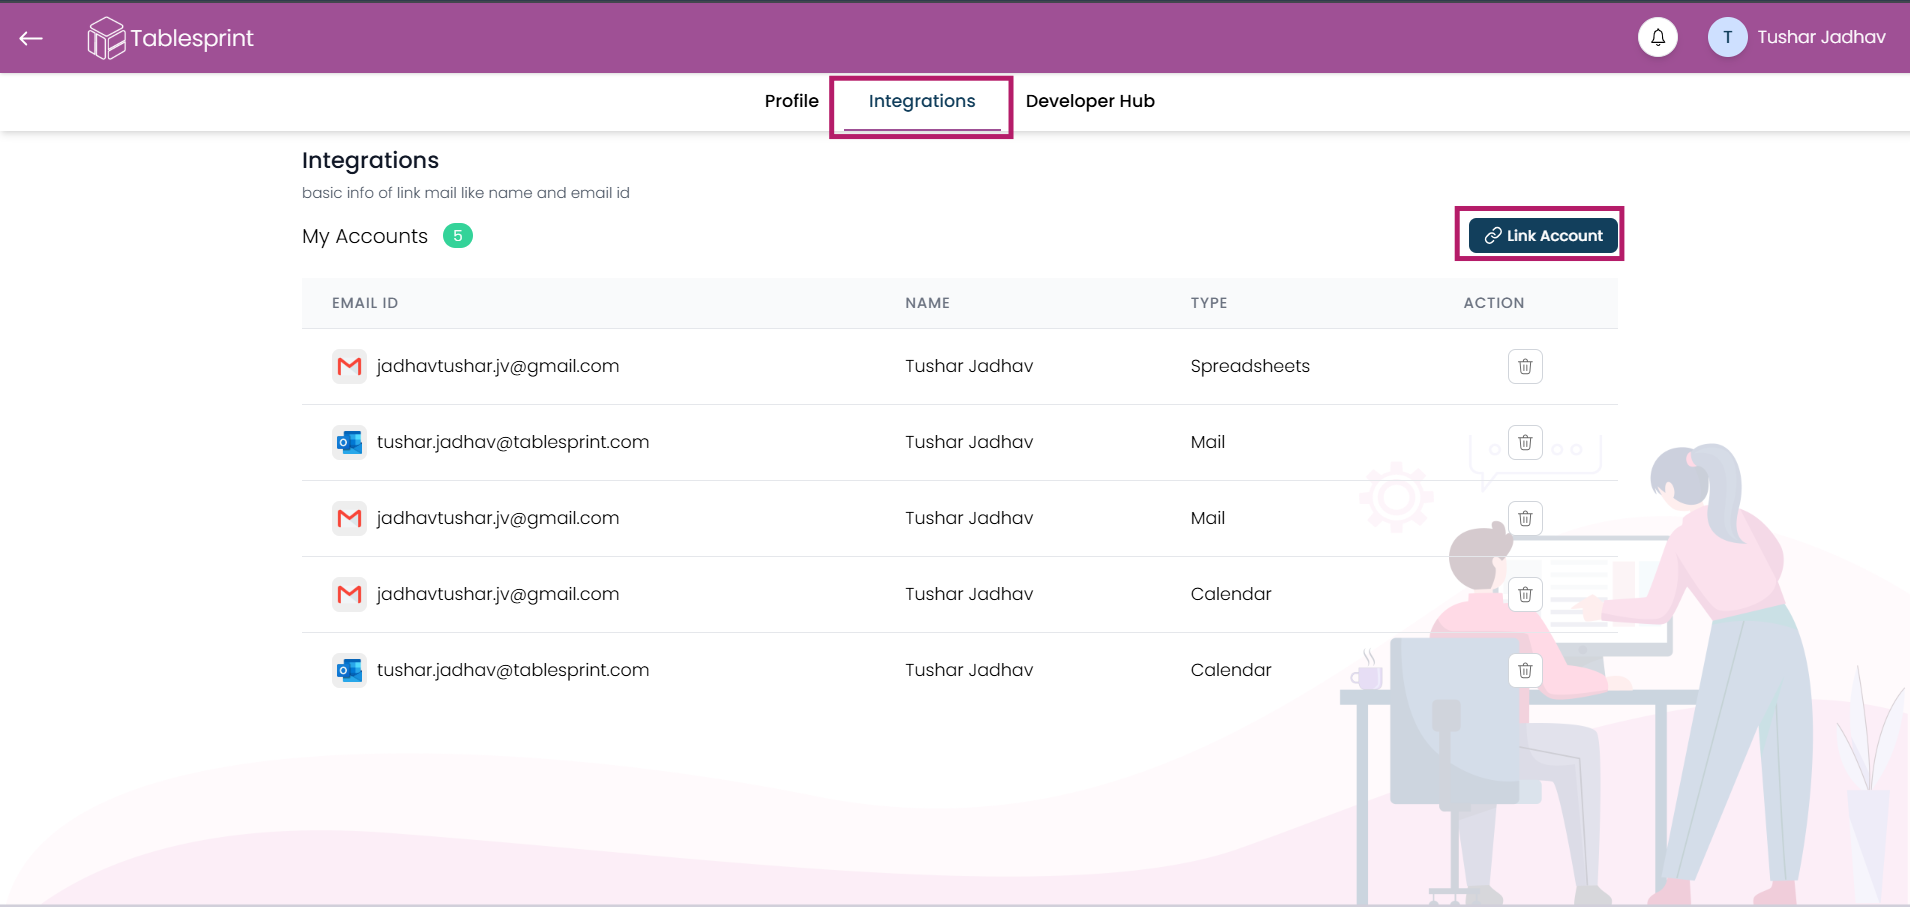
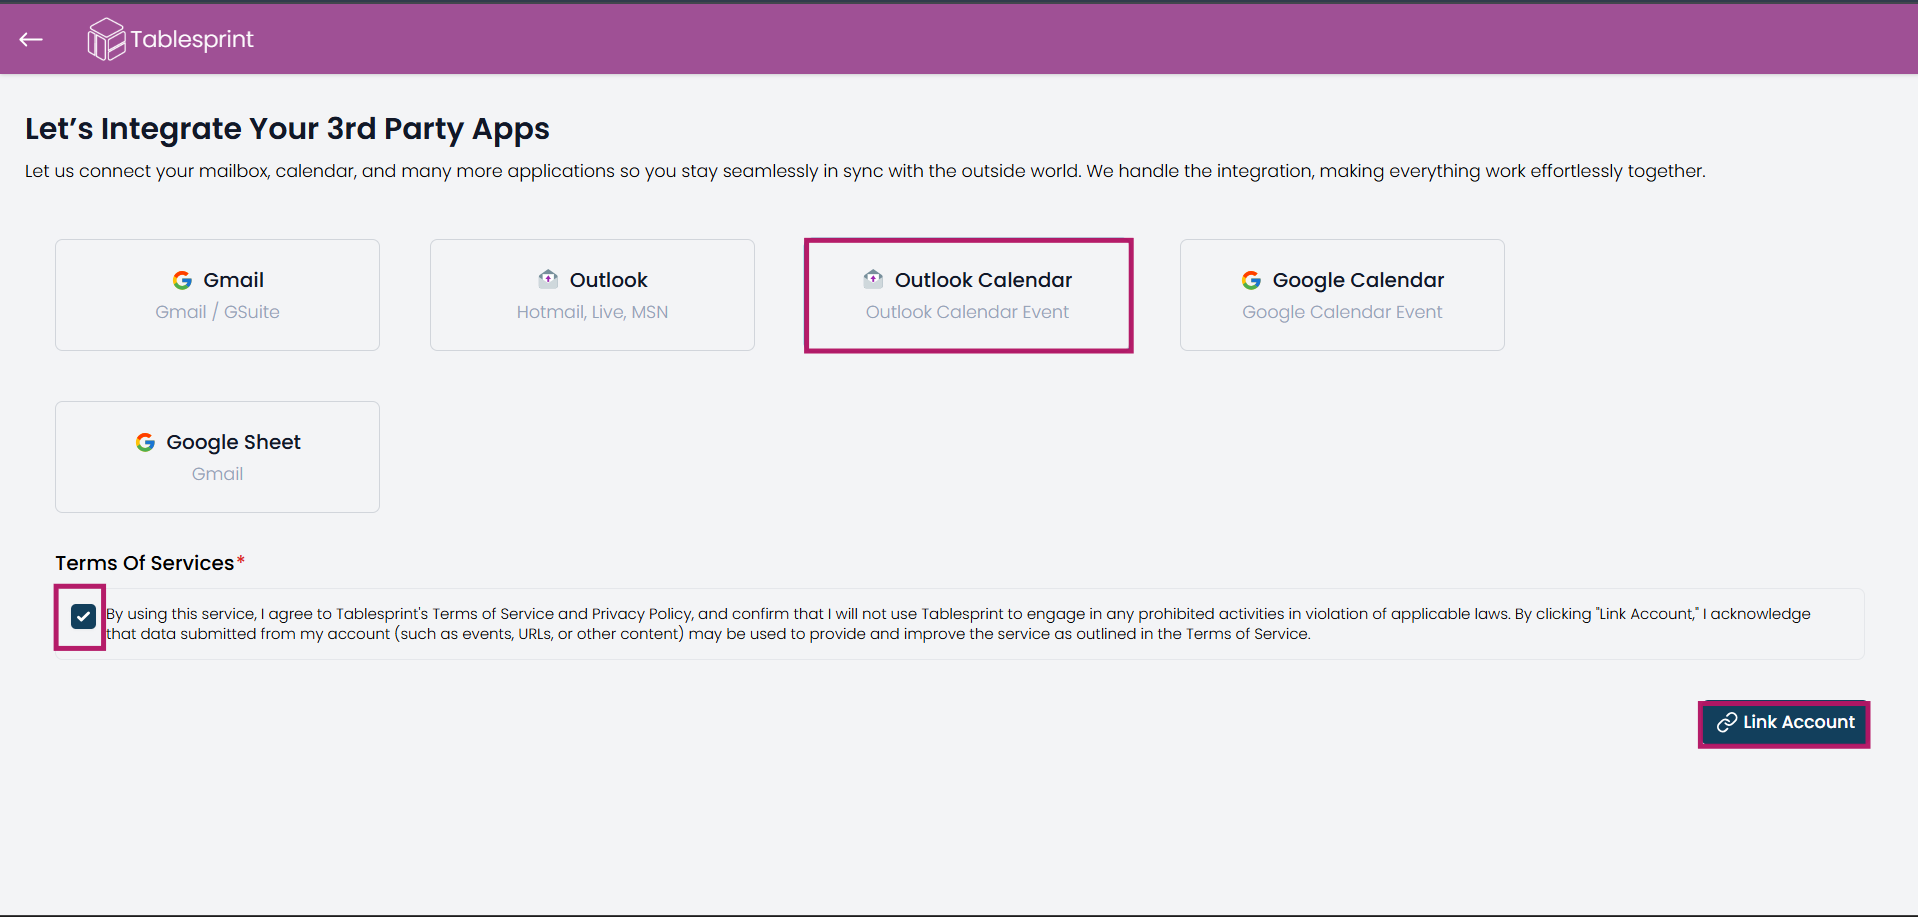
2.In the Settings menu, navigate to Integrations and click on the Link Account button. This will allow you to integrate with third-party calendar apps. Choose either Google Calendar or Outlook Calendar, based on your preference. For reference, check the images below:
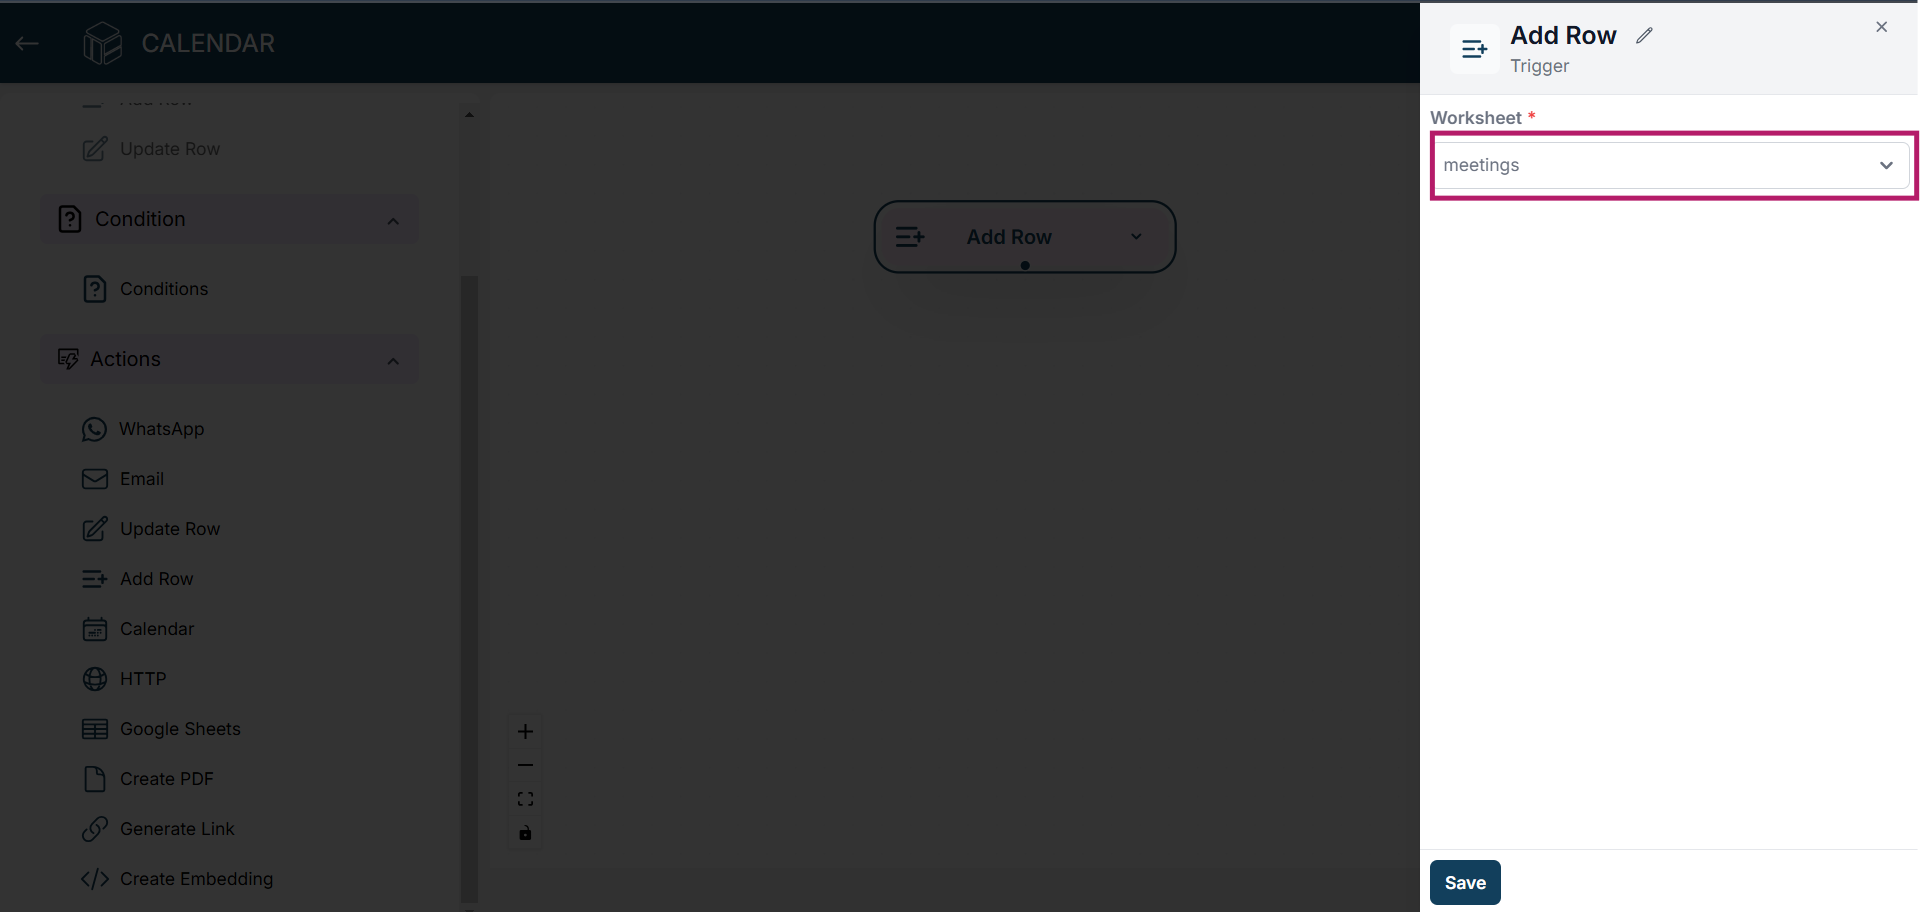
3.Now open the worksheet in which you want to perform action and start to create workflow. After creating your workflow, drag the “Add Row” button from the Triggers section onto the canvas. Click on the “Add Row” button to configure the worksheet that will trigger the calendar event.
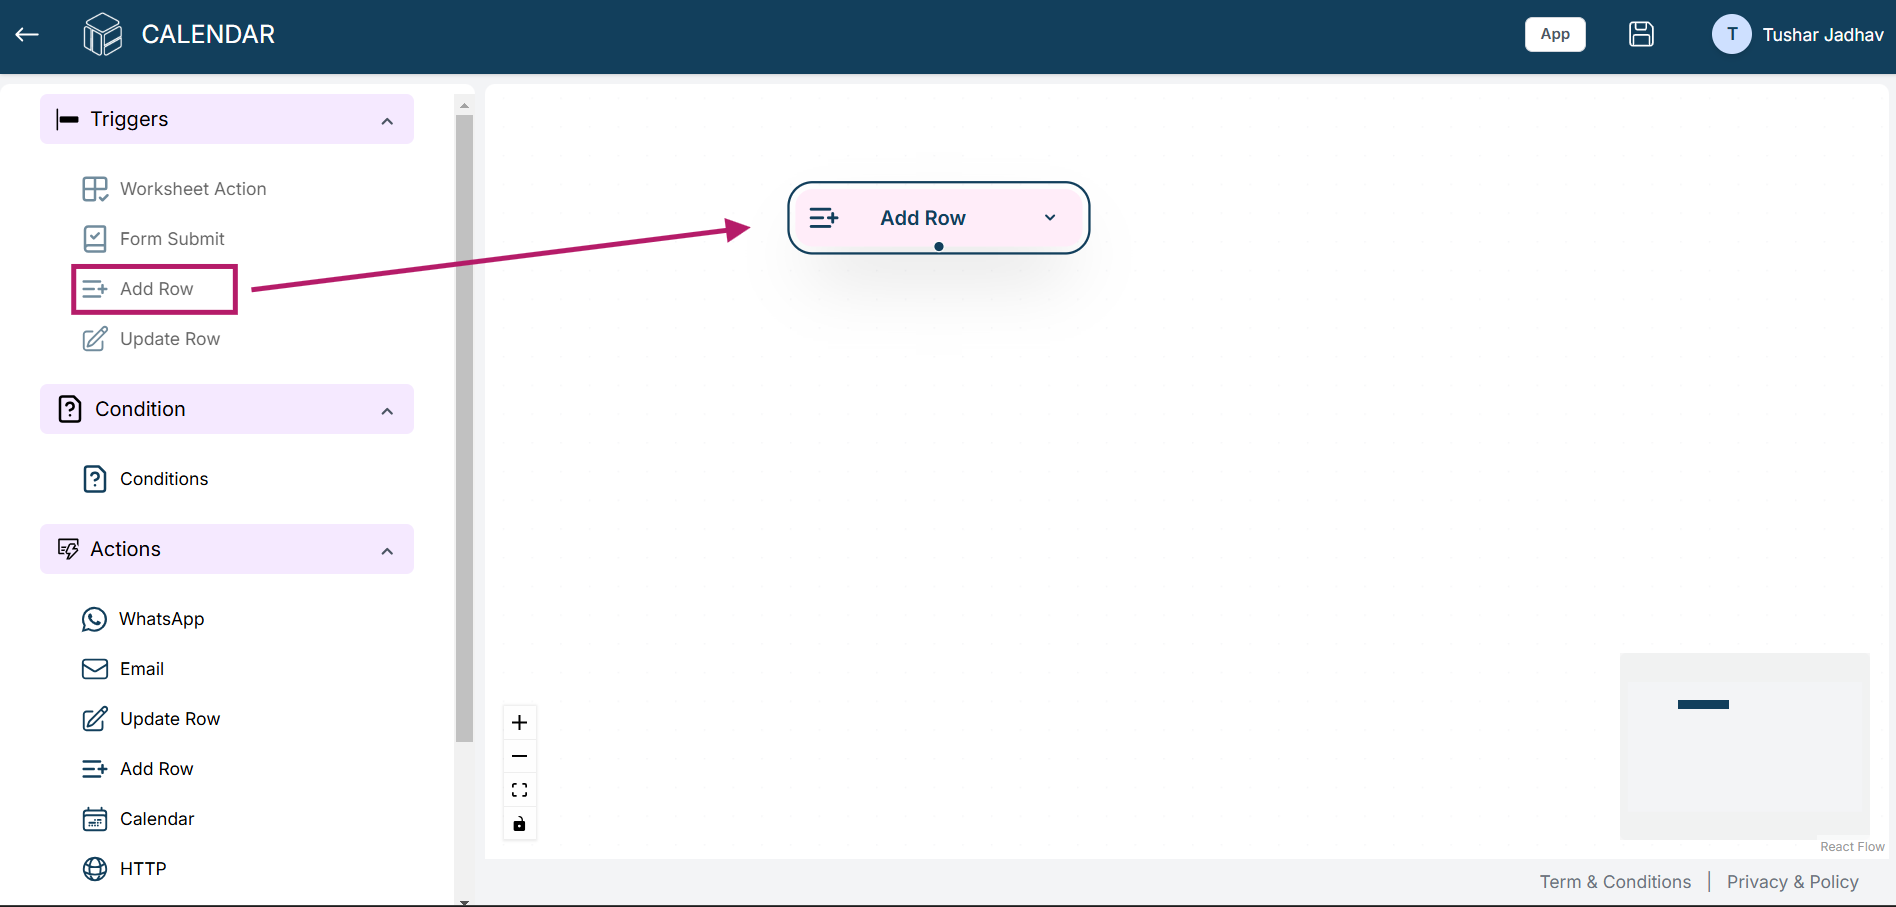
4.Next, drag the “Calendar” button from the Actions section onto the canvas. This action is used to create a calendar event when a row is added to the selected worksheet.
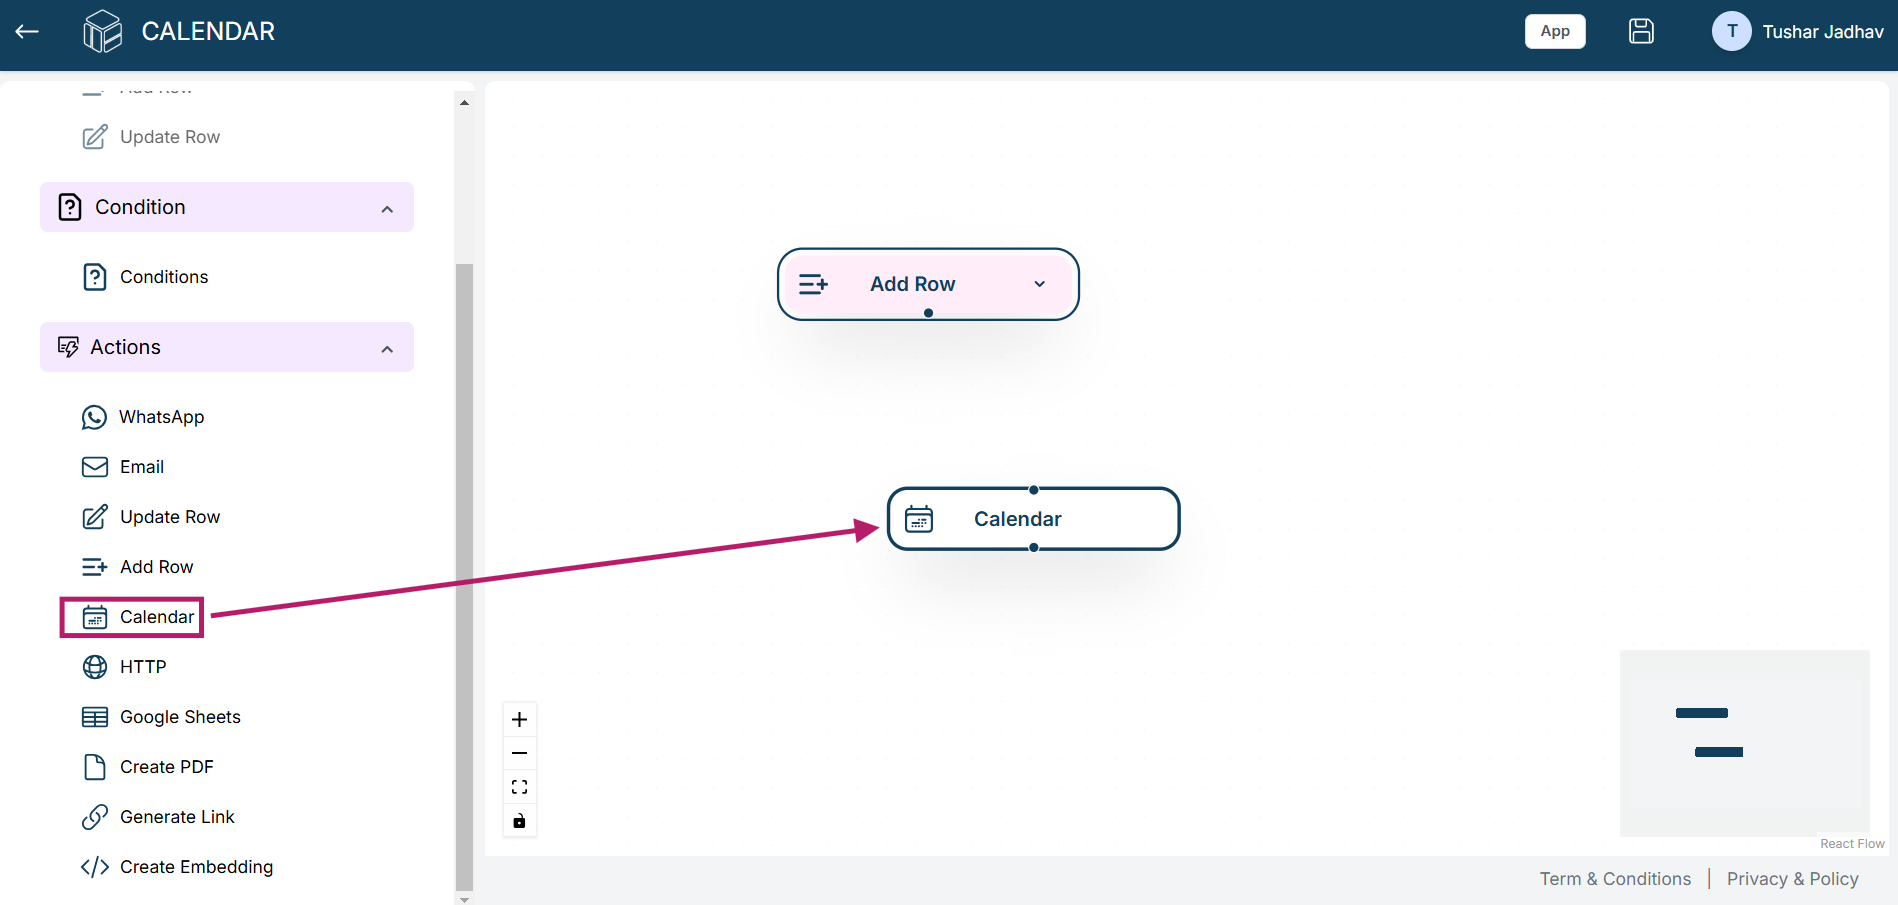
5.Click on the Calendar Event button to open the configuration settings.
- In the configuration:
- • From Field: Select the email account that was integrated with TableSprint for calendar events.
- • To Field: Select the email field from the worksheet that you want to send the event invitation to.
- • Start Date & End Date: Choose the date fields from the worksheet to set the event's start and end times.
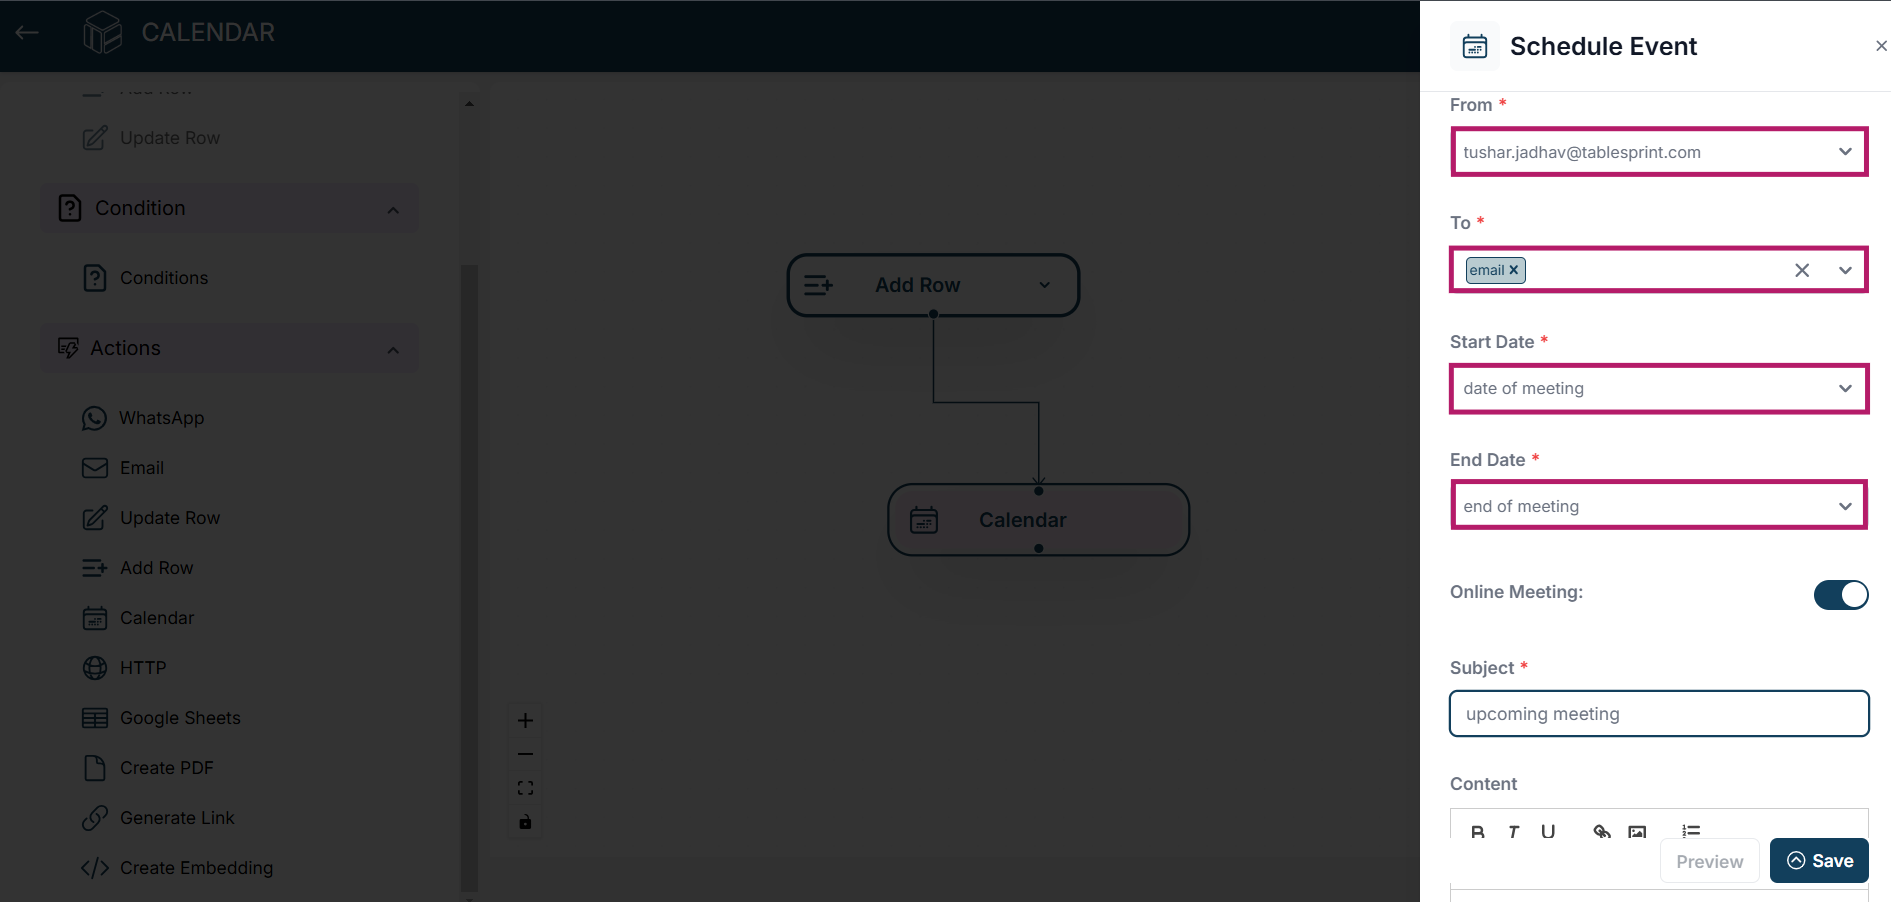
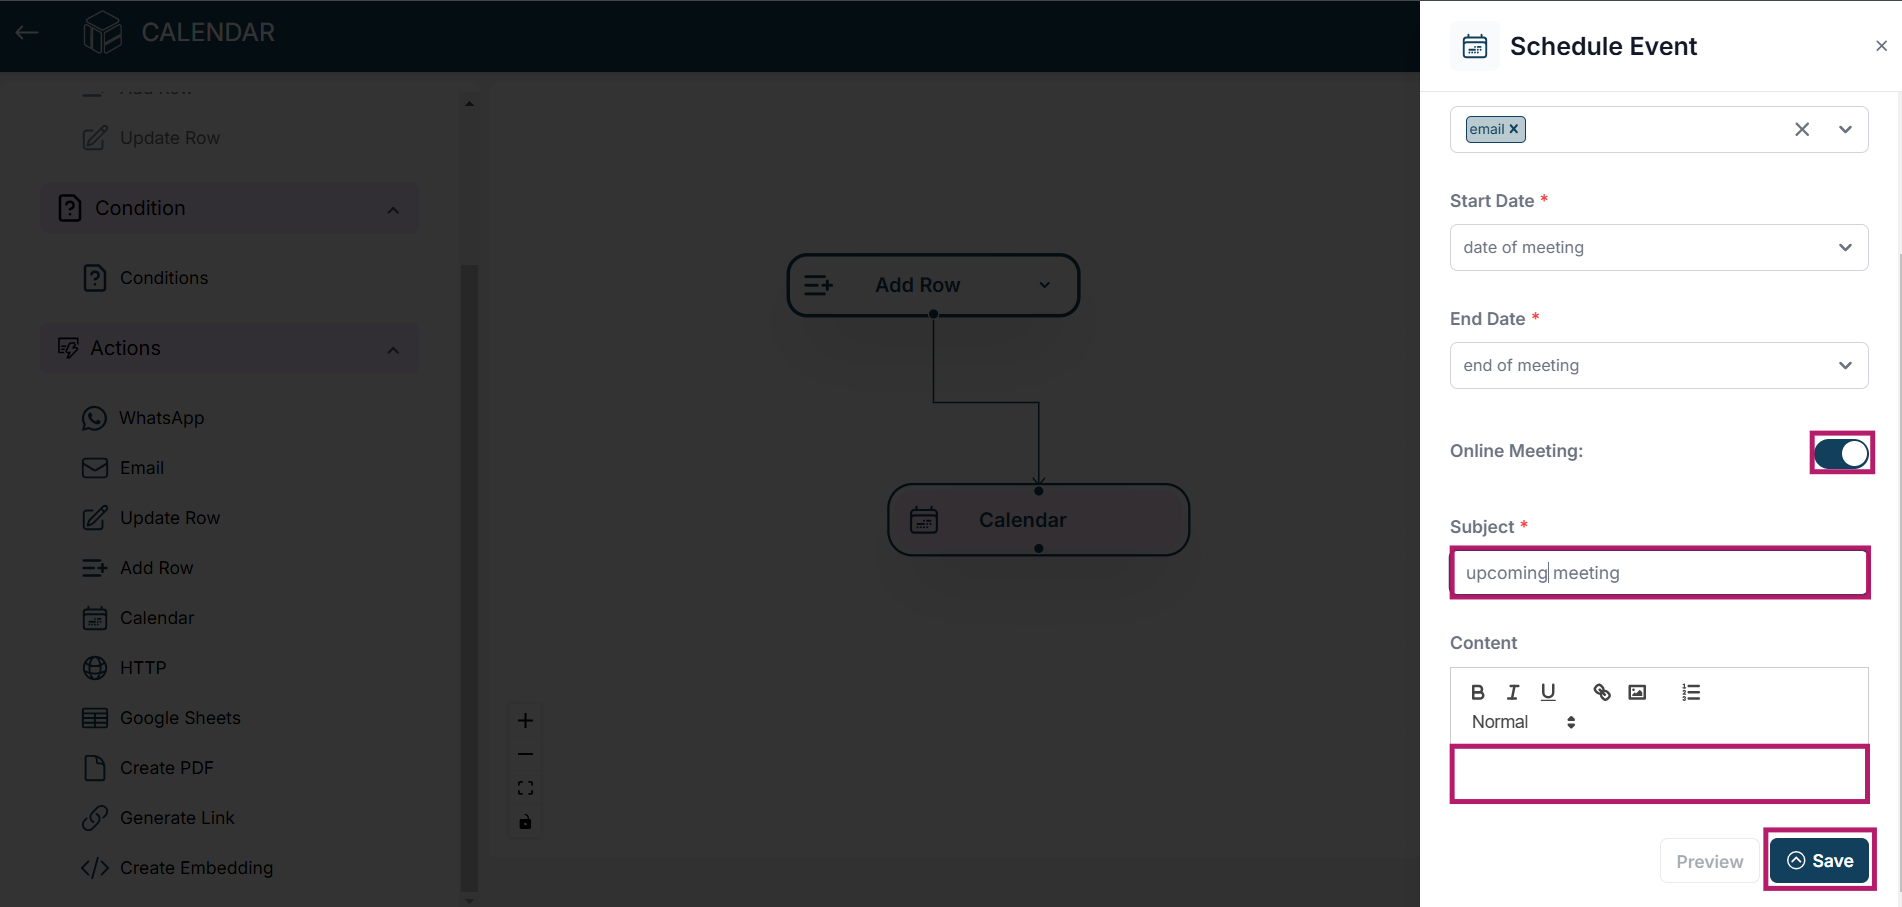
6.After choosing date enable “online meeting” button. Which will automatically create meeting link and will get added to calendar.
- Set Subject & Content:
- • Subject: Enter the subject of the calendar event.
- • Content: Add a description that will be sent to the recipient's email. This can include event details such as agenda, location, or additional instructions.
- • Once you've configured all the necessary fields, click the Save button to apply the settings. The calendar event will now be created automatically when a new row is added to the worksheet.
LLM Action
1. Add the Add Row Trigger
Start by dragging the “Add Row” trigger from the Triggers section onto the canvas.
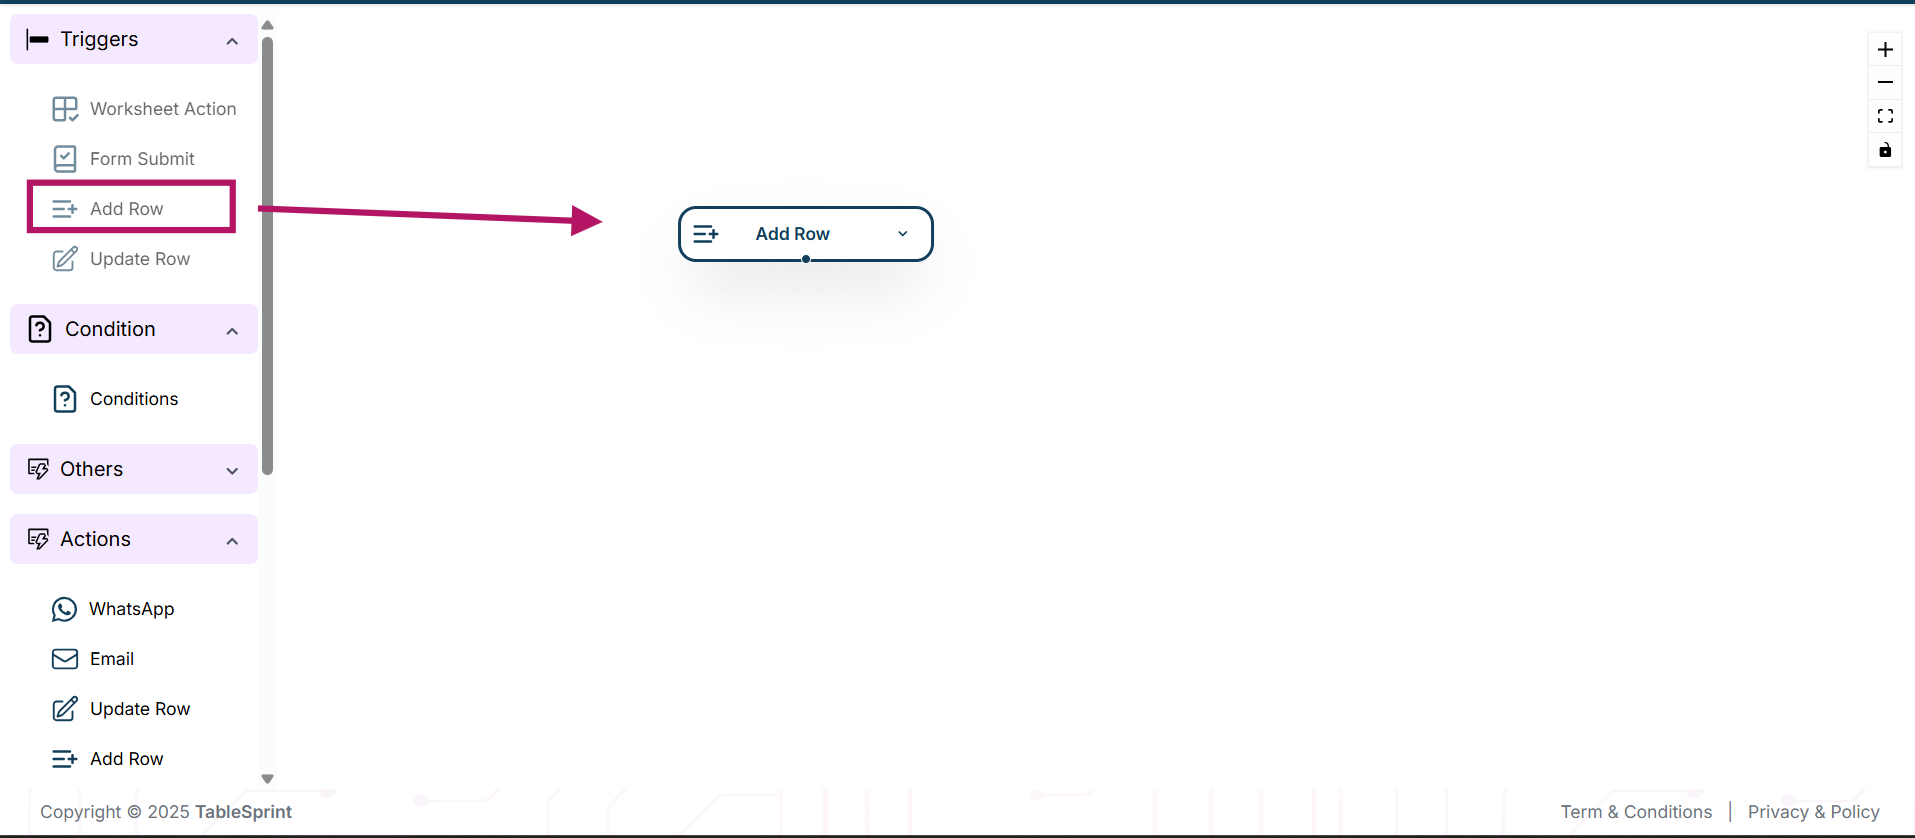
2. Select Worksheet
Select the worksheet in which you want to trigger LLM Action.

3. Add the LLM Action
Drag the “LLM Action” from the Actions section onto the canvas.
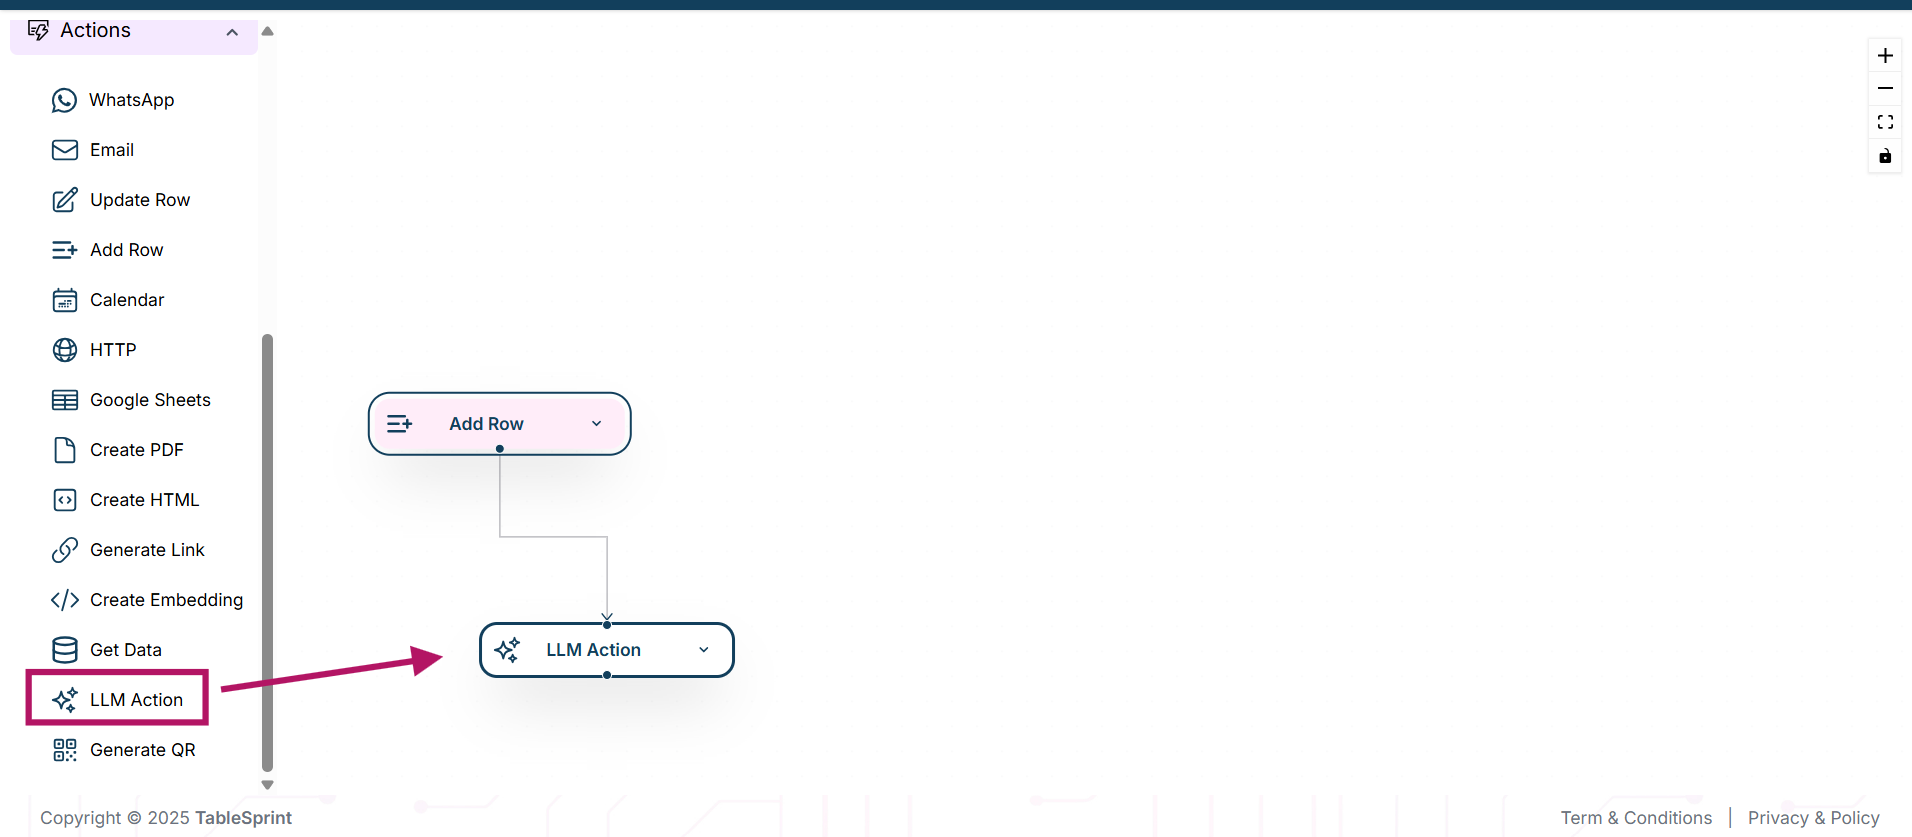
The LLM Action allows you to use AI to generate text, make suggestions, extract information, or summarize content.
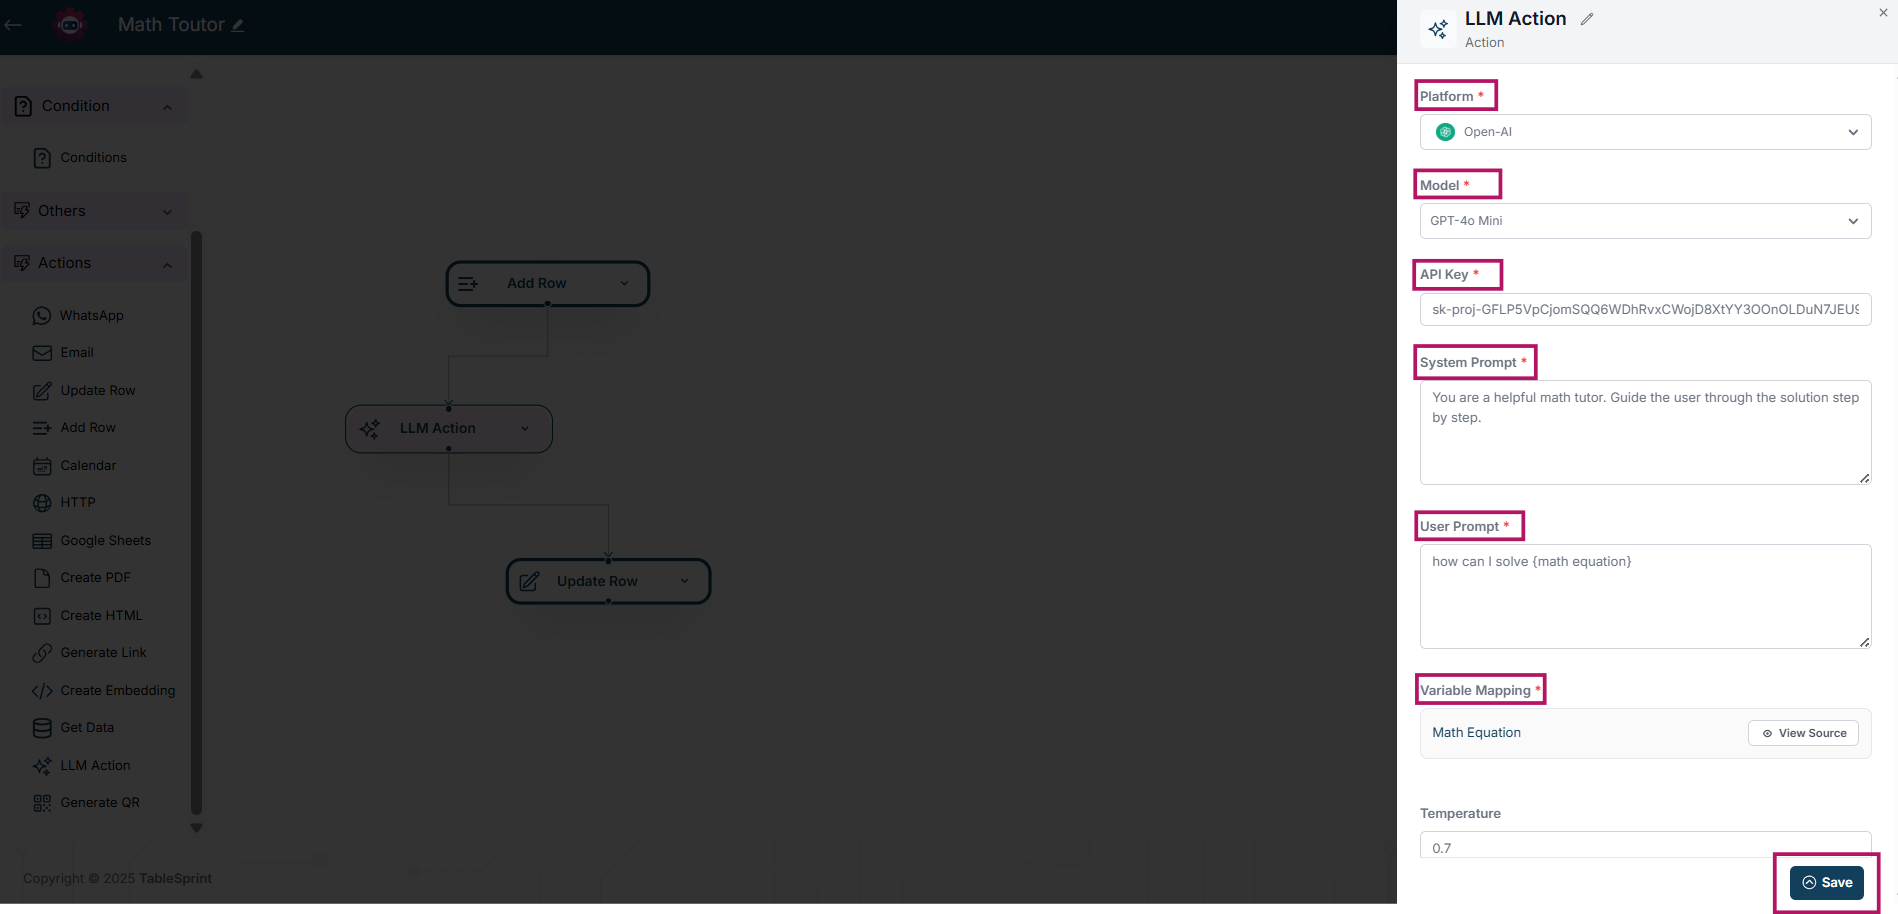
4. Configure the LLM Settings
Click the LLM Action node to open its configuration panel.
You can now:
- Select the platform (e.g.,
OpenAI,Mistral) - Choose the model (e.g.,
GPT-4,GPT-3.5) - Enter your API key
- Define the System Prompt (instructs the AI’s behavior)
- Write the User Prompt (can use form data dynamically)
- Define the Output Structure using Structured Outputs (JSON Schema)
You can generate this JSON Schema using ChatGPT, Claude, or Gemini.
- To insert dynamic data from the field, use curly braces
{variable_name}
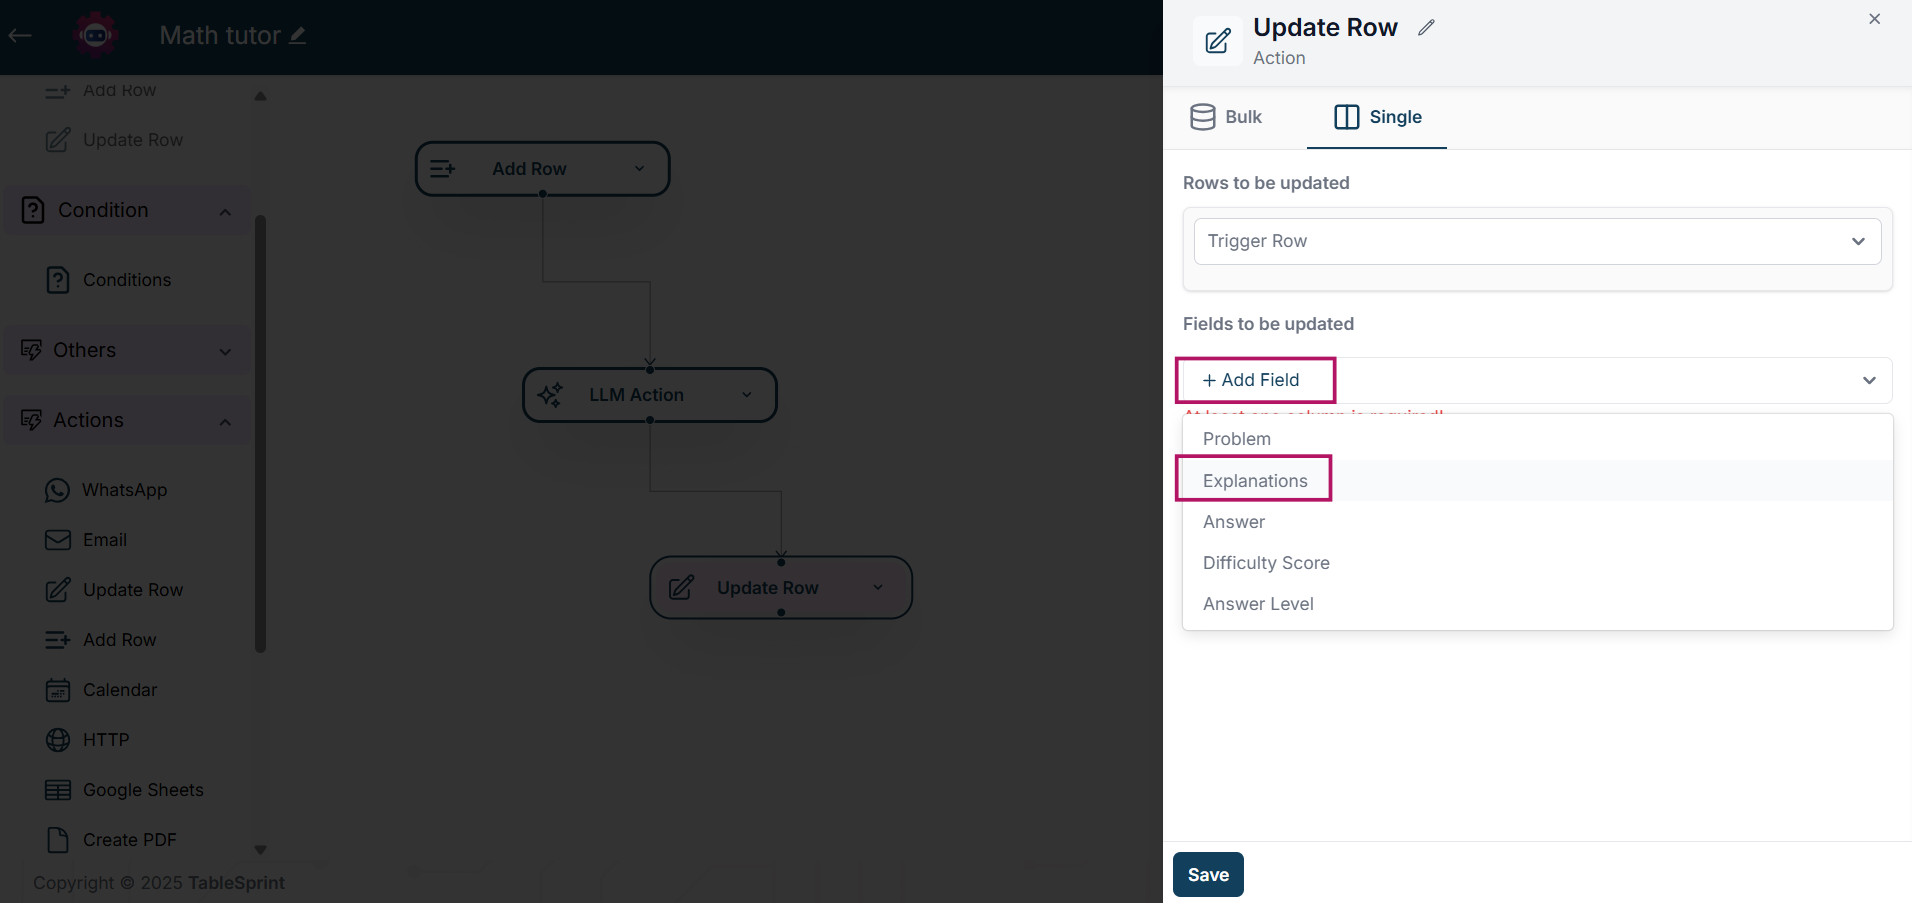
5. Map the LLM Response to Output for Any Next Action
After configuring the LLM Action, you’ll need to map its output to another action within your workflow,(such as Update row, Add row, Send Email, etc.).
🔄 Setting the Source
In the selected action, set the source as the LLM Action.
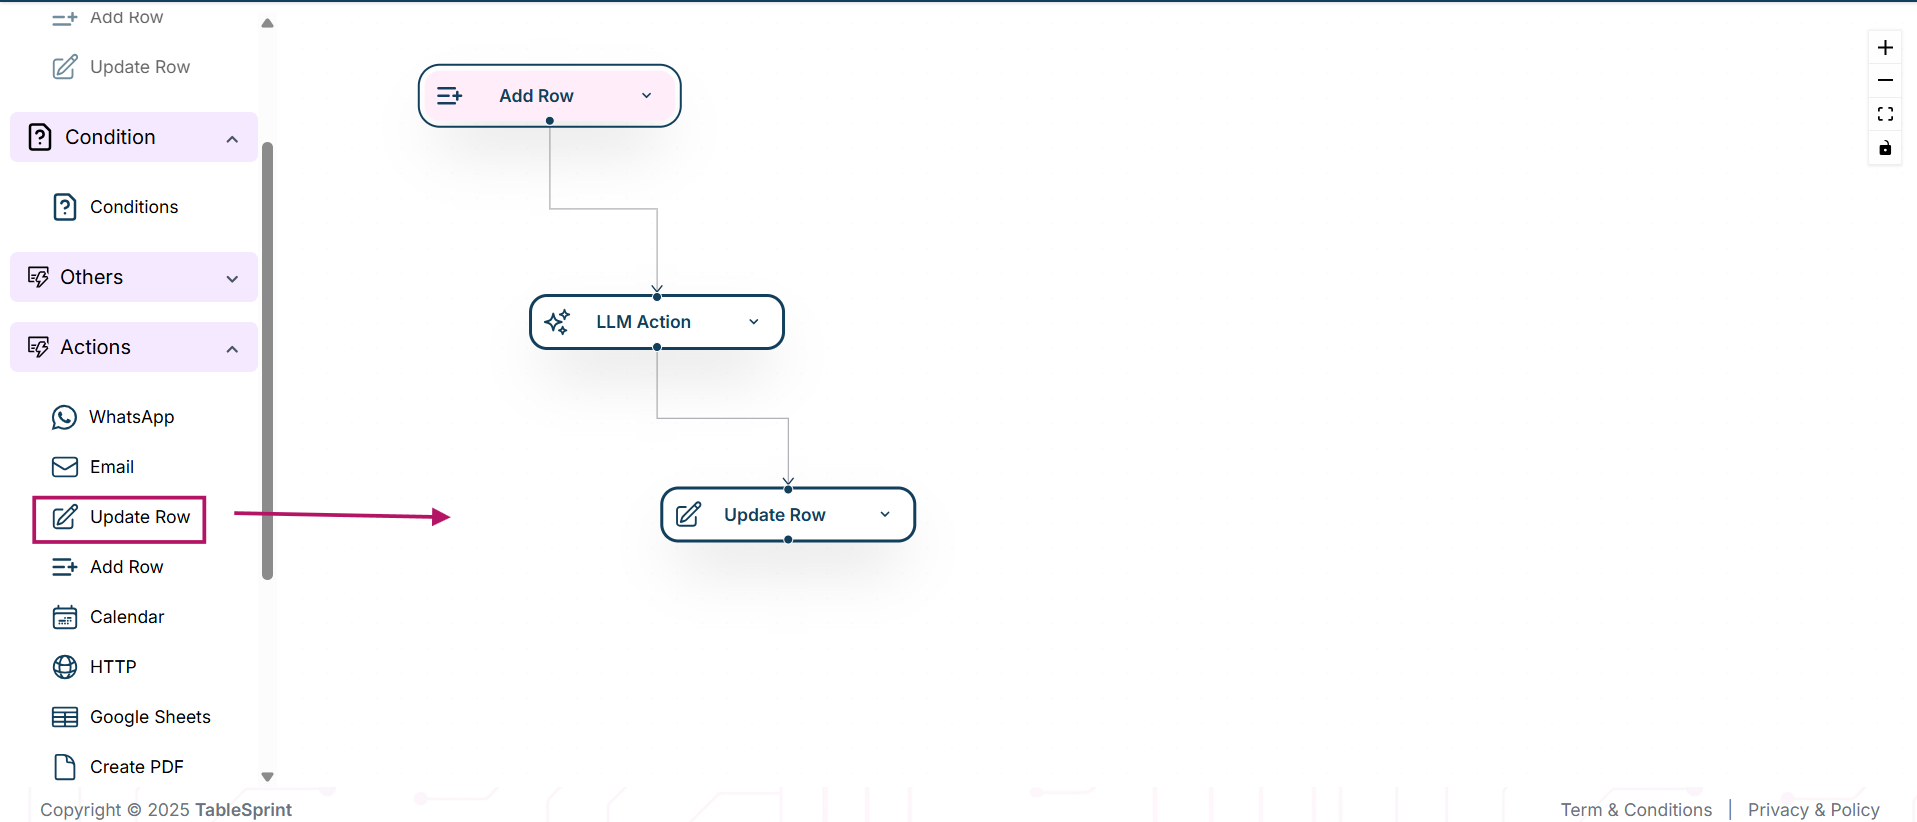
In the selected action, set the source as the LLM Action.
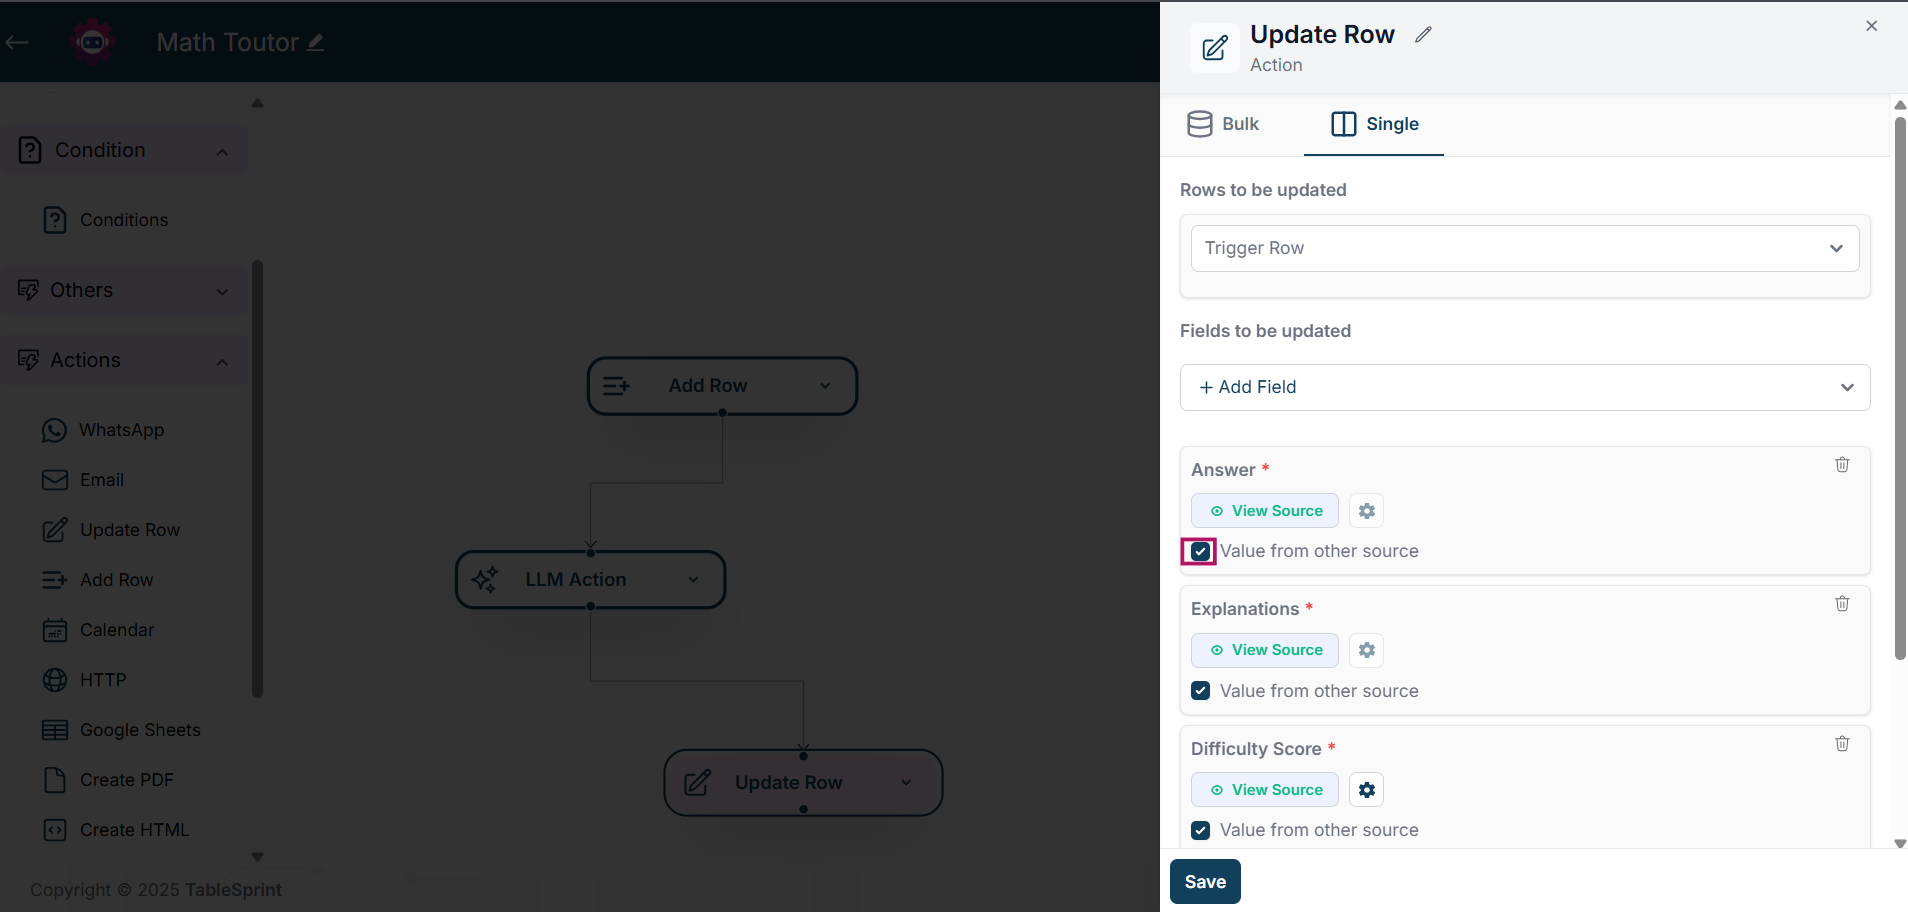
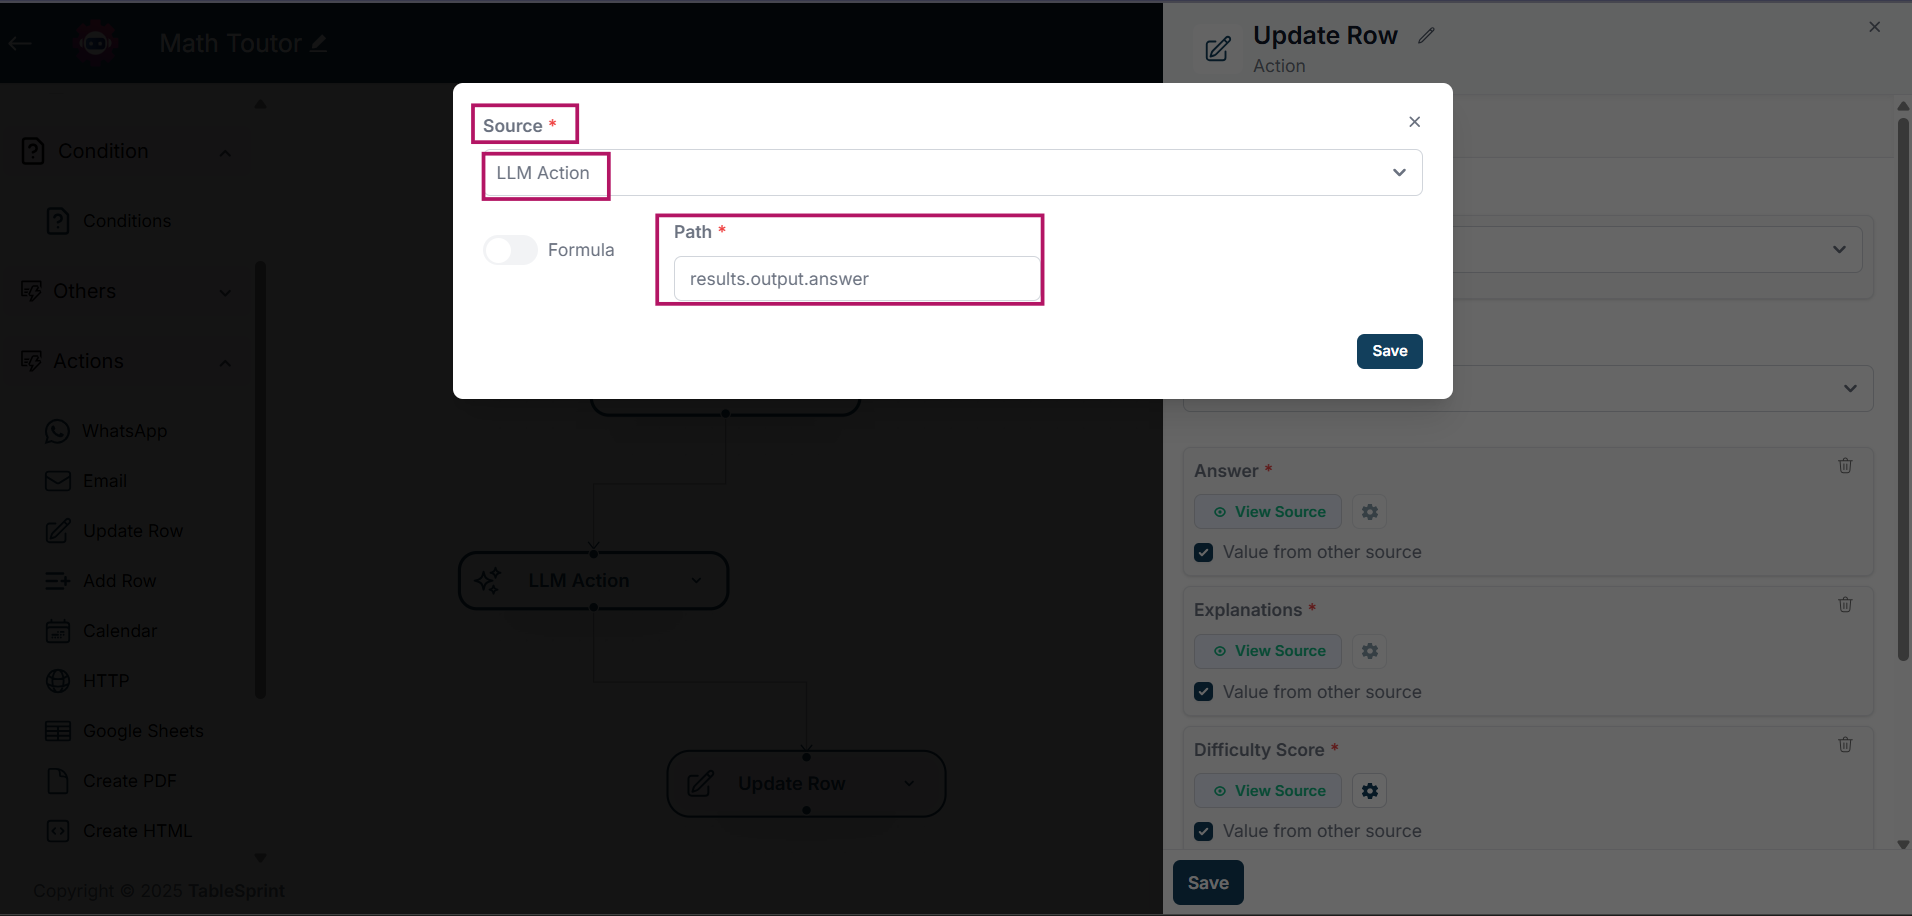
To store the full response, use: results.output
To access a specific field from a structured JSON response, use: results.output.[key]
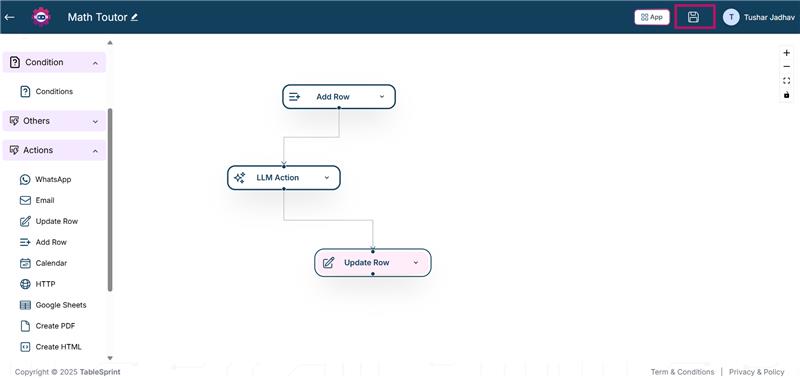
6. Finalize and Save
Click Save to complete the configuration.
Now, every time the form is submitted, the LLM will process the input and return an AI-generated response based on your defined prompts.