Stripe
How to Integrate Stripe Payment Gateway with TableSprint?
Open Organization Settings
Click on your profile icon in the top-right corner of the TableSprint dashboard. From the dropdown menu, select “Organization Setting.”
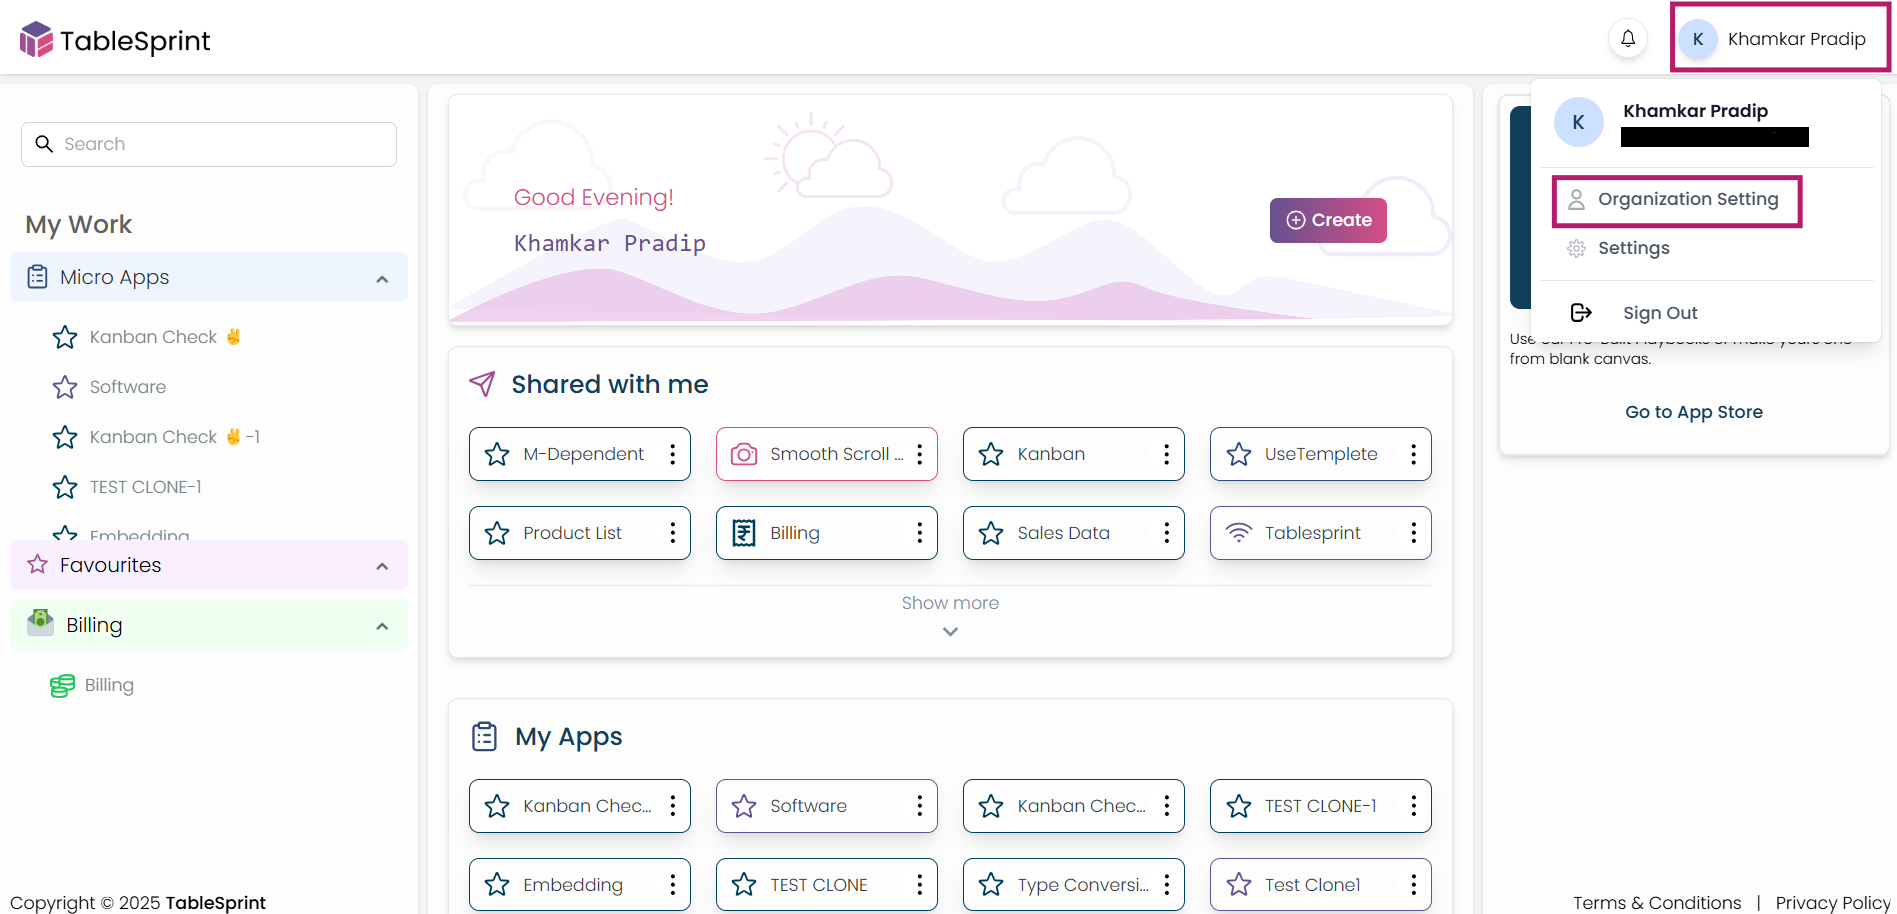 Fig-1
Fig-1
Navigate to Integrations
In the Settings panel, go to the “API” tab. From the list of available providers, select Stripe. Click on the “Configuration” button to begin the setup process.
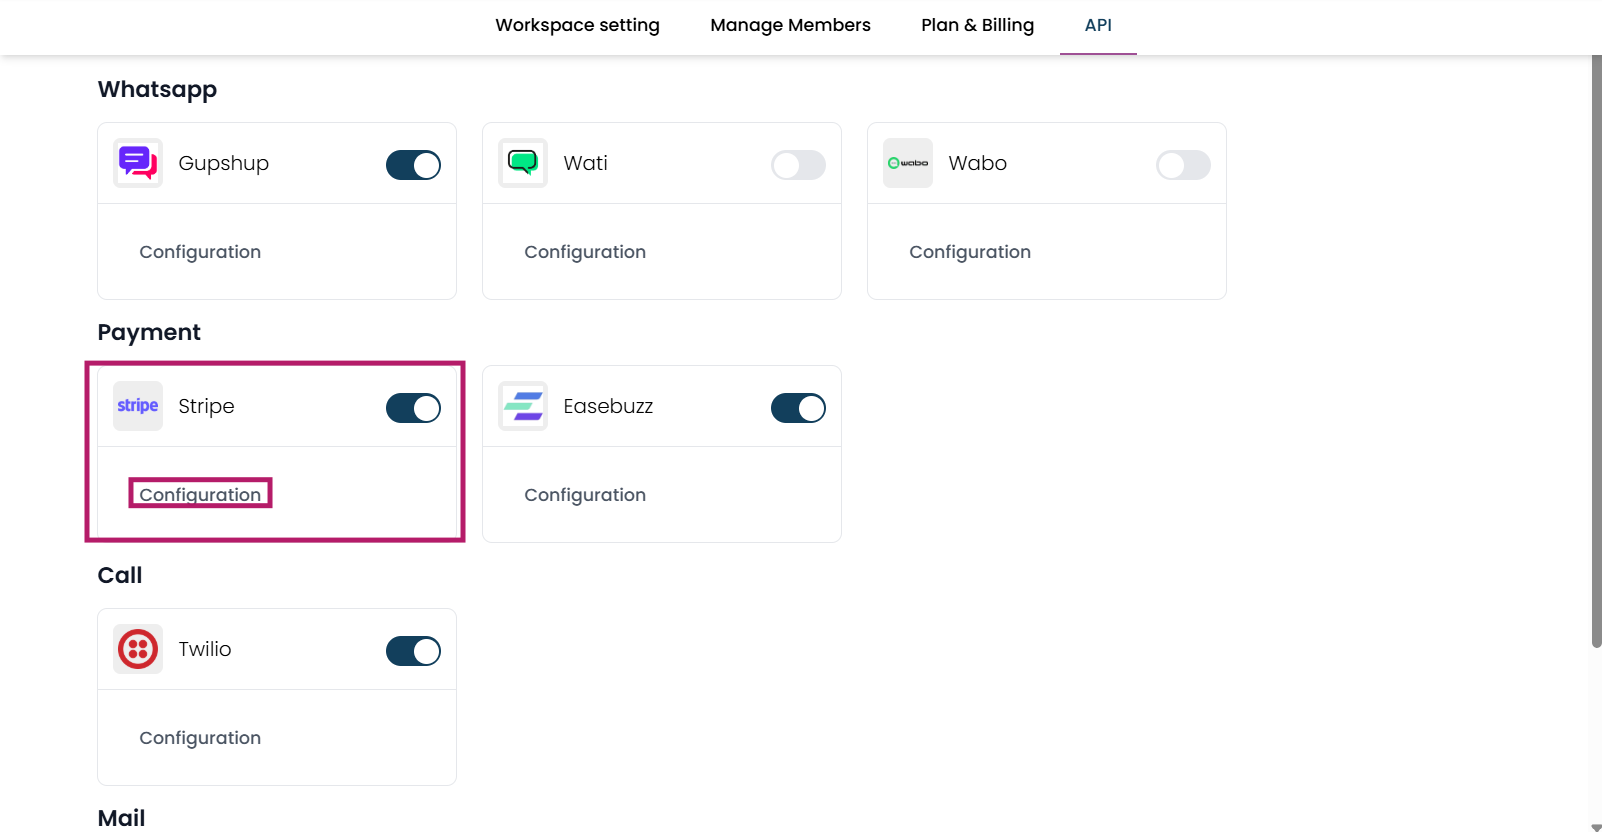
Fig-2
Connect to Stripe
Log in to your Stripe Dashboard and retrieve the required credentials:
- Publishable Key & Secret Key
- Enter these credentials into the configuration form within TableSprint.
Once all the fields are filled in, click the “Save” button. After saving, Stripe will be successfully integrated, and you can start accepting payments through TableSprint.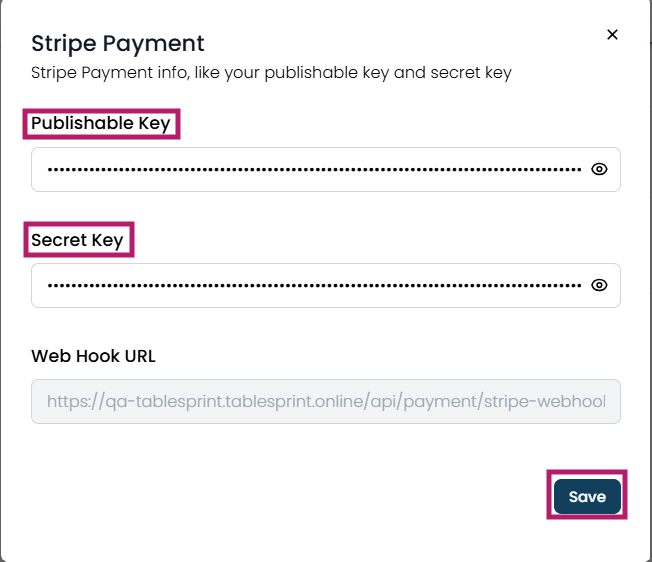 Fig-3
Fig-3
How to integrate the Stripe payment gateway into forms?
Prerequisites
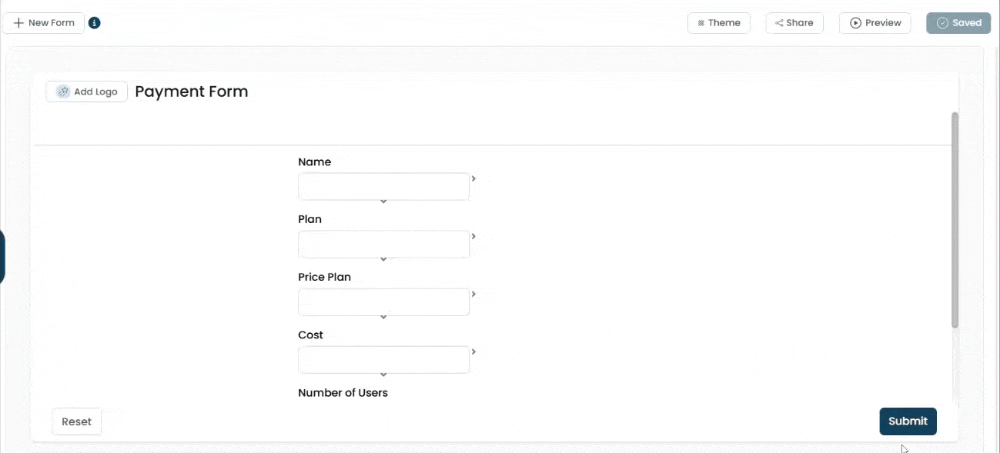
To integrate the Stripe payment gateway, we need to follow certain prerequisites, such as including either a number field, a currency field, or a client formula field in your forms.
Submit
Once you add any of the fields mentioned above along with the other necessary fields, click the submit button on that form.
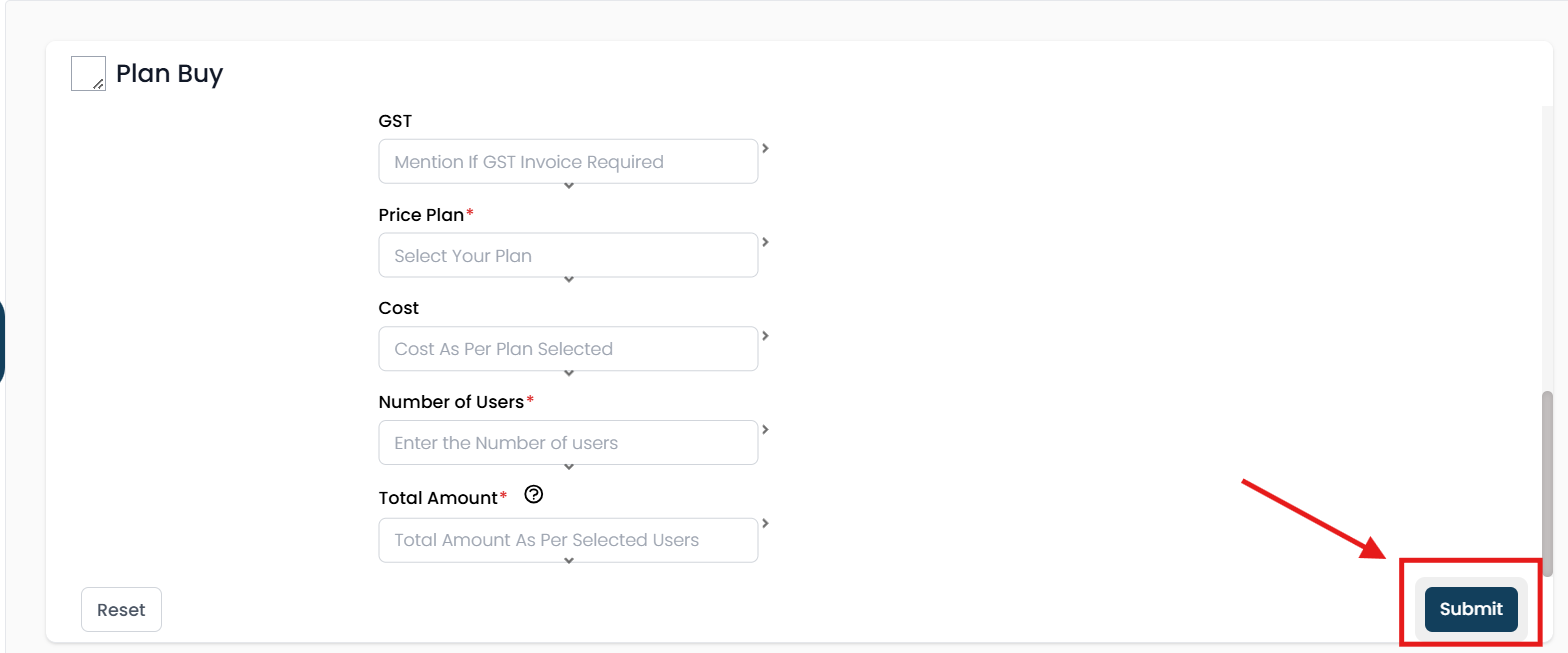 Fig-4.
Once you click the submit button, the details of that button will appear in the right sidebar.
 Vid-1.
Type
From the type dropdown field, select the 'Submit+Pay' option to enable other fields.
 Fig-5.
 Fig-6.
Select Payment Field
Upon selecting the 'Submit+Pay' option from the type field, the 'Select Payment Field' will be displayed automatically.
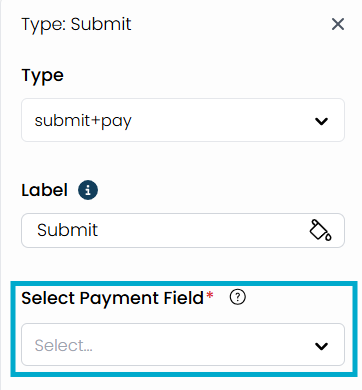 Fig-7.
This field will only display options with data types such as number, currency, or client formula. Select the suitable option from the 'Select Payment Field' dropdown.
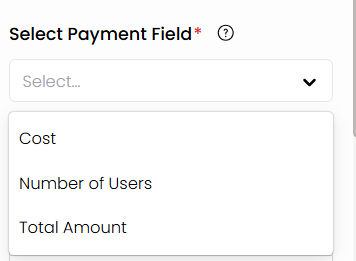 Fig-8.
Upon selecting an option, two fields will be displayed automatically: 'Select Currency' and 'Gateway.
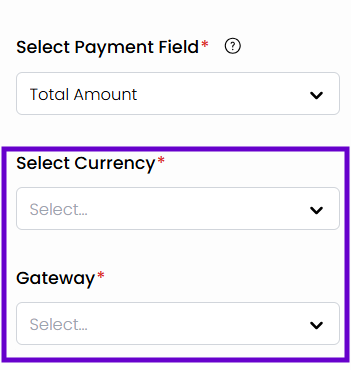 Fig-9.
Select Currency
From the 'Select Currency' field, choose the appropriate currency option to accept payments in that currency only.
 Fig-10.
Gateway
Select 'Stripe' from the Gateway field to enable the Stripe payment gateway.
 Fig-11.
Save Changes
Once you have added all the necessary fields, click on 'Save' to save the changes.
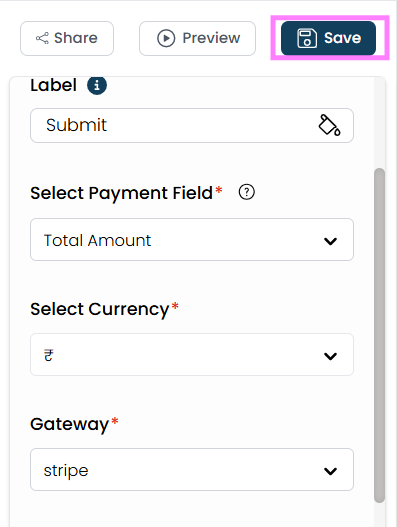 Fig-12.